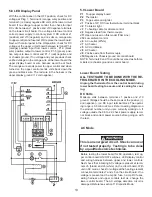
20
8.3 air leaks
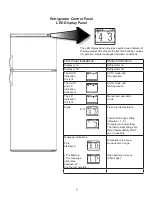
Check the gasket on the doors to be sure of a positive
air seal. A simple method to check gaskets is to close
the door on a dollar bill, then pull the dollar bill out. If no
resistance is felt, the gasket in that place is not sealing
properly. This should be done on all four sides of the door
in several places. If a gasket is not sealing properly, warm
the gasket material with a hair dryer. Then close the door
and the magnetic strip should pull the gasket to the metal
frame. Leave door closed until the material has cooled.
Then recheck for a positive seal. If a positive seal cannot
be achieved, replace the door gasket. Also check that the
cooling unit is installed properly. The cooling unit’s foam
block, the portion that surrounds the evaporator coils,
must be flush to the cabinet at the back of the refrigerator
and have a positive seal. If the cooling unit is not installed
properly, remove and install properly. If the cooling unit
has been changed it could be letting air in from the back-
side , creating excessive frost.
NOTE: Air leaks will cause insufficient cooling as well
as rapid formation of frost.
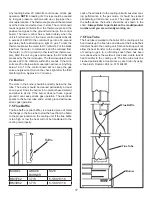
8.4 Interior liner Seal to frame
There is a seal that is applied to the liner in the area
where the metal frame makes contact with the interior
liner. If this seal is incomplete, cold air can migrate out to
the metal frame. If this happens, condensation could form
on the frame and could promote rapid formation of frost.
If you suspect an improper seal, apply a small bead of
silicone all the way around the perimeter where the frame
meets the interior liner. Next remove all screws securing
the refrigerator into the cabinet and slide the refrigerator
out approximately 2–4 inches. Clean the metal frame and
foil-backed insulation around the refrigerator. Apply a foil-
backed adhesive tape to the joint between outer frame
and foil-backed refrigerator insulation. Make sure the
refrigerator is dry and that the surface temperatures are
above 50° F. Use a clear silicon caulking compound and
seal the seam between the refrigerator’s plastic liner and
the metal frame. Apply the silicon in a continuous bead
around both the refrigerator freezer and food compart-
ments.
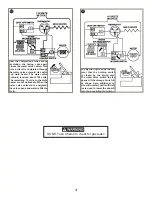
caulK Seam BetWeen
PlaStIc lIner and
metal frame
( r e f r i g e r a t o r
shown with doors
removed)
Another source for an air leaks could be the drain hose.
When units are installed at the end of the drain is a check
valve. At install the hose might be shortened and the
check valve must be moved to the end of drain hose.
Any time lack of performance or excessive frost is experi-
enced, look for the check valve at the end of hose. If the
drain hose is cracked or not attached at discharge perfor-
mance of frost could be a problem.
aPPly foIl-BacKed or alumI-
num taPe to JoInt BetWeen
outer frame and foIl-BacKed
refrIgerator InSulatIon. go
around tHe comPlete frame.
do not oVerHeat
aS you can melt tHe materIal
Summary of Contents for RM3962
Page 15: ...14 RM3762 RM3962...
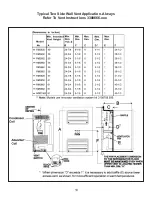
Page 20: ...19 Typical Two Side Wall Vent Application Always Refer To Vent Instructions 3308666 xxx...
Page 23: ...22...
Page 28: ...27...
Page 29: ...28 ICE MAKER TYPICAL WIRING DIAGRAM...
Page 33: ...32...


