4
7.
INSTALLING REFRIGERATOR IN
ENCLOSURE
NOTE: DO NOT install the appliance directly on carpeting.
Carpeting must be removed or protected by a metal or wood
panel beneath the appliance, which extends at least the full
width and depth of the appliance.
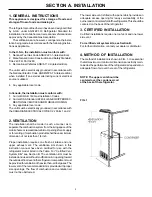
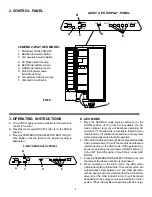
FREEZER DRAIN HOLE: A 3/4" hole must be drilled
through flooring "L" (FIG. 2). The installer MUST make sure
that the hose does not kink when run through the floor. Seal
around the hose that goes through the drilled hole. If a longer
hose than supplied is required to get the water to drain
outside of the vehicle, follow the additional instructions
shown below. Either option is acceptable.
OPTION A:
1. Remove black water check valve from hose.
2. Add additional hose.
3. Reinstall black water check valve.
OPTION B:
1. Cut drain tube at location shown above.
2. Install new drain tube between pieces cut.
NOTE: Black water check valve must be reinstalled to
ensure proper freezer operation. Do not kink hose.
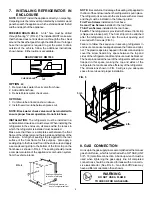
INSTALLATION: The refrigerator must be installed in a
substantial enclosure and must be level. When installing the
refrigerator in the enclosure, all areas within the recess in
which the refrigerator is installed must be sealed.
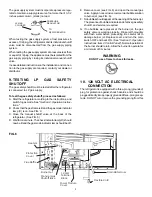
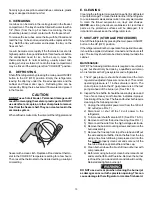
Make sure that there is a complete seal between the front
frame of the refrigerator and the top, sides and bottom of the
enclosure. A length of sealing strip is applied to the rear
surface of the front frame for this purpose. Also apply a
sealing strip to the foremost floor of the enclosure and apply
a second sealing strip to the bottom of the trim strip on the
front base as shown in FIG. 4. The sealing should provide
a complete isolation of the appliance's combustion system
from the vehicle interior.
NOTE: Be careful not to damage the sealing strip applied to
the floor of the enclosure when the refrigerator is put in place.
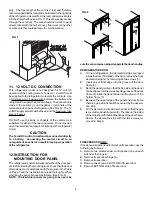
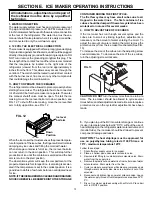
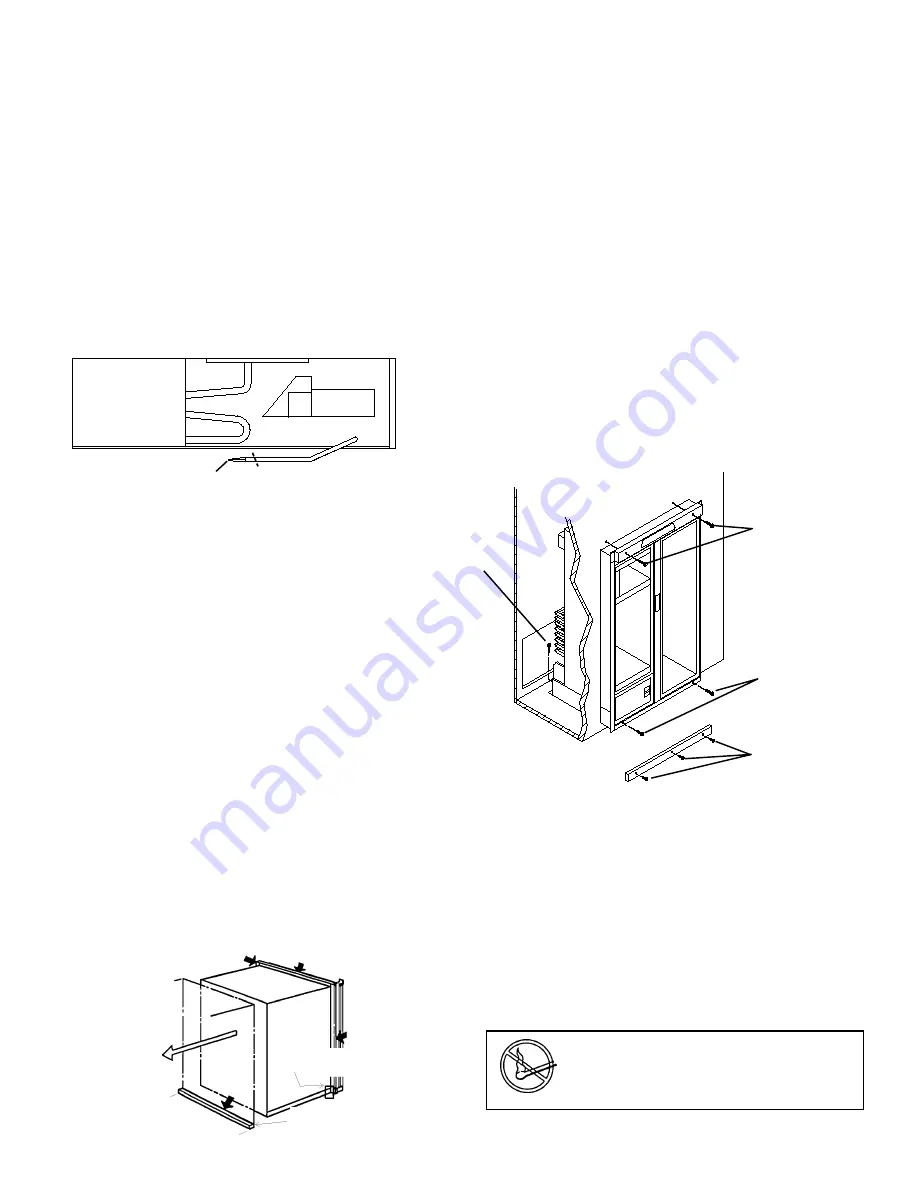
The refrigerator is secured in the enclosure with six screws
and they must be installed in the following order:
First Two Screws installed on front base;
Second Two Screws installed in the top frame;
Third Two Screws installed in the rear base.
Fourth - The refrigerator is provided with a lower front strip
(shipped as a loose part). The front strip is to be attached
after the refrigerator is set into the cutout opening and
secured with 3 screws (FIG. 5).
Failure to follow the sequence in securing refrigerator in
enclosure can cause leakage between the frame and cabi-
net. The plastic caps are snapped in the decoration strip to
cover the screw heads. Any space between the top and
sides of the refrigerator and its enclosure must be blocked.
The heat produced at the rear of the refrigerator will become
trapped in this space, making the top and sides of the
refrigerator hot and reduce the efficiency of the refrigerator.
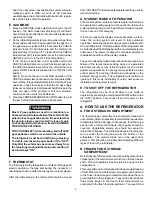
The dimensions shown in FIG. 3 will give you adequate
space for service and proper installation.
REAR VIEW OF RM7030
CHECK VALVE
CUT
Sealing strip applied
to bottom of trim strip
Sealing strip placed on
front of compartment floor
FIG. 4
1 st.
2 nd.
3 rd.
4 th.
FIG. 5
8. GAS CONNECTION
Hook up to the gas supply line is accomplished at the manual
gas shutoff valve, which is furnished with a 3/8" SAE (UNF
5/8" – 18) male flare connection. A back-up wrench must be
used when tightening the gas supply line. All completed
connections should be checked for leaks with a noncorro-
sive leak detector. (See FIG. 6 – Gas Shut-Off Valve may
have a different orientation than shown).
WARNING
DO NOT USE A FLAME
TO CHECK FOR GAS LEAKS.


