7
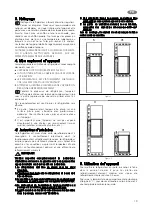
Figure 10.
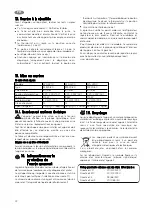
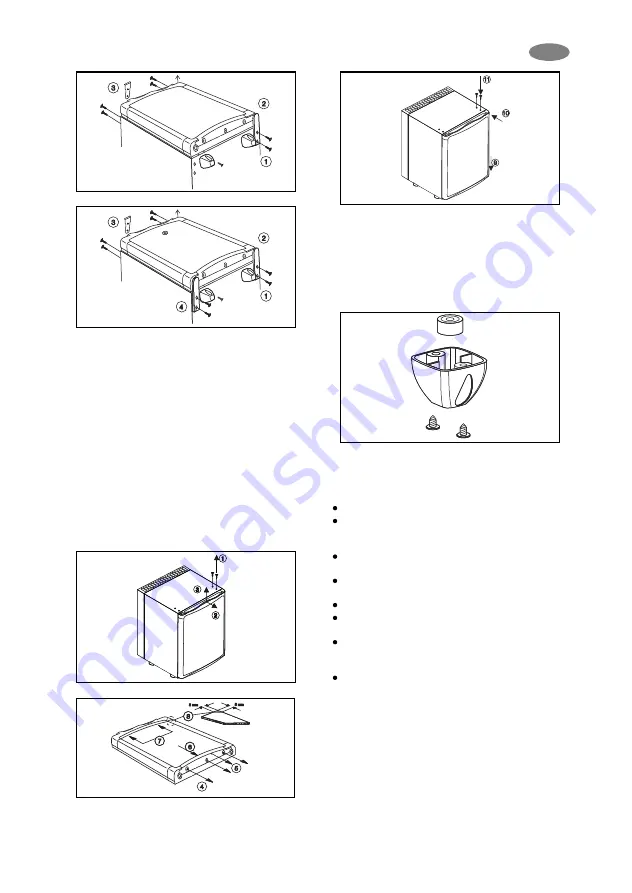
11. Changing the feet
(Fig. 11)
Should you wish to install your miniCool, you will not
need the 40 mm feet. After having removed the 40 mm
feet, you can then re-attach the 12 mm feet, located
inside the 40 mm feet, to the front and rear fixing points.
The 40 mm feet and the 4 remaining screws should be
retained for future use.
Figure 11.
12. Customer service
Before you call a service engineer, carry out the following
simple tests:
Is there a power failure? Check the fuses.
Is the plug firmly connected to the socket and is the
socket switched on? Check the socket by plugging in
another appliance, e.g. a table lamp.
Is the thermostat at the correct setting? (normally 3 or
4).
Has the door not been closed properly causing the
inside temperature to rise too quickly?
Is the refrigerator level?
Has the defrosting button been inadvertently pushed
in? (only for semi-automatic defrost)
If, so turn the thermostat dial to "0" and the defrosting
button will be released. Reset the dial to its usual
position and the refrigerator should start cool again.
Has the ventilation become obstructed?
If after checking all the above points, the refrigerator is
still not working satisfactorily, contact your nearest
service engineer. State the problem, model, product-
and serial-number.
(Details of the model, product- and serialnumber are to
be found on the data label in the top left of the inside
compartment.)
In the event of a fault developing, contact your nearest
Service Centre-see local telephone directory.
www.dometic.com
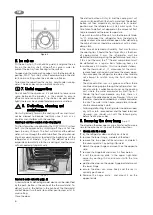
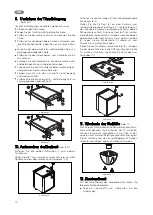
Figure 6.
Figure 7.
10. Replacing the decorative door
panel
(Fig. 8-10)
Remove the two screws (1) from the upper hinge of the door.
Pull the door together with the hinge away from the housing
and up off the lower hinge bolt (2-3).
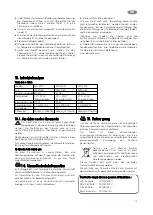
Remove screws (4) and pull off the frame edge (5).
Slide the decorative panel (6) out of the door frame and
insert the new panel (7), so that the upper edge of the panel
runs exactly parallel to the upper edge of the frame. A new
panel can be inserted more easily into the upper edge of the
frame when the two corners are cut off by approx. 5 x 5 mm
(8). Put the frame edge (5) back in place and secure with
screws.
Place the door on the lower hinge (9), slot the upper hinge
into the opening, press together with the door against the
housing and secure with the two screws (11).
Figure 8.
Figure 9.
GB


