background image

EN

MDT400X

Installing the safe

7

6.1

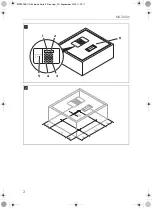
Control elements

7

Installing the safe

7.1

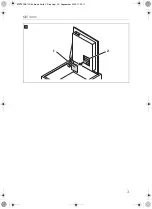
Notes on installation

A

Follow the instructions when installing.

Carefully check the safe for damage once you have removed it from the 
packaging. If there is visible damage, contact the manufacturer (see rear of safe 
for addresses).

Install the safe on a flat and even surface.

Select a location for installation which is a sufficient distance from heat sources 
(e.g. radiators). Avoid installing in locations with temperatures of under 0 °C and 
over 45 °C.

Avoid damp ambient conditions (e.g. in the bathroom and swimming pool) to 
avoid condensation forming in the device.

Select a fastening material (screws with plugs, if necessary) which is appropriate 
for the installation location.

No. in 

fig.

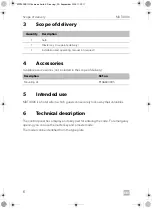
1

, page 2

Description

1

Display

2

Number  keys

3

CLOSE

 button

Closes the safe lock after the code is entered

4

CLEAR

 button

Deletes the last position of the code

5

Lock for master key (behind cover)

6

Locking mechanism cover

NOTICE! 

The safe must only be installed by qualified specialists.

MDT400X-IO-16s.book  Seite 7  Dienstag, 20. September 2016  11:22 11

Summary of Contents for XSAFE MDT400X

Page 1: ... safe til hoteller Monterings og betjeningsvejledning 81 Elektroniskt kassaskåp för hotell Monterings och bruksanvisning 92 Elektronisk safe for hoteller Monterings og bruksanvisning 103 Elektroninen tallelokero hotellikäyttöön Asennus ja käyttöohje 114 Электронные сейфы для отелей Инструкция по монтажу и эксплуатации 125 Elektroniczny sejf dla hoteli Instrukcja montażu i obsługi 136 Elektronický ...

Page 2: ...4X CL OS E PIN 4X CL OS E 1 2 3 4 5 6 7 8 9 CL EA R 0 PIN 4X CLOSE PIN 4X CLOSE 1 2 3 4 5 6 7 8 9 CLEAR 0 1 2 3 6 4 5 1 210 60 Ø 1 0 85 2 1 0 9 5 9 5 2 MDT400X IO 16s book Seite 2 Dienstag 20 September 2016 11 22 11 ...

Page 3: ...MDT400X 3 PIN 4X CLOSE PIN 4X CLOSE 1 2 3 4 5 6 7 8 9 CLEAR 0 1 2 3 MDT400X IO 16s book Seite 3 Dienstag 20 September 2016 11 22 11 ...

Page 4: ...ble of contents 1 Explanation of symbols 5 2 Safety instructions 5 3 Scope of delivery 6 4 Accessories 6 5 Intended use 6 6 Technical description 6 7 Installing the safe 7 8 Using the safe 8 9 Replacing the batteries 12 10 Display messages 12 11 Troubleshooting 13 12 Maintaining and cleaning the safe 13 13 Warranty 14 14 Disposal 14 15 Technical data 14 MDT400X IO 16s book Seite 4 Dienstag 20 Sept...

Page 5: ... lack of experience and knowledge providing they are supervised or have been taught how to use the device safely and are aware of the resulting risks Only use the product as intended Do not make any modifications or alterations to the product A NOTICE No unauthorised persons should have access to the master key and the master code Keep the master key very carefully in a safe place WARNING Safety i...

Page 6: ... 6 Technical description The control panel has a display and a key pad for entering the code For emergency opening you can use the master key and a master code The model can be identified from the type plate Quantity Description 1 Safe 1 Master key in separate delivery 1 Installation and operating manual on request Description Ref no Mounting kit 9106600005 MDT400X IO 16s book Seite 6 Dienstag 20 ...

Page 7: ...oid installing in locations with temperatures of under 0 C and over 45 C Avoid damp ambient conditions e g in the bathroom and swimming pool to avoid condensation forming in the device Select a fastening material screws with plugs if necessary which is appropriate for the installation location No in fig 1 page 2 Description 1 Display 2 Number keys 3 CLOSE button Closes the safe lock after the code...

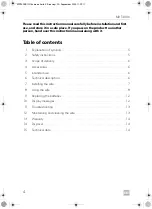
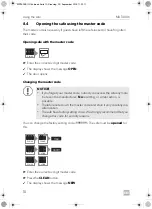
Page 8: ...f the battery compartment Insert four AA batteries in the battery compartment fig 3 2 page 3 Put the cover back on the battery compartment 8 2 Hiding displaying the code The code can be displayed or hidden while it is being entered Press the CLEAR button twice Press the CLOSE button Depending on the previous status the code is displayed or hidden while entering 8 3 Operating functions for users Lo...

Page 9: ...ill open The display first shows OPEN then OPENED I NOTE If an incorrect code is entered the E CODE message appears on the display After five incorrect attempts the safe lock will remain blocked for 15 minutes and no further entries are possible As soon as you press a button the HOLD message appears on the display followed by the remaining time in minutes PIN 4X CLOSE PIN 4X MDT400X IO 16s book Se...

Page 10: ... safe must be opened for this Enter the correct six digit master code Press the CLEAR button The display shows the message NEW NOTICE If you forget your master code nobody can access the safe any more not even the manufacturer No resetting or similar action is possible Therefore note down the master code and store it very carefully in a safe location Thesafehasafactorysettingcode Westronglyrecomme...

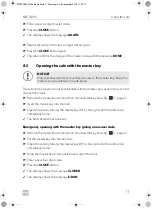
Page 11: ...afe by turning the master key 90 to the right until the bolts slide completely home The bolts extend mechanically Emergency opening with the master key giving a new user code Remove the instruction sticker which conceals the key hole fig 1 5 page 2 Put the master key into the key hole Open the safe by turning the master key 90 to the right until the bolts slide completely home Keep the master key ...

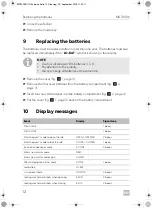
Page 12: ...ent 10 Display messages NOTE Use four alkaline AA LR6 batteries 1 5 V Pay attention to the polarity Always change all batteries at the same time Event Display Signal tone Press CLEAR 1 beep Press CLOSE 1 beep Enter the guest s code to open the safe OPEN OPENED 2 beeps Enter the guest s code to lock the safe CLOSE CLOSED 1 beep Incorrect sequence or code E CODE 3 beeps Enter a new master code NEW E...

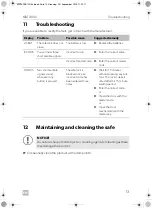
Page 13: ...Enter the correct code Incorrect master code Enter the correct master code HOLD15 Two short audible signals sound whenever any button is pressed The safe lock is blocked once an incorrect code has been entered three times Wait for 15 minutes without pressing any but tons The lock is deacti vated after this 15 minute waiting period Enter the correct code or Open the door with the master code or Ope...

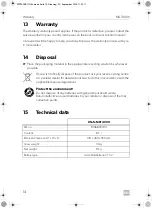
Page 14: ...wish to finally dispose of the product ask your local recycling centre or specialist dealer for details about how to do this in accordance with the applicable disposal regulations B Protect the environment Do not dispose of any batteries with general household waste Return defective or used batteries to your retailer or dispose of them at collection points 15 Technical data XSafe MDT400X Ref no 91...

Page 15: ... customerservices dometic co nz NORWAY Dometic Norway AS Østerøyveien 46 N 3232 Sandefjord 47 33428450 47 33428459 Mail firmapost dometic no POLAND Dometic Poland Sp z o o Ul Puławska 435A PL 02 801 Warszawa 48 22 414 3200 48 22 414 3201 Mail info dometic pl PORTUGAL Dometic Spain S L Branch Office em Portugal Rot de São Gonçalo nº 1 Esc 12 2775 399 Carcavelos 351 219 244 173 351 219 243 206 Mail ...

Reviews:

Related manuals for XSAFE MDT400X