68
MAINTENANCE
7/124 - 10/104, 10/124 - 14/114, 14/84
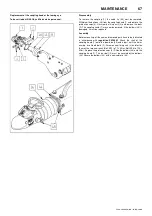
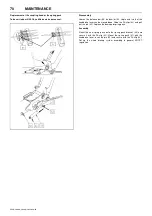
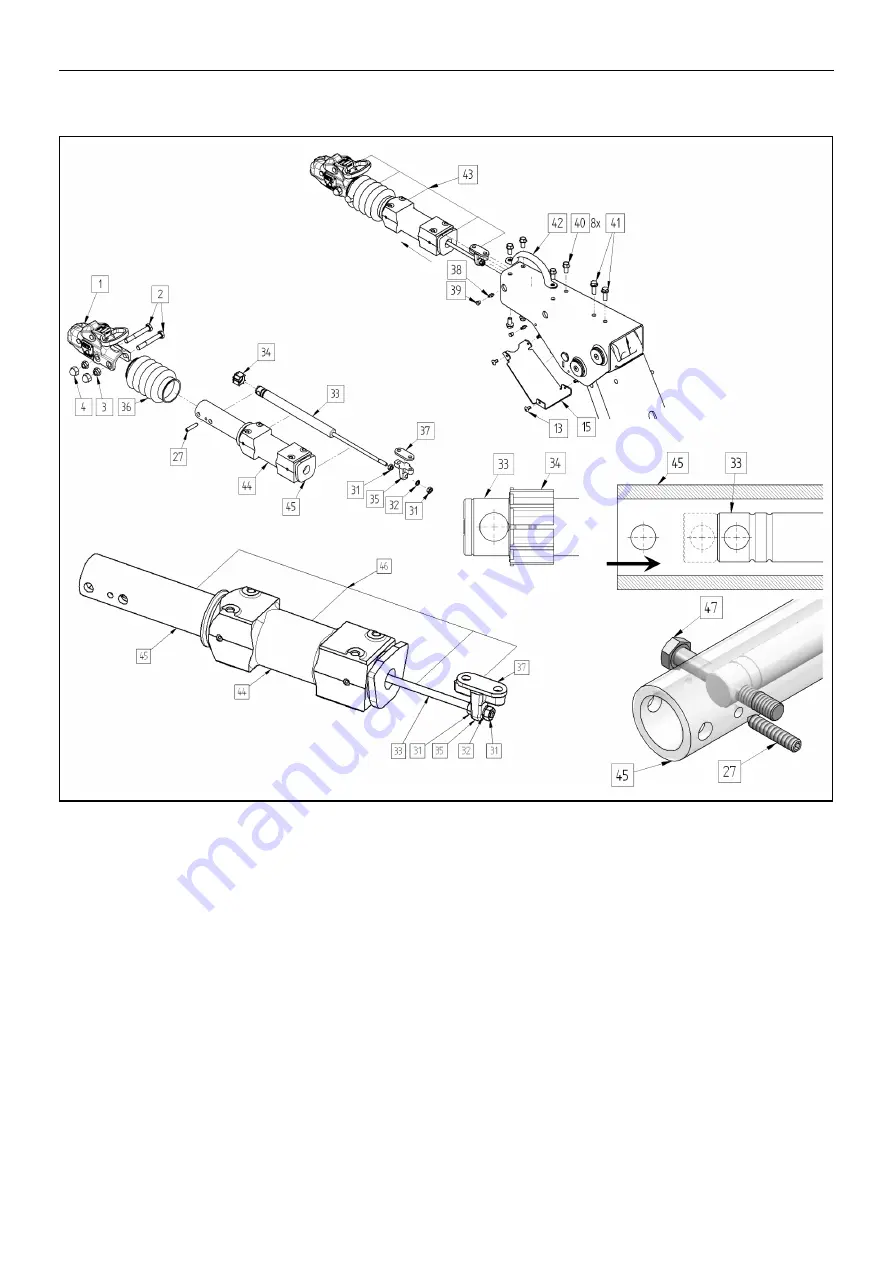
Replacement of the shock absorber
To be carried out ONLY by skilled service personnel.
Disassembly
Drill out the blind rivets (13), remove the shield (15), grease the nipple
caps (39) and the nipples (38) themselves. Unscrew all the bolts
(41)
and also all bolts (40) and then pull out the assembly (43). remover the
coupling head (1), the bellows (36) and the pin (27) from the drawtube
(45). Unscrew the hexagonal nut (31) from the shock absorber (33) and
pull out the shock absorber (33) to the front. Dismount the centraliser
tube (34) (if present) from the shock absorber (33) and replace the
shock absorber (33).
Assembly
Before mounting, all the new and removed parts must be
lubricated in accordance with regulation SK70003
.
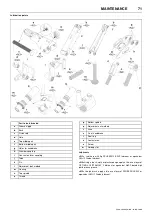
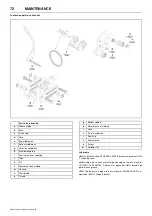
Mount the
centraliser tube (34) (if present) onto the shock absorber (33). Push the
shock absorber (33) into the drawtube (45) from the front and bolt
together with the shock absorber bracket (35). Fasten the hexagonal
nut (31) with a tightening moment of 30±5Nm. Push the unit (46) from
the front into the housing, place the disc (37) (if present) between the
housing and the shock absorber bracket (35) and fasten with lock bolts
(40), (41). At the same time mount the hand grip (42). Fasten the lock
bolts with a tightening moment of 80+5Nm. Using a screw clamp, the
shock absorber (33) has to be pressed together so far that the position
of the hole in the shock absorber (33) coincides with the position of the
rear hole in the drawtube (45). Secure in position using the bolt (47)
and screw in (plug in) the pin (27) through the drawtube (45). Mount the
bellows (36) and the coupling head (1) on the drawtube (45). Secure
the bellows (36) on the coupling head (1) and the guide bearing (44)
using cable ties (48). Replace the grease nipples (38), nipple caps (39)
and the shield (15) for the overrun head.
Summary of Contents for 10/104
Page 2: ......
Page 4: ......
Page 11: ...ISO SYMBOLS 7 7 124 10 104 10 124 14 114 14 84 Replace any cracked protective shield ...
Page 83: ...MAINTENANCE 79 7 124 10 104 10 124 14 114 14 84 ...
Page 84: ...80 MAINTENANCE 7 124 10 104 10 124 14 114 14 84 ...
Page 92: ...88 MACHINE SYSTEMS 7 124 10 104 10 124 14 114 14 84 ...
Page 108: ......
Page 109: ......

