MAINTENANCE
69
7/124 - 10/104, 10/124 - 14/114, 14/84
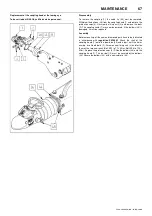
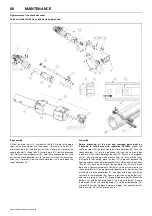
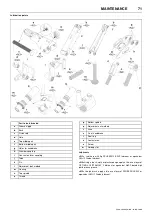
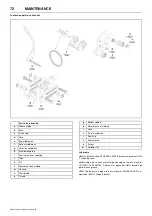
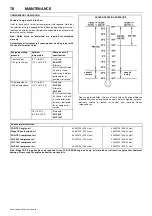
Replacement of the cable
To be carried out ONLY by skilled service personnel.
Disassembly
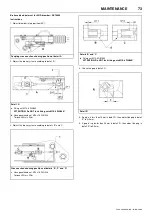
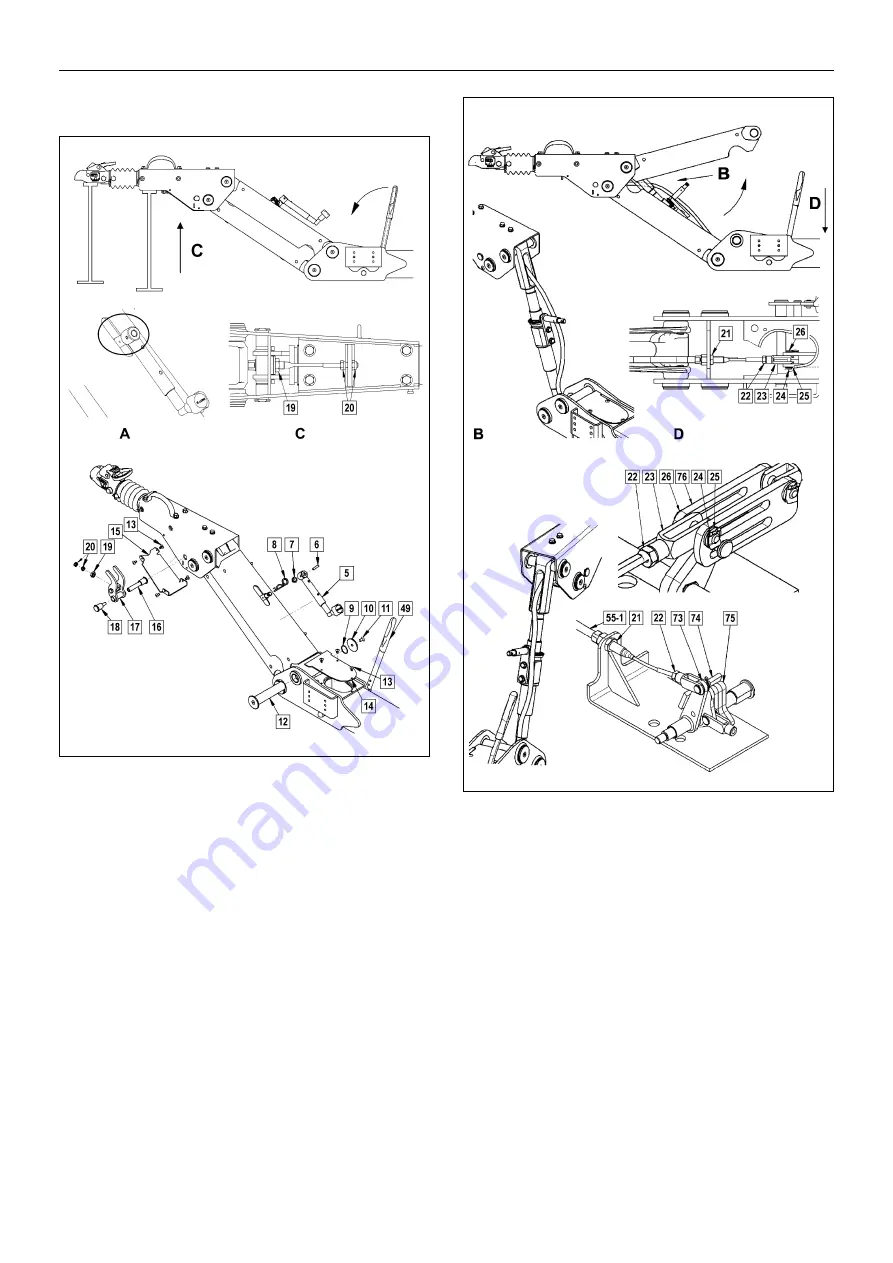
Remove the lock spring (8). Turn the handle (5) until halfway up the slot
(See View A). Move the handbrake lever (49) to the front. Drill out the
blind rivets (13) and shields (15) and (14). Unscrew the nut (20) from
the cable (See View C), then pull the cable from the cable bracket.
remove the hexagonal nut (19) and pins (16) and (18). Pull the cable
out of the transmission lever (17). Knock out the pin (6) using a
hammer and remove the winding handle (5). Pull out the adaptor (7).
Unscrew the bolt (11) and remove the disc (10) with the seal ring (9).
Secure the overrun head against falling off – injury risk!!!
Knock
out the pin (12) with a hammer and bronze bar. Lift off the top middle
part and
secure it against falling off – injury risk!!!
Remove the SL-clip (24) and the disc (25) and pull out the pin (26).
Unscrew the clevis (23) and hexagonal nuts (22) and (21). Pull out the
cable and replace it.
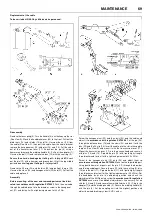
Assembly
Before mounting, all the new and removed parts must be lubri-
cated in accordance with regulation SK70003
. Push the new cable
through the cable bracket into the drawbar, screw in the hexagonal
nut (21) and fasten it with a tightening moment of 30 ± 2Nm.
Screw the hexagonal nut (22) and the clevis (23) onto the cable and
adjust it
in accordance with regulation SK70008
. Put the pin (26)
through the balance lever (76) and the clevis (23) and lock it with the
disc (25) and the SL-clip (24). Insert the cable into the slot in the spindle
top part (See View B) and mount it with the transmission lever (17).
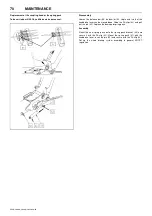
Mount the transmission lever (17) into the overrun head and secure it
with pins (16) and (18). Spread the pin (18) with liquid high strength
thread locker and fasten it with a tightening moment of 30 ± 2Nm.
Screw in the hexagonal nuts (19) and (20) and adjust them
in
accordance with regulation SK70008
.
Mount on the top middle part.
Using gentle hammer impacts, put the pin (12) through the drawbar
and the top middle part. Secure the pin (12) with the seal ring (9), disc
(10) and the bolt (11). Spread the bolt (11) with liquid high strength
thread locker and fasten it with a tightening moment of 20 ± 2Nm. Set
the handbrake lever into its non-braking position and check the
adjustment of the KHD braking system
in accordance with regulation
SK70008
once more. Do additional adjustments if necessary. Put on
shields (15) and (14) and secure them with blind rivets (13). Plug in the
adaptor (7) and the winding handle (5). Secure the winding handle (5)
with the pin (6). Put the coupling unit into the highest position and
adjust the whole braking system (KHD + axles).
Summary of Contents for 10/104
Page 2: ......
Page 4: ......
Page 11: ...ISO SYMBOLS 7 7 124 10 104 10 124 14 114 14 84 Replace any cracked protective shield ...
Page 83: ...MAINTENANCE 79 7 124 10 104 10 124 14 114 14 84 ...
Page 84: ...80 MAINTENANCE 7 124 10 104 10 124 14 114 14 84 ...
Page 92: ...88 MACHINE SYSTEMS 7 124 10 104 10 124 14 114 14 84 ...
Page 108: ......
Page 109: ......

