4-17
Inspection, Maintenance and Adjustment
Check Fuel Level
1.
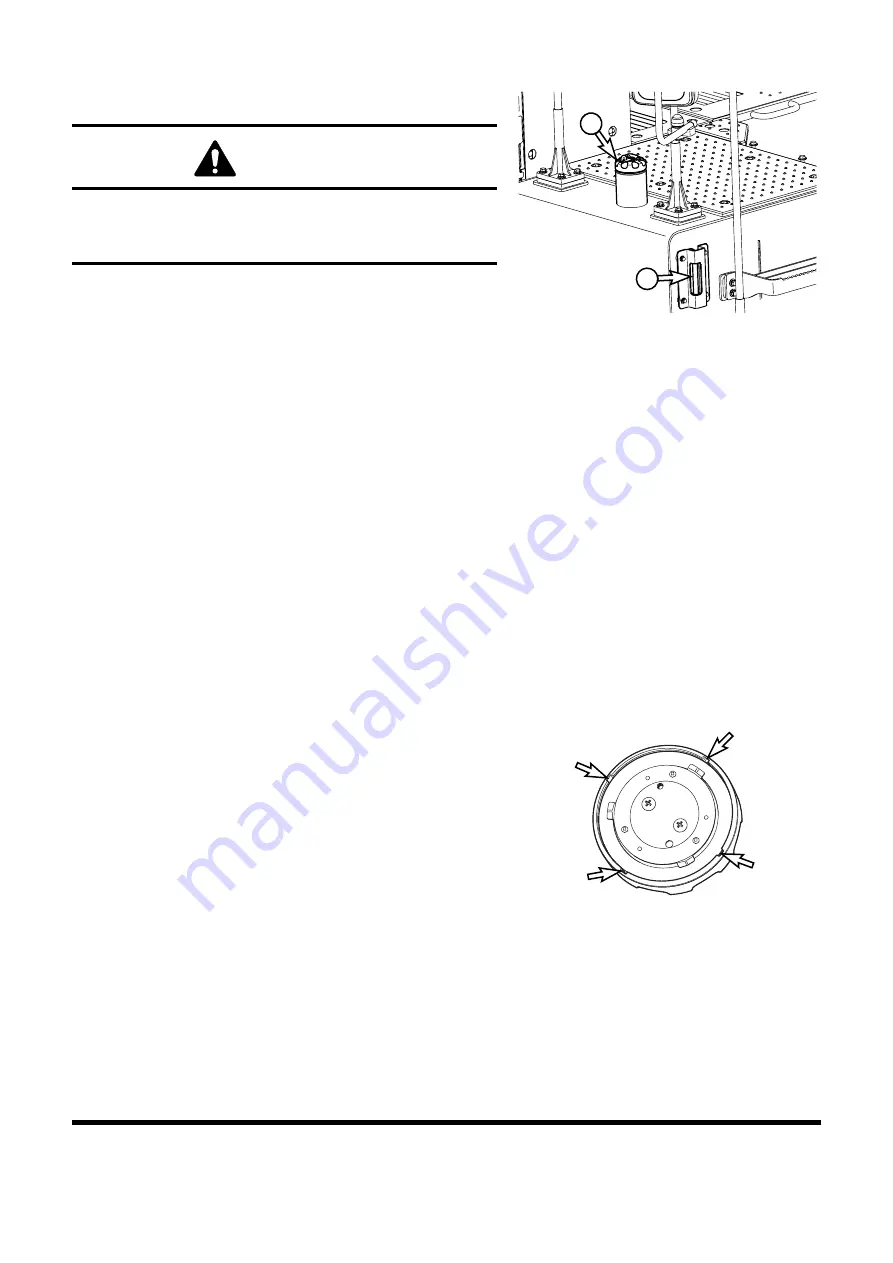
At end of each work day, fill fuel tank. Add fuel through fuel
fill tube (1, Figure 20). When working at a temperature of
0°C (32°F) or higher, use ASTM No. 2-D or its equivalent.
At temperatures below 0°C (32°F) use ASTM No. 1-D or its
equivalent.
2.
Make sure that the fuel fill hose is grounded to the
excavator before fueling begins.
3.
Check the amount of fuel in the tank by observing the fuel
tank sight gauge (2, Figure 20).
NOTE:
See “Fluid Capacities” on page 4-8. for capacity.
4.
The excavator may be equipped with the optional battery
operated fuel fill pump. The pump assembly is in the
hydraulic pump compartment. Put the suction hose of the
pump into the fuel resupply tank. Turn the switch in the
pump compartment "ON", and the fuel will be pumped into
the excavator fuel tank.
NOTE:
See “Fuel Transfer Pump (Optional)” on
page 4-84, for further information.
5.
Do not overfill the tank.
6.
Securely tighten cap after fueling.
NOTE:
1. If breather holes (Figure 21) in cap are
clogged, a vacuum may form in the tank
preventing proper fuel flow to engine. Keep
holes in fuel cap clean.
2. Please change the inner filter of cap per
every 1,000 hr.
Figure 20
2
FG0
15798
1
WARNING
Use extreme safety precautions while refueling to prevent
explosions or fire.
Immediately clean up any split fuel.
Figure 21
FG015799
Summary of Contents for DX700LC
Page 2: ......
Page 72: ...OP001120 Safety 1 66 ...
Page 142: ...OP001121 Operating Controls 2 70 ...
Page 188: ...OP001122 Operation 3 46 ...
Page 197: ...OP001123 4 9 Inspection Maintenance and Adjustment ...
Page 282: ...OP001123 Inspection Maintenance and Adjustment 4 94 ...
Page 298: ...OP000030 Troubleshooting 6 6 ...
Page 301: ...OP001125 7 3 Specification ...
Page 308: ...OP001125 Specification 7 10 ...
Page 314: ...950106 00012E Index 8 6 ...


