background image

Engine Operation

Operation & Maintenance Manual

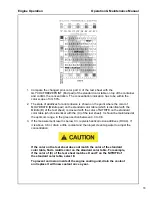
Checking the Coolant

If the reservoir cap is opened to exchange or replenish coolant while the
engine is overheated, hot water will spurt out and may cause serious
burns. If it is absolutely necessary to open the reservoir cap while the
engine is overheated, wrap the reservoir cap with a cloth and slowly
open the reservoir cap in two steps until the steam pressure has been
released from the inside. After the steam pressure has been completely
released, remove the reservoir cap.

1. Make sure that the engine and radiator are cooled.

2. Check the level in the supplementary tank.

3. If the coolant level indicates between the upper limit and the lower limit on the

supplementary tank, it means that the coolant volume is normal.

4. If there is insufficient coolant, replenish it.

5. Open the reservoir cap and check the condition of the coolant. If the coolant cap

is contaminated or insufficient, measure the coolant concentration. If the coolant
concentration is outside the specified range, exchange the coolant.

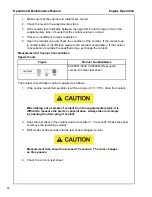
Measurement of Coolant Concentration

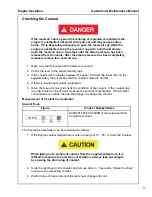
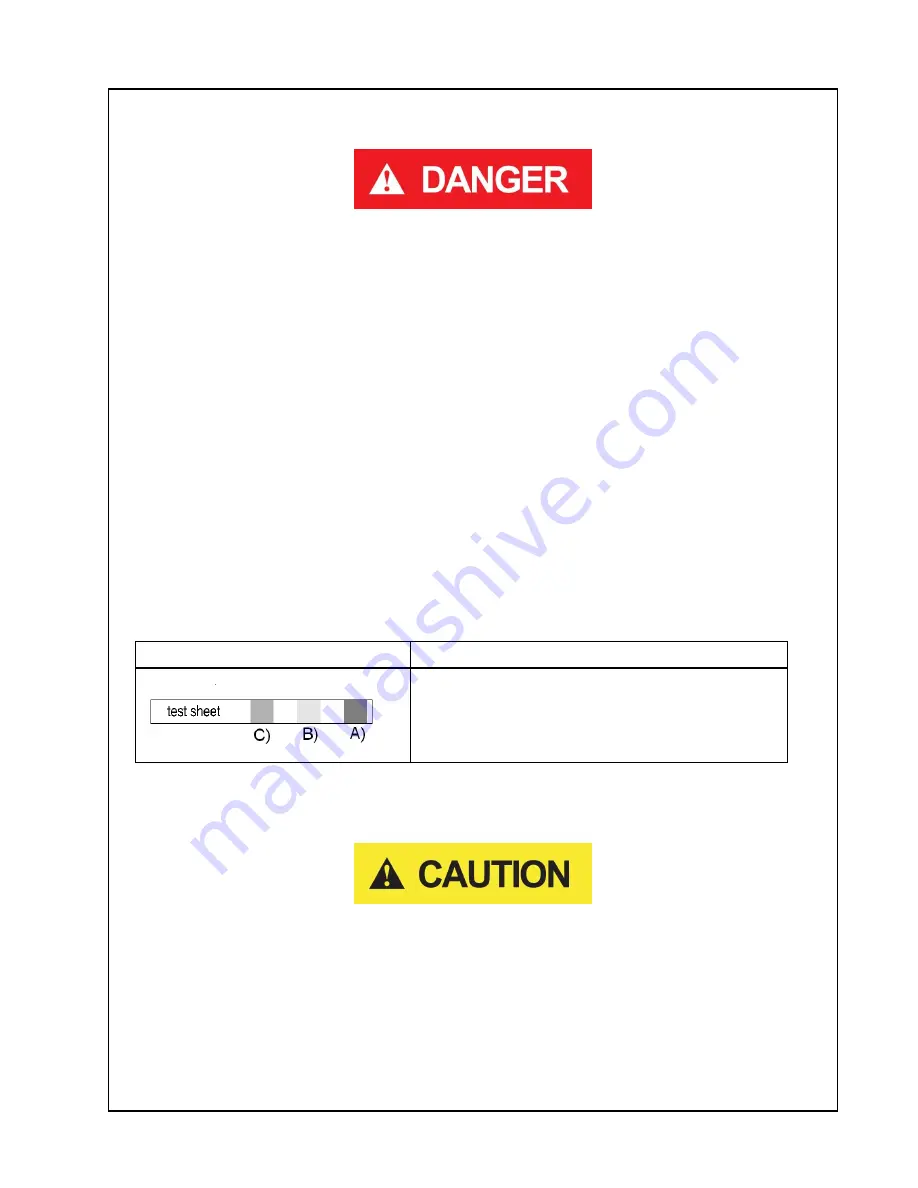
Special Tools

Figure

Product Number/Name

60.99901-0038 CC2602M (Fleet guard number)
Coolant test sheet

The Coolant concentration can be measured as follows:

1. If the Engine coolant temperature is within a range of 10 ~ 55° C, drain the Coolant.

When taking out a sample of coolant from the supplementary tank, it is
difficult to measure the precise concentration. Always take out sample
by opening the drain plug of coolant.

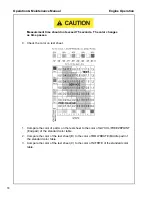
2. Soak the test sheet in the coolant and remove after 3 ~ 5 seconds. Shake the sheet

to remove the remaining coolant.

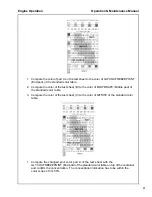
3. Wait for about 45 seconds until the test sheet changes its color.

77

Summary of Contents for Infracore HP210WDO-T4F

Page 1: ...OPERATION and MAINTENANCE MANUAL COMPRESSORS MODEL Doosan Infracore Portable Power 1293 Glenway Drive Statesville N C 28625 DoosanPortablePower com P N 46720670 2018 Rev C P250 HP210WDO T4F G91...

Page 2: ......

Page 3: ...iii...

Page 4: ......

Page 5: ...tem 20 Materials 20 Battery 21 Coolant System 22 Transport 22 Decals 23 NOISE EMISSION 27 Noise Emission 28 Compressor Noise Emission Control Information 28 Maintenance Log 29 Noise Emission Warranty...

Page 6: ...Instructions 54 ENGINE OPERATION 55 Engine Operation and Maintenance 56 Safety 57 Instructions 58 General Repair 60 Environmental Pollution 61 Engine Management 62 Prevention of Pollution 63 Start an...

Page 7: ...ystem 96 Scavenge Line 97 Exterior Finish Care 97 Field Replacement of Exterior Decals 98 Preventive Maintenance Schedule 100 TROUBLESHOOTING 103 Introduction 104 Troubleshooting Chart 105 Diagnostic...

Page 8: ...8...

Page 9: ...Foreword 9...

Page 10: ...Be Of A Type Approved By Portable Power Clearly Rated For A Pressure At Least Equal To The Compressor Safety Valve Setting Compatible With The Compressor Oil Accompanied With Instructions For Safe In...

Page 11: ...rements Explained In This Manual Be Performed At The Required Intervals Exceeding These Intervals May Reduce The Reliability Of The Compressor The Purpose Of This Manual Is To Train The Operator With...

Page 12: ...12...

Page 13: ...Drawbar Instructions 13...

Page 14: ...Operation Maintenance Manual Drawbar Instructions Instruction Kit For Drawbar To Convert from Shipping Position to Towing Position 14...

Page 15: ...tely 1 inch above the ground 4 Remove the temporary Retaining Bolts from both sides of the Frame at the Drawbar connection See Figure 1 5 Carefully lower the Drawbar to the Level position 6 Install th...

Page 16: ...16...

Page 17: ...Safety 17...

Page 18: ...uld be checked for total security All components which are loose damaged or unserviceable must be rectified without delay Air discharged from this compressor may contain carbon monoxide or other conta...

Page 19: ...ply line at tool or vent valve before performing any service or maintenance Discharged air contains a very small percentage of compressor lubricating oil and care should be taken to ensure downstream...

Page 20: ...ation Refer to engine manual for further safety instructions and information on the exhaust aftertreatment system and controls Materials THe following substances may be produced during the operation o...

Page 21: ...freeze brake fluid oil air filters and batteries which may require proper disposal when performing maintenance or service tasks Contact local authorities for proper disposal of these materials Battery...

Page 22: ...e solution It is advisable to wear personal protective equipment to prevent skin and eye contact with the antifreeze solution Transport When loading or transporting the compressor ensure the specified...

Page 23: ...slackness for the towed compressor to articulate without the brake being applied Attach safety chains to the towing vehicle at substantial anchorage points of suitable strength Ensure effective chain...

Page 24: ...ructions inform your supervisor Red Background Indicates the presence of a hazard which WILL cause serious injury death or property damage if ignored Orange Background Indicates the presence of a haza...

Page 25: ...Safety Operation Maintenance Manual 25...

Page 26: ...26...

Page 27: ...Noise Emission 27...

Page 28: ...f B The Air Intake System or Parts thereof C Enclosure or Parts thereof 2 Removal of any of the following A Fan Shroud B Vibration Mounts C Sound Absorption Material 3 Operation of the Compressor with...

Page 29: ...ise Control prior to its Sale or Delivery to the Ultimate Purchaser or while it is in use or 2 the use of the Compressor after such Device or Element of Design has been removed or rendered inoperative...

Page 30: ...ther system bypassed disabled or nonfunctional Daily ACOUSTIC MATERIALS In daily inspections observe these materials Maintain all acoustic material as nearly as possible in its original condition Repa...

Page 31: ...pressor back in operation Unrestricted airflow over the radiator and oil cooler must be maintained at all times during operation 250 HOURS ISOLATION MOUNTS Engine Airend isolation mounts should be ins...

Page 32: ...32...

Page 33: ...General Data 33...

Page 34: ...DC FLUID CAPACITIES Compressor Lubricant gallon litres 4 5 17 liters Engine Cooling System gallon liters 2 6 9 8 liters Engine Crankcase Lubricant gallon litres 2 4 9 1 liters Fuel Tank gallon litres...

Page 35: ...ir Cleaner Element Compressor Secondary Optional 46707047 Air Cleaner Element Engine Secondary Optional 46707047 Engine Oil Filter Element 46668934 Pre Fuel Filter 36845493 Final Fuel Filter w WIF Sen...

Page 36: ...36...

Page 37: ...Operating Instructions 37...

Page 38: ...Gauge Indicates Pressure in the Separator Tank 2 Mini Port Display Displays Compressor Operating Parameters and Diagnostic Codes 3 Hour Meter Displays Machine Hours 4 Keypad Used for Starting and Stop...

Page 39: ...or Increases a value until the end of the Parameter List Menu choices or Maximum Parameter Value is reached DOWN The DOWN Button functions identical to the UP Button with the exception that its direct...

Page 40: ...ons continuously loops through the Quick View Screens i e when the last screen is reached pressing the DOWN button displays the first screen and vice versa See Figure 1 Note 1 Only the Parameters that...

Page 41: ...s the Display unit will Display The SPN FMI OC and description for Engine Fault or the CPR Code and description for Compressor Error An Engine Fault will be Displayed only when the Engine is shutdown...

Page 42: ...nter button to acknowledge an Alert has occurred If there are Multiple Alerts pressing the DOWN button will scroll through the various Alerts All Faults and Alerts will be Displayed until the Engine s...

Page 43: ...ce channels or press the ENTER button to acknowledge a service has occurred Pressing the ENTER button after the service channels have been displayed acknowledges The message and the display unit retur...

Page 44: ...s The Engine Hours Using the UP or DOWN buttons To highlight the desired interval and press the ENTER button to select Use the UP and DOWN buttons to Increase or Decrease the number of hours Hours wil...

Page 45: ...nu to access the Setup Menu press and hold the ENTER button while the Default Screen of Engine Hours is Displayed until the Main Menu appears Scroll to the Setup Option using the DOWN button then pres...

Page 46: ...n using the DOWN button and press the ENTER button Scroll to the Display Option using the DOWN button and press The ENTER button Use the DOWN or UP buttons to highlight and the ENTER button to select...

Page 47: ...he Compressor ID can be changed by accessing the Setup Menu To access the Setup Menu press and hold the ENTER button while the Default Screen is displayed until the Main Menu appears Scroll to the Set...

Page 48: ...e Misc Menu Press and hold the ENTER button while the Default Screen is Displayed until the Main Menu appears Scroll to the Misc Option using the DOWN button then press the ENTER button Use the DOWN o...

Page 49: ...coupler of the compressor Engage the parking brake and chock the tires of the tow vehicle Stand to the side and ensure pin is FULLY inserted secure in tube of jack Crank jack to seat pintle eye or cou...

Page 50: ...l servicing and maintenance The air going into the inlet must be relatively free of oil dirt soot and other debris It must be no more than 10 F 5 C over the ambient temperature Setting Up Position as...

Page 51: ...n ultra low sulfur diesel fuel for maximum service from the engine Check the compressor lubricating fluid level between bottom and midway of the sight glass on the separator tank Drain water from fuel...

Page 52: ...e to fall below 50 psi Normal Operation The operator may observe and monitor operating parameters using the Mini Port and gauges In the event the compressor controller detects a parameter outside norm...

Page 53: ...ompressor will unload by closing the inlet valve The compressor then runs at idle speed unloaded with no air delivery If air demand increases pressure falls below the load point pressure the compresso...

Page 54: ...e With the at idle press high pressure button turn the adjusting screw on the pressure regulator clockwise until the discharge pressure gauge indicates 175 180 psi Tighten the pressure regulator jam n...

Page 55: ...Engine Operation 55...

Page 56: ...acilities serious bodily injury or critical faults in engine performance may occur Regular inspection and maintenance are required to maintain long term optimal engine conditions and best performance...

Page 57: ...ur to workers However this section cannot predict all possible risks In the event the compressor controller detects a parameter at a dangerously high or low level the compressor will be automatically...

Page 58: ...er than workers from accessing the engines Let engine operators know that they are responsible for the safety of the engine room 3 Only authorized people may start and operate engines Unauthorized peo...

Page 59: ...r engine Only refuel when the engine is shut down 6 Mark and separately manage containers for storing coolant from beverage containers to avoid confusion See a doctor immediately in case of drinking c...

Page 60: ...t 4 Store the disassembled parts in a specified space to avoid damage or contamination 5 Use specified and special tools for efficient and safe repair 6 If parts need to be replaced use only genuine D...

Page 61: ...ine has been started 9 Discard oil according to the regulations set forth by the relevant authorities 10 If engine oil or fuel leaks on the floor or is improperly discharged serious environmental poll...

Page 62: ...ly Use only fuel recommended in this Operation and Maintenance Manual Using inappropriate or unspecified fuel may cause critical damage faults and diminished engine performance 2 Do not operate an eng...

Page 63: ...card them according to regulations 5 Classify the antifreeze cooling water and anticorrosive agent as hazardous waste and discard them by observing the regulations Handling of Engine Oil Prolonged and...

Page 64: ...engine after preheating it sufficiently through the glow plug After Starting the Engine 1 Operate engine at light load until engine has reached normal operating temperature 2 Oil air or fuel leaks ca...

Page 65: ...or shut down 5 Do not operate the engine with less than 70 of the engine load 6 Inspection check and repair of engines should be managed by officially certified technicians at certified service cente...

Page 66: ...oil and oil filter need to be replaced use only genuine engine oil and parts recommended by Doosan Operation after Break in Slowly preheat the engine when starting up during cold weather or in areas...

Page 67: ...is unusual during operation shut down the engine diagnose the cause and fix the fault 4 Check the engine status through the alarm indicator lamp and gauges mounted on the apparatus during operation En...

Page 68: ...eventing Overcooling of the Engine When the engine is cooled below the normal operating temperature thermal efficiency is lowered and fuel consumption as well as abrasion of the cylinder liner may inc...

Page 69: ...the oil pan The engine oil level should indicate between the upper limit and the lower limit of the oil level gauge Engine oil should be periodically replaced based on the regular inspection table and...

Page 70: ...tes 4 Pull the oil level gauge upward to pick it out 1 Check the position of the oil level gauge 2 It is mounted beside the oil filter at the side of the engine 3 Pull the ring of the oil level gauge...

Page 71: ...and try again 3 Pull the oil level dipstick upward to remove 1 Check if the oil is smeared between the upper limit a and the lower limit b of the oil level gauge 2 If engine oil is smeared below the...

Page 72: ...ual Engine Operation Replacement of Engine Oil Special Tools Tightening Torque Component Tightening Torque Drain Plug 16 20 Nm Oil Capacity Crank Case Oil Capacity 2 4 gal 9 1 liters Note Including 0...

Page 73: ...in with gasoline fuel thinner or solvent Apply a skin protective cream after cleaning Do not put oil stained gloves or cloth in pockets Discard exchanged oil according to the regulations set forth by...

Page 74: ...aminate the other parts by using a cloth when detaching the filter After replacing the oil filter wipe clean any other parts which the oil has touched 2 Cleanly wipe the surface on which the oil filte...

Page 75: ...final inspection 1 Check if engine oil leaks after starting the engine 2 Start the engine and then stop it when it reaches a normal temperature 3 Wait for 5 10 minutes 4 Check the engine oil level wi...

Page 76: ...tio for the engine coolant is 40 antifreeze and 3 5 additives DCA4 to prevent corrosion For the water in the coolant use clean tap water Periodically check coolant to maintain the concentration of ant...

Page 77: ...coolant volume is normal 4 If there is insufficient coolant replenish it 5 Open the reservoir cap and check the condition of the coolant If the coolant cap is contaminated or insufficient measure the...

Page 78: ...olor on test sheet 1 Compare the color of part A on the test sheet to the color of GLYCOL FREEZEPOINT End pad of the standard color table 2 Compare the color of the test sheet B to the color of MOLYBD...

Page 79: ...E on the standard color table which is identical with the C of the test sheet It should be maintained at the optimum range in the green section between 0 3 to 0 8 3 If the measurement result is below...

Page 80: ...e coolant Measurement of Coolant Concentration Special Tools Figure Product Number Name 60 99901 0038 CC2602M Fleet guard number Coolant test sheet The coolant concentration can be measured as follows...

Page 81: ...o the color of MOLYBDATE Middle pad of the standard color table 3 Compare the color of the test sheet C to the color of NITRITE of the standard color table 1 Compare the changed pink color part A of t...

Page 82: ...in the green section between 0 3 to 0 8 3 If the measurement result is below 0 3 replenish anticorrosion additives DCA4 If it is above 0 8 or drain a little coolant and then inject clean tap water to...

Page 83: ...e and radiator are cold 2 Replenish coolant up to the inlet of the radiator 3 After starting the engine let the coolant circulate sufficiently and check the coolant level If there is insufficient cool...

Page 84: ...ant drain plug of the radiator and drain coolant 5 After completing coolant drain connect the coolant drain plug 6 Drain the coolant from the coolant supplementary tank and cleanse the tank 7 Fill the...

Page 85: ...15 Replenish coolant to the upper limit of the supplementary tank and then install radiator cap 16 Operate the engine at idle until the cooling fan rotates 2 3 times 17 Shut down the engine and wait u...

Page 86: ...86...

Page 87: ...Lubrication 87...

Page 88: ...of the moving parts reduces to a minimum the possibility of mechanical failures The Maintenance Schedule shows those items requiring regular service and the interval in which they should be performed...

Page 89: ...23 C to 52 C Preferred PRO TEC Alternate ISO Viscosity Grade 46 PAO with rust and oxidation inhibitors for rotary screw compressor service 350 psi 23 C to 52 C 10 F to 125 F 65 F to 125 F 18C C to 52...

Page 90: ...90...

Page 91: ...Maintenance 91...

Page 92: ...of pre operation and post operation procedures to be performed by the operating or maintenance personnel The primary function of preventive maintenance is to prevent failure and consequently the need...

Page 93: ...an fuel is poured or pumped into the tank When filling the fuel tank on this unit by methods other than a pump and hose use a CLEAN non metallic funnel Battery Keep the battery posts to cable connecti...

Page 94: ...mitted to enter the engine s combustion chamber or compressor intake Some of the air lines are nylon tubing The associated fittings are push in design Features are as follows Pulling on the tubing wil...

Page 95: ...he gasket seal area on the oil filter head Installing A New Oil Filter Element When The Old Gasket Remains On The Filter Head Will Cause An Oil Leak And Can Cause Property Damage 4 Lubricate the new f...

Page 96: ...six 6 months whichever comes first Refer to warranty section about extended warranty Receiver Separator System High pressure air can cause severe injury or death from hot oil and flying parts Always...

Page 97: ...essure for 30 to 40 minutes to permit element to clear itself Exterior Finish Care This unit was painted and heat cured at the factory with a high quality thermoset polyester powder coating The follow...

Page 98: ...or until dry to touch 10 Apply any Dupont Topcoat Finish such as Imron or Centari according to the label instructions NOTE To re topcoat the textured surfaces when sheet metal repairs are not necessar...

Page 99: ...99...

Page 100: ...Operation Maintenance Manual Maintenance Preventive Maintenance Schedule Preventive Maintenance Schedule Front 100...

Page 101: ...Maintenance Operation Maintenance Manual Preventive Maintenance Schedule Back 101...

Page 102: ...102...

Page 103: ...Troubleshooting 103...

Page 104: ...intenance Work Has Been Done 4 If The Compressor Will Still Operate Is It Safe To Continue Operating It To Make Further Checks Do The Simplest Things First Most troubles are simple and easily correcte...

Page 105: ...level sender device Replace if determined faulty See Electronic Service Manual Defective sensor Identify and check sensor Replace if necessary See Electronic Service Manual Malfunctioning relay Ident...

Page 106: ...vice Manual Malfunctioning relay Identify and check relay Replace if necessary See Electronic Service Manual Engine malfunctioning See troubleshooting in Engine manual Airend malfunctioning See Compla...

Page 107: ...sor to be more level Low compressor oil Add compressor oil Look for and repair any leaks Wrong compressor oil Change compressor oil Review compressor oil specification Dirty cooler s Clean exterior of...

Page 108: ...ints 11 12 Rubber mounting isolators loose or damaged Tighten or replace Defective or imbalanced fan Replace fan Defective airend drive coupling Replace coupling Engine malfunctioning See troubleshoot...

Page 109: ...ed 10 Compressor will not unload Plugged vent leak Clean and or replace Operating pressure too high Reduce pressure to rated operating pressure Malfunctioning inlet unloader Inspect valve Make adjustm...

Page 110: ...hese Codes Are Provided In This Section The Engine Diagnostic Codes Can Also Be Read With The Engine Manufacturer S Service Tool A Service Tool Connector Is Provided In The Electrical Harness Providin...

Page 111: ...t started after 3 crank attempts ALERT CPR CODE 12 FUEL LEVEL LOW Low Fuel Level Fuel level in tank approaching empty ALERT CPR CODE 16 HIGH ENGINE TEMP High Engine Temperature Engine coolant temperat...

Page 112: ...the Separator Tank exceeded limit FAULT CPR CODE 36 SAFETY VALVE OPEN Safety Valve Open Safety relief valve on separator tank opened FAULT CPR CODE 38 AIR FILTERS RESTRICTED Intake Air Filters Restric...

Page 113: ...CODE 61 IQ FILTER PRES ERROR IQ Filter Pressure Sensor IQ Differential Pressure Sensor reading out of range ALERT CPR CODE 63 AMBIENT TEMP SENSOR Ambient Temperature Sensor Ambient temperature sensor...

Page 114: ...114...

Page 115: ...Appendix A 115...

Page 116: ...Operation Maintenance Manual Appendix A Warranty 116...

Page 117: ...Appendix A Operation Maintenance Manual 117...

Page 118: ...Operation Maintenance Manual Appendix A 118...

Page 119: ...Revision History REV REV DATE DESCRIPTION A 02 20 2018 Original Release B 05 04 2018 Added Compressor Diagnostic Codes Updates C 07 18 2018 Added Prop 65 Warning Label Updated PMS 119...

Page 120: ......

Page 121: ......

Page 122: ...Doosan Infracore Portable Power 1293 Glenway Drive Statesville N C 28625 DoosanPortablePower com Doosan Infracore Portable Power Printed in the U S A...

Reviews: