* Replace scavenge tube in cover (cover is still off
of tank).
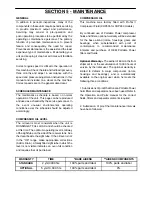
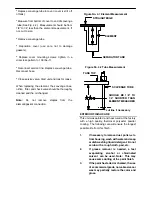
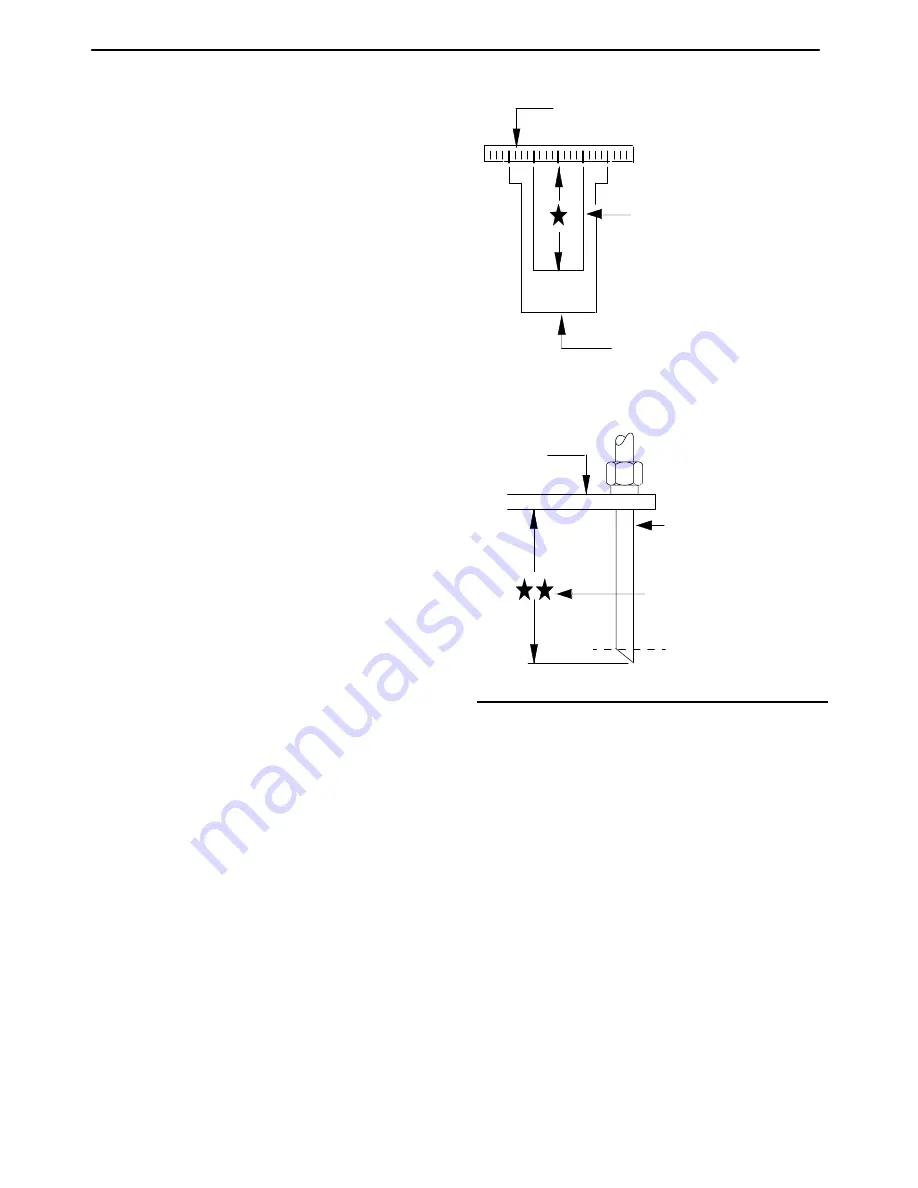
* Measure from bottom of cover to end of scavenge
tube (See Fig. 4.2). Measurement should be from
1/8” to 1/4” less than the element measurement. If
not, cut to size.
* Remove scavenge tube.
* Reposition cover (use care not to damage
gaskets).
* Replace cover mounting screws: tighten in a
crisscross pattern to 100 lbs.--ft.
* Reconnect service line. Replace scavenge tube.
Reconnect hose.
* Close service valve. Start unit and look for leaks.
When replacing the element, the scavenge lines,
orifice, filter, and check valve should be thoroughly
cleaned and the oil changed.
Note:
Do
not
remove
staples
from the
element/gasket connection.
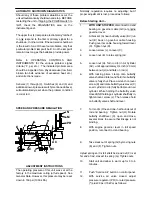
Figure No. 4.1 Element Measurement
STRAIGHTEDGE
ELEMENT
SEPARATOR TANK
Figure No. 4.2 Tube Measurement
TANK TOP
SCAVENGE TUBE
SHOULD BE 1/8” TO
1/4” SHORTER THAN
ELEMENT MEASURED
cut line if necessary
EXTERIOR FINISH CARE
This unit was painted and heat cured at the factory
with a high quality, thermoset polyester powder
coating. The following care will ensure the longest
possible life from this finish.
1.
If necessary to remove dust, pollen, etc.
from housing, wash with water and soap
or dish washing liquid detergent. Do not
scrub with a rough cloth, pad, etc.
2.
If grease removal is needed, a fast
evaporating alcohol or chlorinated
solvent can be used. Note: This may
cause some dulling of the paint finish.
3.
If the paint has faded or chalked, the use
of a commercial grade, non--abrasive car
wax may partially restore the color and
gloss.

