The Dorel Living 0-65857-17827-2 is a sleek and modern piece of furniture that will add style and functionality to any space. To learn how to assemble and maintain this product, download the free manual from 88.208.23.73:8080 and get started today.
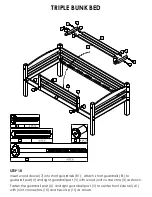
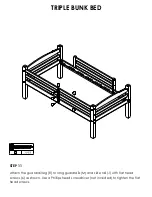
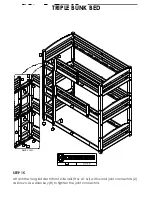
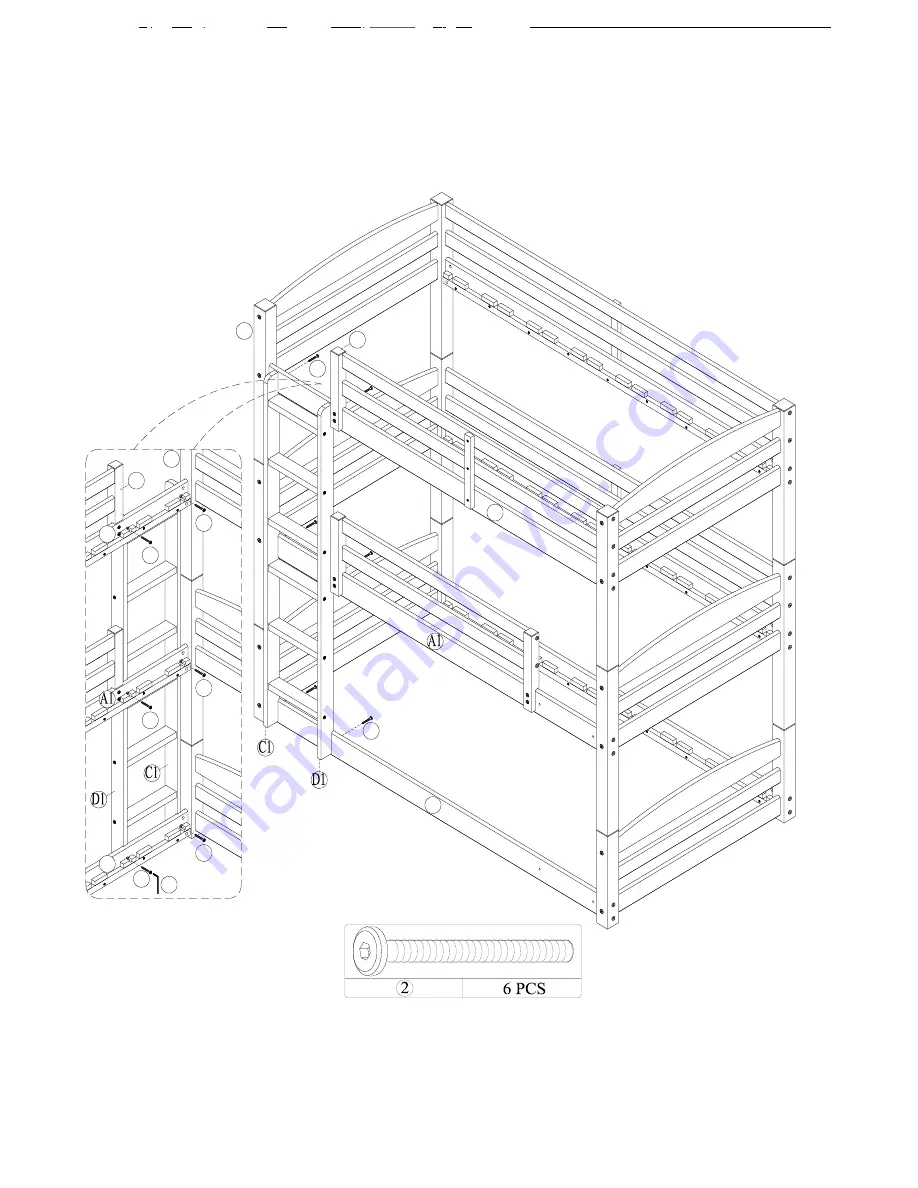
STEP 15
TRIPLE BUNK BED
Attach the long ladder to front side rails (H & A1 & I) with wood joint connectors (2) as shown. Use Allen key (8) to tighten the joint connectors.
I
U
H
A
2
8
back view
Page 1: ...sia Our agents are available Monday to Friday 8am to 5pm EST to answer any question you may have For faster service always have the model number ready when calling our toll free number 1 800 295 1980...
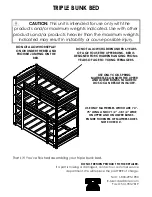
Page 2: ...OR BOTH TO HELP PREVENT THE LIKELIHOOD OF ENTRAPMENT OR FALLS USE ONLY COIL SPRING MATTRESSES ON BOTH THE UPPER AND LOWER BUNKS FAILURE TO DO SO CAN RESULT IN INJURY USE ONLY MATTRESSES WHICH ARE 74...
Page 3: ...missing DO NOT USE CARE AND CLEANING Dust regularly with a soft dry cloth We do not recommend the use of chemical cleaners or wax on our lacquered furniture as it may damage the finish Keep solvents a...
Page 4: ...TOR 4mm HEX HEAD HEX CAP 8 PCS 9 PCS 10mm x 50mm WOOD DOWEL ALLEN KEY 40 PCS 36 PCS 10mm x 100mm 4mm x 30mm METAL DOWEL FLAT HEAD SCREW 24 PCS 28 PCS 6 5mm x 100mm 4mm x 35mm WOOD JOINT CONNECTOR 4mm...
Page 5: ...P CROSS 2 PCS 2 PCS 6 PCS NOTE the components needed to assemble the triple bunk bed are packed in 2 boxes Make sure that all parts are accounted for before beginning assembly BOTTOM POST TRIPLE BUNK...
Page 6: ...CS 2 PCS RIGHT LADDER END LADDER STEP GUARDRAIL LEG 1 PC 9 PCS 3 PCS LONG GUARDRAIL SHORT GUARDRAIL LEFT LADDER END 4 PCS 2 PCS 1 PC BACK SIDE RAIL BOTTOM BACK SIDE RAIL SLAT WITHOUT WOOD DOWEL 2 PCS...
Page 7: ...Z A1 B1 C1 D1 1 PC LONG LADDER RIGHT END 1 PC 1 PC FRONT SIDE RAIL LONG LADDER LEFT END 1 PC CENTER POST 1 PC SHORT GUARDRAIL 2 PCS TRIPLE BUNK BED CENTER POST CENTER POST 1 PC 1 PC RIGHT GUARDRAIL PO...
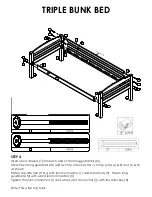
Page 8: ...1 Insert wood dowels 7 into the ends of headboard top cross F headboard bottom cross G and headboard center cross S Attach them to top posts A B using wood joint connectors 3 as shown Tighten the woo...
Page 9: ...ds of headboard top cross F headboard bottom cross G and headboard center cross S and attach them to bottom posts D E using wood joint connectors 3 as shown Tighten the wood joint connectors 3 with th...
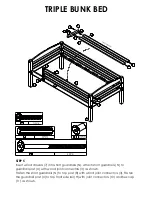
Page 10: ...e lower bunk Attach the two headboards with bottom posts D E to bottom front side rail I and bottom back side rail K using joint connectors 1 and barrel nuts 9 as shown Tighten the joint connectors 1...
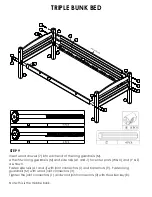
Page 11: ...rdrails M and two top side rails H J to top posts A B and C B as shown Fasten top side rails H J with joint connectors 1 and barrel nuts 9 Fasten long guardrails M with wood joint connectors 3 Tighten...
Page 12: ...3 Fasten the guardrail post U to top front side rail H with joint connectors 10 and hex cap 11 as shown TRIPLE BUNK BED Insert wood dowels 7 into short guardrails N Attach short guardrails N to guardr...
Page 13: ...top front side rail H with flat head screws 6 Attach the other guardrail leg R on the other side of the bed to long guardrails M and top back side rail J with flat head screws 6 as shown Use a Philli...
Page 14: ...K BED Insert wood dowels 7 into the end of the ladder steps Q Attach left ladder end O and right ladder end P to ladder steps Q with wood joint connectors 2 Tighten the wood joint connectors 2 with th...
Page 15: ...ross F headboard bottom cross G and headboard center cross S Attach the center posts W X using wood joint connectors 3 and Allen key 8 NOTES Headboard top crosses F G and S may require that they be pu...
Page 16: ...drails M and side rails A1 and J to center posts W X and Y Z as shown Fasten side rails A1 and J with joint connectors 1 and barrel nuts 9 Fasten long guardrails M with wood joint connectors 3 Tighten...
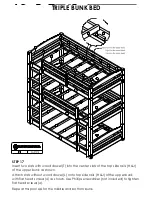
Page 17: ...center front side rail A1 with joint connectors 10 and hex cap 11 as shown TRIPLE BUNK BED Insert wood dowel 7 into short guardrails B1 Attach short guardrails B1 to guardrail post U and right guardr...
Page 18: ...P 11 TRIPLE BUNK BED Attach the guardrail leg R to long guardrails M and side rail J with flat head screws 6 as shown Use a Phillips head screwdriver not included to tighten the flat head screws 6 6 6...
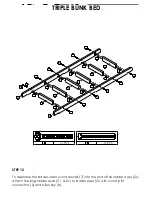
Page 19: ...STEP 12 TRIPLE BUNK BED To assemble the ladder insert wood dowels 7 into the end of the ladder steps Q Attach the long ladder ends C1 D1 to ladder steps Q with wood joint connectors 2 and Allen key 8...
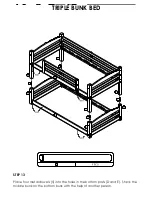
Page 20: ...STEP 13 TRIPLE BUNK BED Place four metal dowels 5 into the holes in the bottom posts D and E Stack the middle bunk on the bottom bunk with the help of another person 5 5 5 5 E D D I...
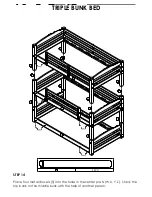
Page 21: ...STEP 14 TRIPLE BUNK BED Place four metal dowels 5 into the holes in the center posts W X Y Z Stack the top bunk on the middle bunk with the help of another person 5 5 5 5 I A B B C H...
Page 22: ...EP 15 TRIPLE BUNK BED Attach the long ladder to front side rails H A1 I with wood joint connectors 2 as shown Use Allen key 8 to tighten the joint connectors I U I H U A A 2 2 2 2 2 2 8 2 2 back view...
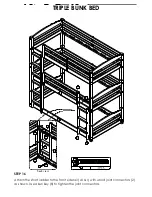
Page 23: ...STEP 16 TRIPLE BUNK BED Attach the short ladder to the front side rail A1 I with wood joint connectors 2 as shown Use Allen key 8 to tighten the joint connectors 2 I O P V I V P O 2 2 2 2 8 back view...
Page 24: ...od dowel T into the center slots of the top side rails H J of the upper bunk as shown Attach slats without wood dowel L onto top side rails H J of the upper bunk with flat head screws 4 as shown Use P...
Page 25: ...RIPLE BUNK BED To convert the bunk bed into three different twin bed remove both ladders and all the guardrails With the help of another person unstack the top bunk and center bunk from the lower bunk...
Page 26: ...MATTRESSES WHICH ARE 74 75 LONG AND 37 1 2 38 1 2 WIDE ON UPPER AND ON LOWER BUNKS ENSURE THICKNESS OF MATTRESS DOES NOT EXCEED 6 DO NOT ALLOW CHILDREN UNDER 6 YEARS OF AGE TO USE THE UPPER BUNK BED I...
Page 27: ...ci n de nuestros clientes Nuestros representantes est n disponibles de lunes a viernes de 8 h a 17 h hora del este para responder a todas sus preguntas Con el fin de acelerar el servicio por favor ten...
Page 28: ...RECOMENDADO O LOS DOS PARA EVITAR LA POSIBILIDAD DE CA DAS O QUE EL NI O QUEDE ATRAPADO UTILICE SOLAMENTE COLCHONES CON RESORTES EN ESPIRAL EN LAS DOS CUCHETAS EL NO RESPETAR ESTO PUEDE CAUSAR LESION...
Page 29: ...ue haya sido mal armado sujeto a mal uso o abuso o que haya sido alterado o reparado de cualquier manera Esta garant a le da las derechas legales espec ficas y usted puede tambi n tener otras derechas...
Page 30: ...28 PCS 6 5mm x 100mm 4mm x 35mm PERNO CONECTOR MADERA 4MM CABEZA TORNILLO CABEZA PLANA HEXAGONAL 40 PCS 36 PCS 10mm x 100mm 4mm x 30mm CLAVIJA DE METAL TORNILLO CABEZA PLANA PERNO DE BRIDA HEXAGONAL...
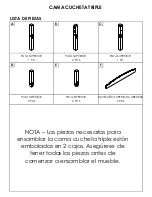
Page 31: ...R PATA SUPERIOR 1 PC 2 PCS 1 PC PATA INFERIOR TRAVESA O SUPERIOR CABECERA 2 PCS 2 PCS 6 PCS NOTA Las piezas necesarias para ensamblar la cama cucheta triple est n embaladas en 2 cajas Aseg rese de ten...
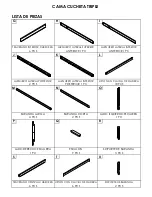
Page 32: ...R 1 PC ANTERIOR 1 PC LARGUERO LATERAL POSTERIOR LARGUERO LATERAL INFERIOR LIST N SIN CLAVIJA DE MADERA 2 PCS POSTERIOR 1 PC 18 PCS BARANDA LARGA BARANDA CORTA LADO IZQUIERDO ESCALERA 4 PCS 2 PCS 1 PC...
Page 33: ...2 PCS CAMA CUCHETA TRIPLE PIE CENTRAL PIE CENTRAL 1 PC 1 PC SOPORTE DE BARANDA DERECHO PIE CENTRAL 1 PC LARGUERO LATERAL ANTERIOR LADO IZQUIERDO ESCALERA LARGA 1 PC PIE CENTRAL 1 PC BARANDA CORTA 1 PC...
Page 34: ...del travesa o superior de la cabecera F del travesa o inferior de la cabecera G y del travesa o central de la cabecera S nalos con las patas superiores A y B con pernos conectores para madera 3 como...
Page 35: ...erior de cabecera F del travesa o inferior de cabecera G y del travesa o central de cabecera S y nalos con las patas inferiores D y E con pernos conectores para madera 3 como ilustrado Ajuste los pern...
Page 36: ...s dos cabeceras con las patas inferiores D y E al larguero lateral inferior anterior I y al larguero lateral inferior posterior K con pernos conectores 1 y tuercas barrilete 9 como ilustrado Ajuste lo...
Page 37: ...ales superiores H y J con las patas superiores A y B y C y B como ilustrado Fije los largueros laterales superiores H y J con pernos conectores 1 y tuercas barrilete 9 Fije las barandas largas M con p...
Page 38: ...U al larguero lateral superior anterior H con pernos conectores 10 y pernos de brida hexagonal 11 como ilustrado CAMA CUCHETA TRIPLE Inserte clavijas de madera 7 en las barandas cortas N Una las bara...
Page 39: ...ior H con tornillos de cabeza plana 6 Una el otro soporte de baranda R del otro lado de la cama con las barandas largas M y el larguero lateral superior posterior J con tornillos de cabeza plana 6 com...
Page 40: ...de madera 7 en los extremos de los escalones Q Una el lado izquierdo de la escalera O y el lado derecho de la escalera P a los escalones Q con pernos conectores para madera 2 Ajuste los pernos conect...
Page 41: ...nferior de la cabecera G y del travesa o central de la cabecera S Una los pies centrales W y X con pernos conectores para madera 3 y la llave Allen 8 NOTA Puede pasar que los travesa os de la cabecera...
Page 42: ...s laterales A1 y J con las patas centrales W y X e Y y Z como ilustrado Fije los largueros laterales A1 y J con pernos conectores 1 y tuercas barrilete 9 Fije las barandas largas M con pernos conector...
Page 43: ...ior A1 con pernos conectores 10 y pernos de brida hexagonal 11 como ilustrado CAMA CUCHETA TRIPLE Inserte clavijas de madera 7 en las barandas cortas B1 Una las barandas cortas B1 al soporte de barand...
Page 44: ...PLE Una el soporte de baranda R a las barandas largas M y al larguero lateral J con tornillos de cabeza plana 6 como ilustrado Utilice un destornillador Phillips no incluido para ajustar los tornillos...
Page 45: ...TA TRIPLE Para ensamblar la escalera inserte clavijas de madera 7 en los extremos de los escalones Q Una los lados de la escalera larga C1 y D1 con los escalones Q con pernos conectores para madera 2...
Page 46: ...A TRIPLE Coloque cuatro clavijas de metal 5 en los agujeros de las patas inferiores D y E Con la ayuda de otra persona coloque la cama del medio sobre la cama inferior 5 5 5 5 E D D I Agujeros Agujero...
Page 47: ...E Coloque cuatro clavijas de metal 5 en los agujeros de las patas centrales W X Y Z Con la ayuda de otra persona coloque la cama superior sobre la cama del medio 5 5 5 5 I A B B C H Agujeros Agujeros...
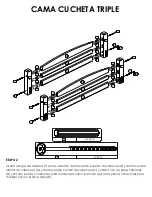
Page 48: ...a escalera larga a los largueros laterales anteriores H A1 e I con pernos conectores para madera 2 como ilustrado Utilice la llave Allen 8 para ajustar los pernos conectores I U I H U A A 2 2 2 2 2 2...
Page 49: ...na la escalera corta a los largueros laterales anteriores A1 e I con pernos conectores para madera 2 como ilustrado Utilice la llave Allen 8 para ajustar los pernos conectores 2 I O P V I V P O 2 2 2...
Page 50: ...superiores H y J de la cama superior como ilustrado Fije los listones sin clavija de madera L en los largueros laterales superiores H y J de la cama superior con tornillos de cabeza plana 4 como ilus...
Page 51: ...chetas en tres camas simples separadas retire las dos escaleras y todas las barandas Con la ayuda de otra persona retire la cama superior y la cama del medio de la cama inferior La primera cama simple...
Page 52: ...MA EST DISE ADA PARA NI OS DESDE 6 A OS HASTA LA ADOLESCENCIA TEMPRANA UTILICE SOLAMENTE COLCHONES CON RESORTES EN ESPIRAL EN LAS DOS CUCHETAS EL NO RESPETAR ESTO PUEDE CAUSAR UTILICE NICAMENTE COLCHO...
Page 53: ...important pour nous chez Dorel Asia Nos repr sentants sont disponibles du lundi au vendredi de 8 h 17 h heure de l est pour r pondre toutes vos questions Afin d acc l rer le service ayez toujours en...
Page 54: ...E D PASSE PAS 6 LA SURFACE DE MATELAS DOIT TRE AU MOINS DE 5 127MM CI DESSOUS DE LA BANDE SUP RIEURE DE GUARDRAILS NE PAS PERMETTRE AUX ENFANTS DE MOINS DE 6 ANS D UTILISER LE LIT SUP RIEUR TOUJOURS U...
Page 55: ...qui a t alt r ou r par d une fa on quelconque Cette garantie vous donne des droits l gaux sp cifiques et vous pouvez galement avoir d autres droits qui varient d une province l autre MISE EN GARDE Si...
Page 56: ...VIS T TE HEXAGONALE 8 PCS 9 PCS 10mm x 50mm GOUJON DE BOIS CL ALLEN HEXAGONALE 40 PCS 36 PCS 10mm x 100mm 4mm x 30mm GOUJON DE M TAL VIS T TE PLATE HEXAGONALE 24 PCS HEXAGONALE 28 PCS 6 5mm x 100mm 4...
Page 57: ...6 PCS NOTE Les pi ces requises pour assembler les lits superpos s trois niveaux sont emball es dans 2 bo tes Assurez vous d avoir toutes les pi ces avant de commencer l assemblage PIED INF RIEUR LITS...
Page 58: ...E MARCHE SUPPORT DE BARRI RE 1 PC 9 PCS 3 PCS BARRI RE LONGUE BARRI RE COURTE C T GAUCHE CHELLE 4 PCS 2 PCS 1 PC BARRE LAT RALE ARRI RE BARRE LAT RALE INF RIEURE ARRI RE LATTE SANS GOUJON DE BOIS 2 PC...
Page 59: ...PC C T DROIT CHELLE LONGUE 1 PC 1 PC BARRE LAT RALE AVANT C T GAUCHE CHELLE LONGUE 1 PC PIED CENTRAL 1 PC BARRI RE COURTE 2 PCS LITS SUPERPOS S TROIS NIVEAUX PIED CENTRAL PIED CENTRAL 1 PC 1 PC SUPPO...
Page 60: ...s de la traverse sup rieure de la t te de lit F dans la traverse inf rieure de la t te de lit G et dans la traverse centrale de la t te de lit S Fixez les aux pieds sup rieurs A et B avec des boulons...
Page 61: ...te de lit F dans la traverse inf rieure de t te de lit G et dans la traverse centrale de t te de lit S et fixez les aux pieds inf rieurs D et E avec des boulons de raccordement pour bois 3 tel qu ill...
Page 62: ...ux t tes de lit aux pieds inf rieurs D et E la barre lat rale inf rieure avant I et la barre lat rale inf rieure arri re K avec des boulons de raccordement 1 et des crous transversaux 9 tel qu illustr...
Page 63: ...H et J aux pieds sup rieurs A et B et C et B tel qu illustr Fixez les barres lat rales sup rieures H et J avec des boulons de raccordement 1 et des crous transversaux 9 Fixez les barri res longues M a...
Page 64: ...rale sup rieure avant H avec des boulons de raccordement 10 et des vis t te hexagonale creuse 11 tel qu illustr LITS SUPERPOS S TROIS NIVEAUX Ins rez des goujons de bois 7 dans les barri res courtes...
Page 65: ...rale sup rieure avant H avec des vis t te plate 6 Fixez l autre support de barri re R de l autre c t du lit aux barri res longues M et la barre lat rale sup rieure arri re J avec des vis t te plate 6...
Page 66: ...goujons de bois 7 dans les extr mit s des marches Q Fixez le c t gauche de l chelle O et le c t droit de l chelle P aux marches Q avec des boulons de raccordement pour bois 2 Serrez les boulons de rac...
Page 67: ...averse inf rieure de la t te de lit G et dans la traverse centrale de la t te de lit S Fixez les pieds centraux W et X avec des boulons de raccordement pour bois 3 l aide de la cl Allen 8 NOTE Peut tr...
Page 68: ...et J aux pieds centraux W et X et Y et Z telle qu illustr Fixez les barres lat rales A1 et J avec des boulons de raccordement 1 et des crous transversaux 9 Fixez les barri res longues M avec des boul...
Page 69: ...de raccordement 10 et des vis t te hexagonale creuse 11 tel qu illustr LITS SUPERPOS S TROIS NIVEAUX Ins rez des goujons de bois 7 dans les barri res courtes B1 Fixez les barri res courtes B1 au suppo...
Page 70: ...S TROIS NIVEAUX Fixez le support de barri re R aux barri res longues M et la barre lat rale J avec des vis t te plate 6 tel qu illustr Servez vous d un tournevis cruciforme non compris pour serrer les...
Page 71: ...OIS NIVEAUX Pour assembler l chelle ins rez des goujons de bois 7 dans les extr mit s des marches Q Fixez les c t s de l chelle longue C1 et D1 aux marches Q avec des boulons de raccordement pour bois...
Page 72: ...PERPOS S TROIS NIVEAUX Placez quatre goujons de m tal 5 dans les trous des pieds inf rieurs D et E Avec l aide d une autre personne placez le lit du milieu sur le lit inf rieur 5 5 5 5 E D D I Trous T...
Page 73: ...TAPE 14 LITS SUPERPOS S TROIS NIVEAUX Placez quatre goujons de m tal 5 dans les trous des pieds centraux W X Y Z Avec l aide d une autre personne placez le lit sup rieur sur le lit du milieu...
Page 74: ...xez l chelle longue aux barres lat rales avant H A1 et I avec des boulons de raccordement pour bois 2 tel qu illustr Servez vous de la cl Allen 8 pour serrer les boulons de raccordement I U I H U A A...
Page 75: ...EAUX Fixez l chelle courte aux barres lat rales A1 et I avec des boulons de raccordement pour bois 2 tel qu illustr Servez vous de la cl Allen 8 pour serrer les boulons de raccordement 2 I O P V I V P...
Page 76: ...sup rieures H et J du lit sup rieur tel qu illustr Fixez les lattes sans goujons de bois L aux barres lat rales sup rieures H et J du lit sup rieur avec des vis t te plate 4 tel qu illustr Servez vous...
Page 77: ...its superpos s en trois lits simples retirez les deux chelles et toutes les barri res Avec l aide d une autre personne s parez le lit sup rieur et le lit du milieu du lit inf rieur Le premier lit simp...
Page 78: ...DONT L GE SE SITUE PARTIR DE 6 ANS JUSQU JEUNES ADOS UTILISEZ SEULEMENT DES MATELAS RESSORTS SUR LES LITS SUP RIEUR ET INF RIEUR D FAUT DE QUOI DES BLESSURES PEUVENT SE PRODUIRE UTILISEZ SEULEMENT DE...