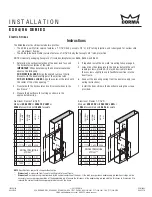
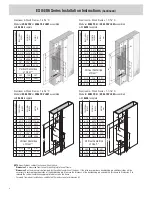
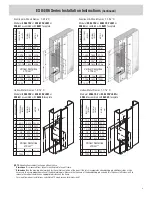
ES84/86 Series Installation Instructions
(Continued)
4
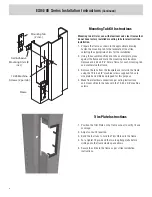
Frame
Self-Adhesive
Mounting Shim (8
incl.)
Mounting Tab
(2 incl.)
12-24 Machine
Screws (2 per tab)
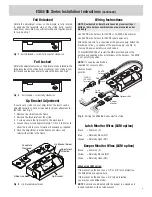
Mounting Tab Kit instructions
Mounting tab kit is for use with aluminum and steel frames that
do not have factory installed mounting tabs for electric strike
installation.
1. Prepare the frame as shown in the approximate drawing.
Fasten the mounting tab to the faceplate of the strike,
selecting the appropriate shims for the installation.
2. Using the assembled strike and tabs as a template, place
against the frame and mark the mounting hole locations.
Remove and drill a 3/16” hole in frame for each mounting tab
and countersink the frame.
3. Remove the tabs from the faceplate and install in the frame
using the 12-24 x 3/8” machine screws supplied. Tabs are
zinc plated and drilled and tapped for this purpose.
4. Make final electrical connections per wiring instructions
and mount strike to the tabs with the 12-24 x 3/8” machine
screws.
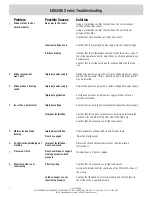
Trim Plate instructions
1. Position the Trim Plate on the frame cut-out to verify fit and
coverage.
2. Adjust cut-out if required.
3. bend the four tabs to hold the Trim Plate onto the frame.
4. For a tighter fit, pre-bend the two long flange tabs before
sliding onto the frame where space allows.
5. Secure the strike to the frame as per strike installation
instructions.