38
ED50/ED100/ED250
09-2021
DL4617-003
dormakaba ED50/ED100/ED250 OHC Header
Setup and Troubleshooting Instructions
Chapter 12
12.6 Perform learning cycle
CAUTION
Learning cycle must be performed while
ED50/ED100/ED250 motor is cold!
CAUTION
Door must not be manually moved or held in
position during the learning cycle!
TIPS AND RECOMMENDATIONS
During learning cycle:
• Safety sensors and activators, are switched
off to insure learning cycle sequence is not
interrupted.
• Operator functions are deactivated.
WARNING
No personnel or objects must be in range of
door motion during learn cycle!
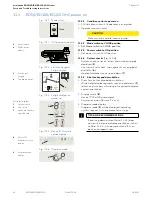
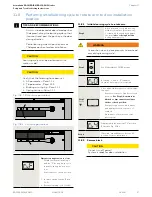
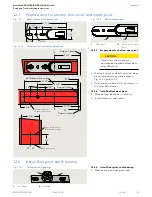
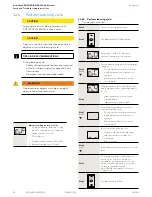
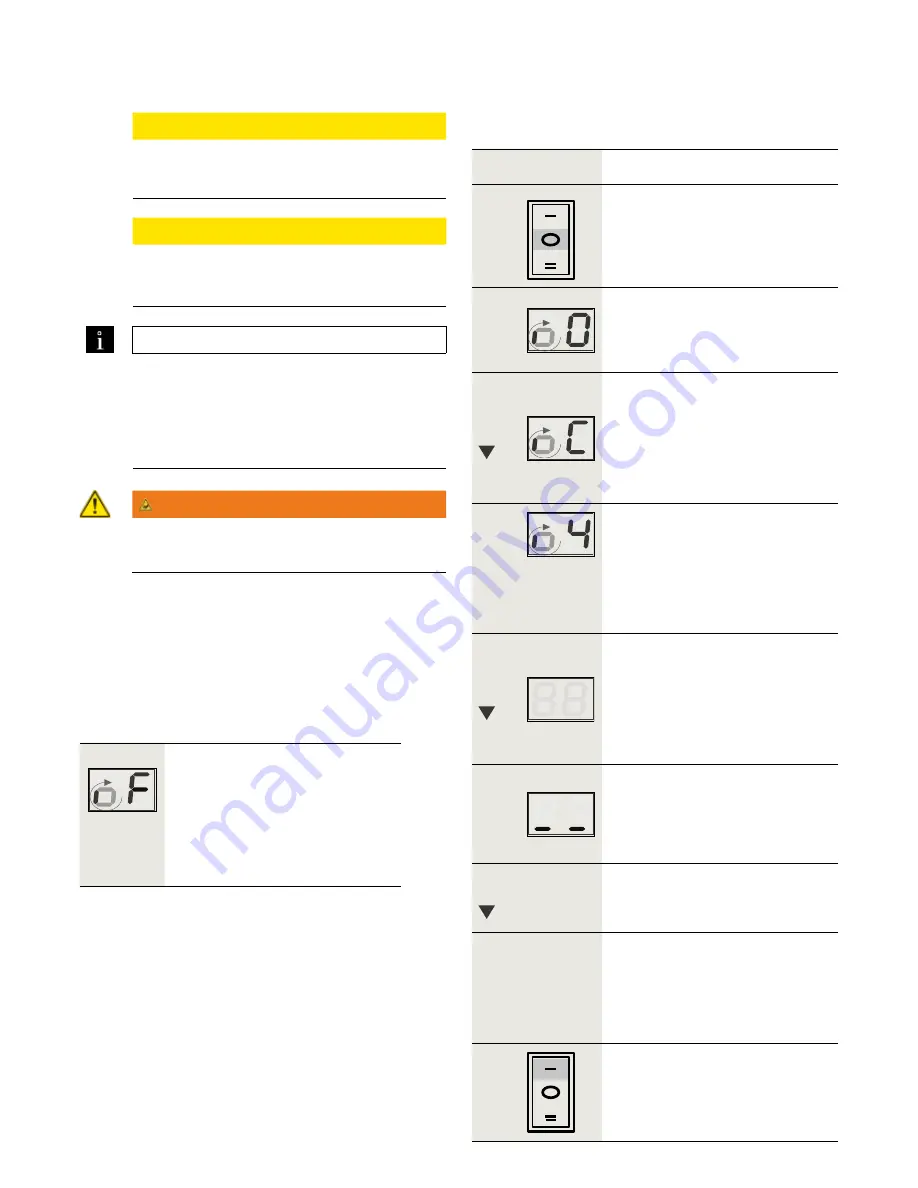
Step 1
Secure motion range of door.
Step 2
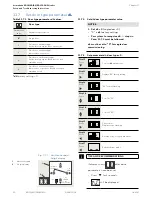
Set Mode switch to CLOSE position.
Rotating "o" and a "0" indicates
operator learning cycle is required.
Step 3
Press
Press and hold down button until display
changes.
• Door performs several movements
and display shows a sequence of
symbols.
• Movements of door must not be
interrupted!
Display indicates door is at 70° position
and is waiting for door opening angle to
be set.
Step 4
• Manually move door to desired
opening angle.
Maximum door angle is 110°.
Step 5
Press
Momentarily press down button to
continue learning cycle.
• Door performs several movements
and display shows a sequence of
symbols.
• Movements of door must not be
interrupted!
Door completes learning cycle.
• Display with two horizontal bars
indicate operator is ready for
operation.
• Door is closed.
Step 6
Press
Momentarily press down button to cycle
door.
Step 7
Following automatic learning cycle,
actual forces on door, and door
opening and closing times must be
measured and changed if necessary
to insure compliance with
ANSI/BHMA standards, reference
Chapter 19.
Step 9
Set Mode switch to Auto.
12.6.1 Perform learning cycle.
1. Turn power switch on.
Operator spring tension too low.
• Display with small rotating "o" and
an "F" during learn cycle indicates
spring tension is too low.
• Door will close.
1. Increase spring tension (Para. 11.1).
2. Restart learning cycle (Step 2).

