background image

dormakaba 8900 JT/JTH Installation Instructions

08280161

09-2019

8900 Surface Applied Closers
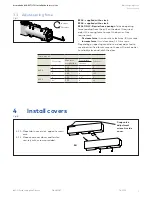
4

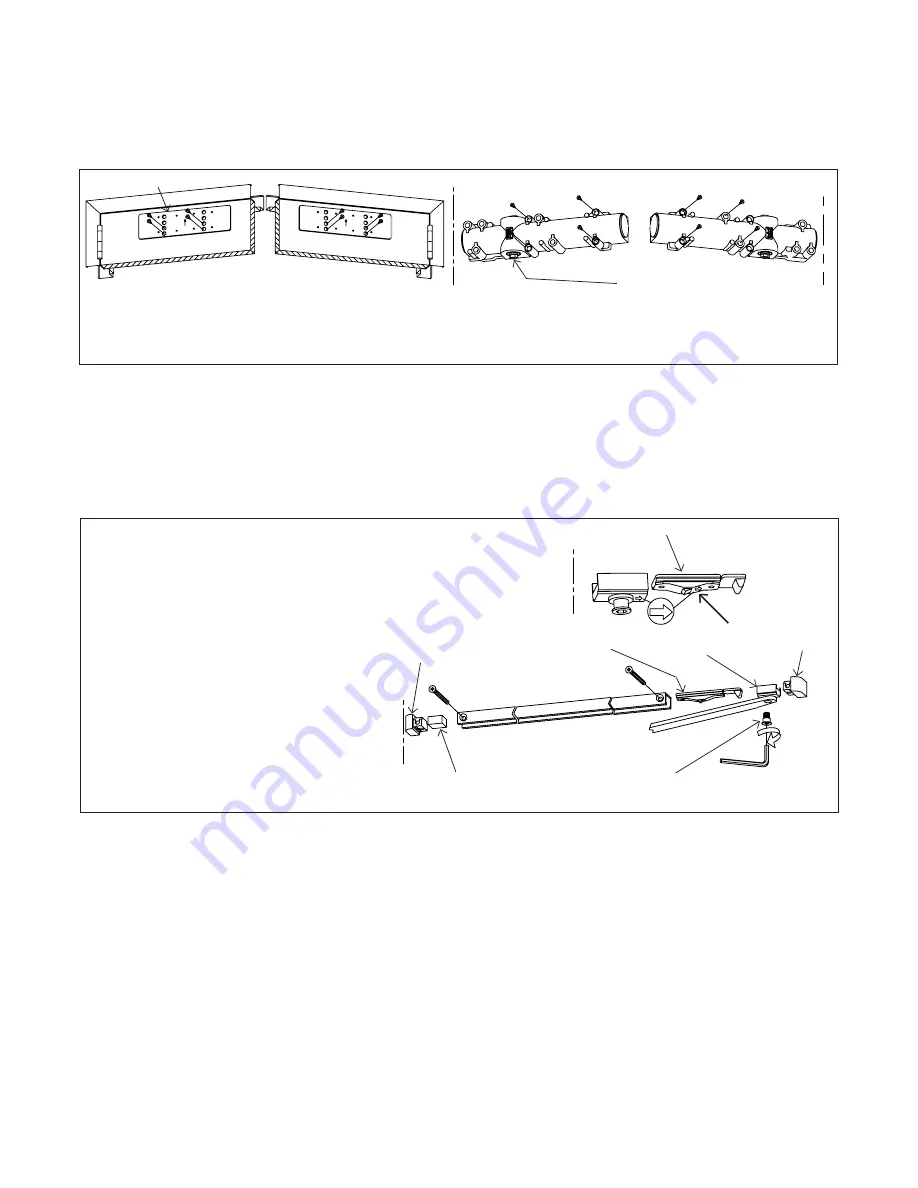
Backplate and surface closer

Track

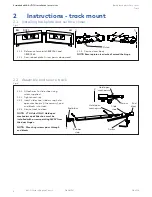
Instructions - track mount

2.1  Installing backplate and surface closer

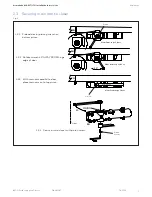
2.2  Assemble and secure track

Fig.2 

Fig.3 

BP89

LH

2.1.1  Reference template 08280162 and 

08280163.

2.1.2  Secure backplate. Arrow points downward.

2.1.3  Secure closer body.

NOTE: Ensure pinion is oriented toward the hinge.

RH

Pinion

2.2.1  Attach arm to slide shoe using 

screw supplied.

2.2.2  Tighten securely.
2.2.3  Insert slide shoe, rubber stop, hold 

open mechanism (if necessary), and 
end blocks into track.

2.2.4  Secure track to door.

NOTE:  JTH Units ONLY: Hold open 
mechanism and slide shoe must be 
installed with arrows pointing AWAY from 
the door hinges.

NOTE:  Mounting screws pass through 
end blocks.

End block

Slide 

shoe

End 

block

Rubber 

stop

Hold open 

mechanism

Hold open 

mechanism

Arrow

Screw

CL

CL

CL

CL

Summary of Contents for 8900 JT

Page 1: ...8900 JT JTH Jamb track pull side mount with hold open JTH and backplate BP89 Installation instructions 08280161 09 2019 EN ...

Page 2: ... 1 1 Overview 3 1 2 Tools recommended 3 1 3 Handing the door 3 2 Instructions track mount 4 2 1 Installing backplate and surface closer 4 2 2 Assemble and secure track 4 2 3 Securing main arm to closer 5 3 Adjustments 6 3 1 Adjust closing speeds sweep latch backcheck delayed action 6 3 2 Adjust hold open optional 6 3 3 Adjust spring force 7 4 Install covers 7 ...

Page 3: ...oor opening degree is 180 Arrow on backplate points upward Hold open range is from 80 to 145 with optional hold open kit Know the swing of the door which is being installed prior to installation Verify closer spring size prior to installation Make sure door efficiently operates prior to installing closer Drill bits 3 Phillips screwdriver Metal 7 32 drill bit 1 4 20 tap 3 16 flat head screwdriver W...

Page 4: ... Secure closer body NOTE Ensure pinion is oriented toward the hinge RH Pinion 2 2 1 Attach arm to slide shoe using screw supplied 2 2 2 Tighten securely 2 2 3 Insert slide shoe rubber stop hold open mechanism if necessary and end blocks into track 2 2 4 Secure track to door NOTE JTH Units ONLY Hold open mechanism and slide shoe must be installed with arrows pointing AWAY from the door hinges NOTE ...

Page 5: ... Preload arm by placing wrench on bottom pinion RH Main arm Pinion Pinion screw C PINION 45 RH RH RH Hinge L 2 3 2 Rotate wrench 45 AWAY FROM hinge edge of door 2 3 3 With main arm parallel to door place main arm onto top pinion 2 3 4 Secure arm to closer with pinion screw View from top of door View from top of door View from top of door Pinion 45 ...

Page 6: ...eed Turn valve counter clockwise Decrease sweep speed Turn valve clockwise 3 1 2 Adjust closing latch speed 15 to close Increase latch speed Turn valve counter clockwise 3 1 3 Adjust opening backcheck beginning at 75 Increase resistance Turn valve clockwise Decrease resistance Turn valve counter clockwise 3 1 4 Adjust closing delayed action angle 180 to start of sweep Increase delayed action Turn ...

Page 7: ...free requirement Decrease force turn counter clockwise 8 turns max Increase force turn clockwise 14 turns max Depending on opening conditions a door adjusted to meet barrier free forces may not have sufficient power to reliably close and latch the door Track mount Closer size Max door weight lbs Door width Full turns Interior 8916 4 125 3 0 5 150 3 6 4 6 200 4 12 8956 6 200 3 6 0 6 250 4 6 4 Insta...

Page 8: ...www dormakaba us dormakaba DORMA USA Inc T 800 523 8483 ...

Reviews: