Installation Instructions for Wi-Q™ Technology 45HQ Mortise Locks
BEST
a Product Group of dormakaba USA Inc.
Installing the trim
4
the lock needs to be connected. Before you install the
mortise case in the door, determine whether you need
to connect the ‘Case Side’ pair of RQE wires or the
‘Cover Side’ pair of RQE wires, based on the handing of
the door.
2 To change the position of a hub toggle, remove the
toggle screw, move the toggle into the desired
position, and re-tighten the screw.
7
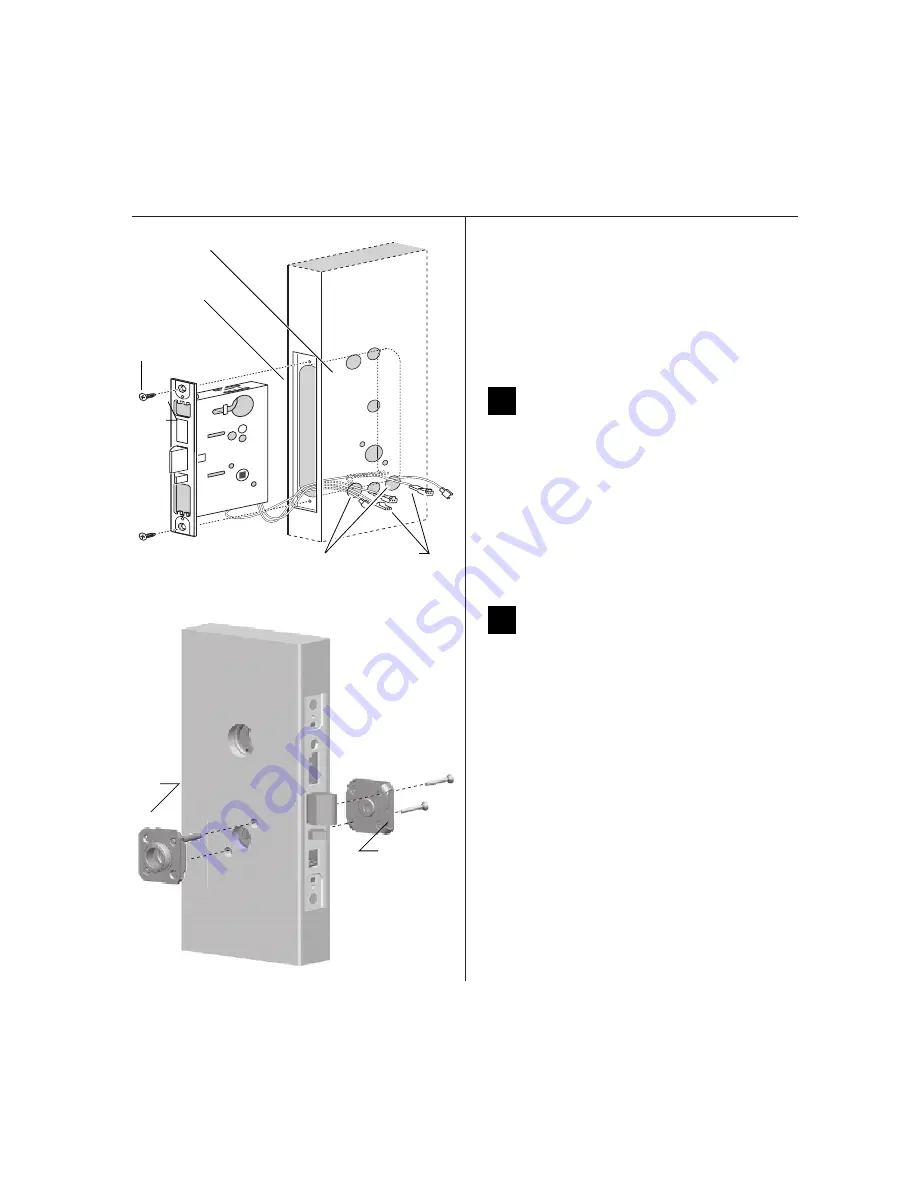
Install mortise case
1 Drill the holes for the case mounting screws.
2 Insert the mortise case into the mortise cavity, while
feeding the sensor and motor wires into the mortise
cavity and out the two sensor & motor wire holes to
the inside of the door as shown in Figure 7.
Note:
The armored front of the mortise case self-
adjusts to the door bevel.
3 Secure the mortise case with the case mounting
screws.
8
Install trim mounting plates
1 Insert the outside trim mounting plate through the
door and mortise case.
2 Position the inside trim mounting plate opposite
the outside trim mounting plate and screw them
securely in place.
Caution:
Do not overtighten the trim mounting
plate screws. Overtightening may damage the
locking mechanism.
3 By temporarily installing a lever, test the lock to
make sure that it doesn’t bind.
Figure 7
Installing the mortise case (inside of door)
Sensor & motor
wire holes
Mortise case
Mortise cavity
Case
mounting
screws
Sensor wires
and motor
wires
Figure 8
Installing the trim mounting plates
Outside
mounting
plate
Inside
mounting
plate


