Page 6
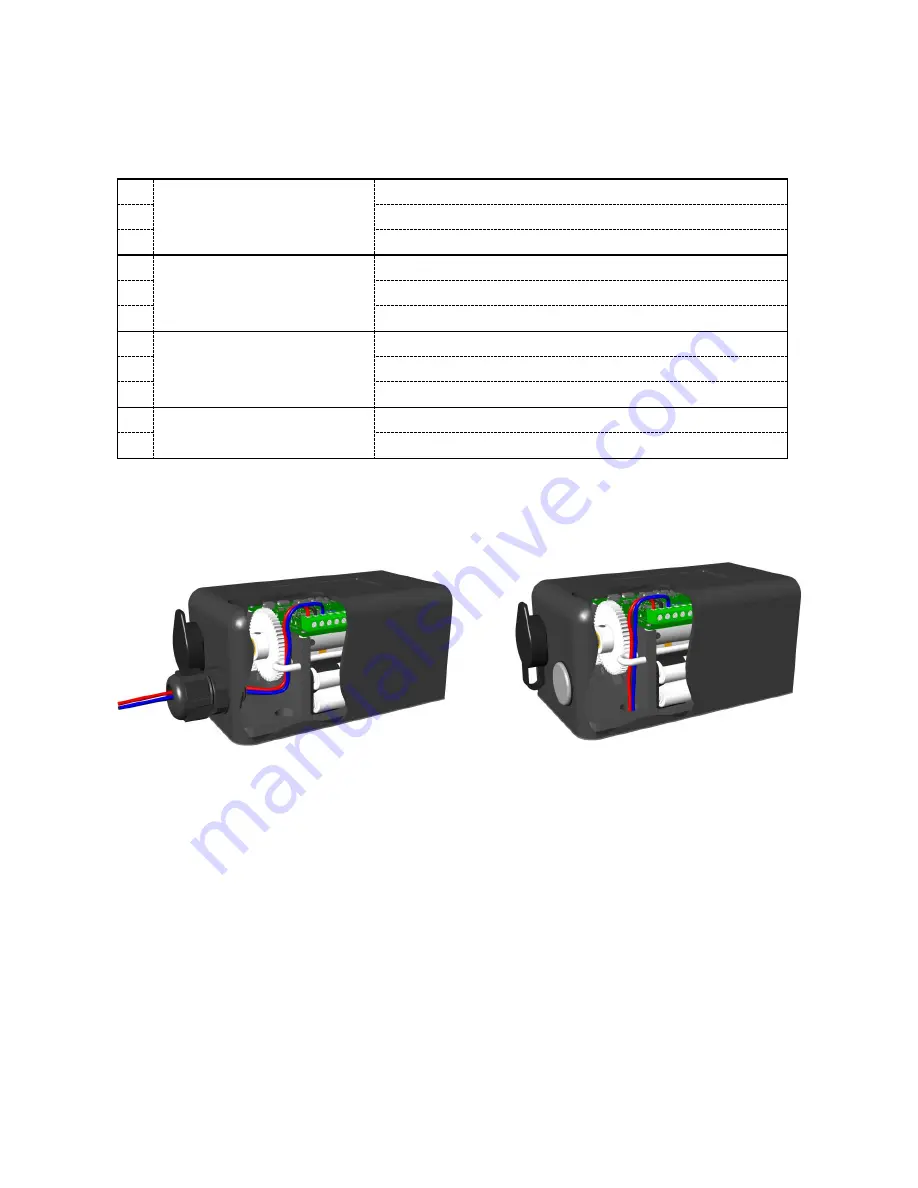
Wires run through a gland in the rear off the lock.
Wires run out of the hole in the base of the lock.
5. WIRING
Connect the GL10 as per the chart below. The three power connections are vital for the operation of the lock whilst
the eight monitor connections are outputs supplied to offer feedback if desired.
+
Power
Positive connection to DC power supply (12
– 24V)
-
Negative connection to DC power supply (12
– 24V)
CL
Switched positive control input
NC
Bolt Position Switch - Unlocked
Normally closed contact of the bolt position unlocked monitor
NO
Normally open contact of the bolt position unlocked monitor
C
Common contact of the bolt position unlocked monitor
NC
Bolt Position Switch - Locked
Normally closed contact of the bolt position locked monitor
NO
Normally open contact of the bolt position locked monitor
C
Common contact of the bolt position locked monitor
NO
Door Position Switch
Normally open contact of the gate position monitor
C
Common contact of the gate position monitor
There are two options available when running wires into the GL10; they can be brought in through a 20mm wiring
gland
(not supplied)
in the rear of the cover, or run discreetly through the hole in the locks base.
Running wires out of the lock via the hole in base ensures a more weather proof and secure installation as the wires
can be concealed. If the preferred option is to use a 20mm wiring gland, a hole is available in the rear of the cover to
achieve this. This hole is covered by a factory fitted blank held in place by an M3 screw that can be removed.
6. OPERATING CONFIGURATION
The operating configuration of the GL10 controls how the lock will function and there are several settings available.
There are four dip switches on the printed circuit board with three being used to configure the lock and the fourth for
diagnostic purposes. The dip switches are located on the top of the printed circuit board and can be set as per the
following table.


