© 2019 dormakaba Canada Inc
www.dormakaba.us • Phone: 1.800.265.6630 • Fax: 1.800.482.9795 • E-mail: sales_RCI@dormakaba.com
NO
NC
C
C
NC
NO
Keeper
Monitor
Latch
Monitor
Optional LMKM
BLACK
BLUE
RED
YELLOW
STRIKE
POWER
Fail Safe
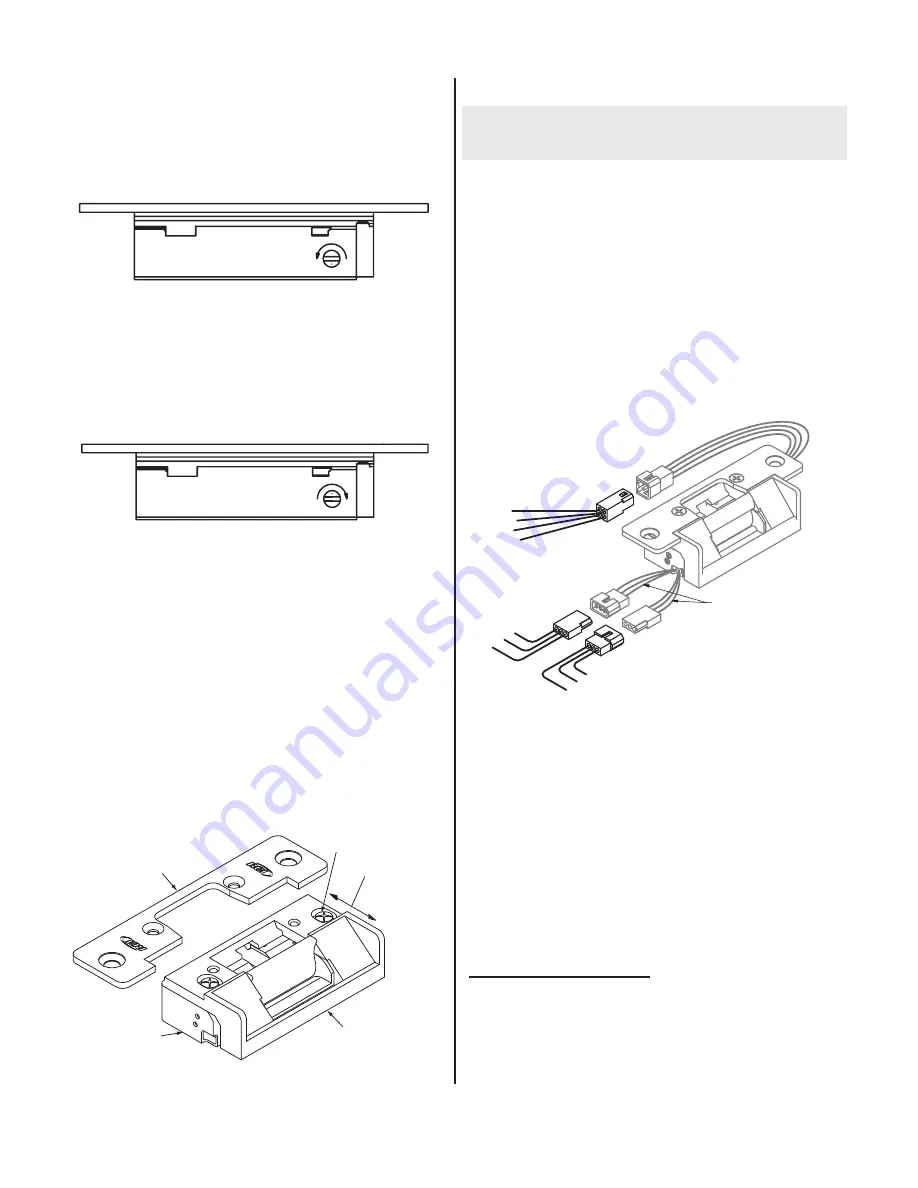
Rotate the adjustment screw so the dimple is fully
rotated to opposite the faceplate side of the strike (fully
counter clockwise). Your strike is now fail safe and
requires power to lock. See Fig. 1.
Fail Secure
Rotate the adjustment screw so the dimple is fully rotated
to the faceplate side of the strike (fully clockwise). Your
strike is now fail secure and requires power to unlock the
door. See Fig 2.
Lip Bracket Adjustment
If your door or latch is out of adjustment, the insert
can be adjusted forward or back as required for proper
alignment to the latch. See Fig. 3
1. Remove the strike from the frame.
2. Remove the faceplate from the strike.
3. 2 screws secure the lip bracket to the main insert.
4. Loosen these screws approximately 1-1/2 to 2
full turns to allow the insert to move forward or
backward as required.
5. Once the adjustment is made tighten all screws and
reinstall the strike in the frame.
Lip Bracket Screw
Faceplate
Removed
Adjustment
Direction
Lip Bracket
Strike Insert
Keeper
Fig. 1
Fail Safe = screw fully counter clockwise
Fig. 2
Fail Secure = screw fully clockwise
Fig. 3
Lip bracket adjustment
Wiring Instructions
NOTE: Overheated or Burnt Coils caused by incorrect input
voltage / wire harne
ss com
binations will not be covered under
warranty.
For 12VDC or 12-24VAC input power :
- connect RED and BLUE wires to positive (+)
- connect BLACK and YELLOW wires to negative (-)
For 24VDC input power only :
- connect YELLOW and BLUE wires together
- connect RED wire to positive (+)
- connect BLACK wire to negative (-)
If using AC power, polarity is not observed.
To meet BHMA A156.31 install the MOV provided across
the positive and negative wires or terminals of the harness.
The MOV is not polarity sensitive.
NOTE:
If a suppression diode is required for access control,
observe proper polarity.
Latch Monitor Wires*
Black = Common (C)
Blue
= Normally Close (NC)
Orange = Normally Open (NO)
Keeper Monitor Wires*
Black = Common (C)
Yellow = Normally Closed (NC)
Green = Normally Open (NO)
*Latch Monitor and Keeper Monitor Switch Ratings:
24VDC (SPDT), 2 Amp, resistive load
When using LMKM option:
If the lockset on the door has a 1/2” or 5/8” latch projec-
tion, the RCI L65 model is appropriate.
If the lockset on the door has a 3/4” latch projection, you
must use the RCI S65 model.
NOTE
: Contacts are indicated with the keeper in a closed
and locked condition, with no latch present.
5
Fig. 4
Wiring the 6 Series
electric strike


