background image

English

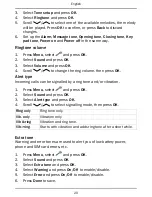
1.

Press

Menu

, select

and press

OK

.

2.

Select

Display

and press

OK

.

3.

Select

Text size

and press

OK

.

4.

Select

Normal

or

Large

and press

OK

.

Note!

Using

Large

, may result in that some text will not fit in the display.

In most cases this is compensated by scrolling text.

Idle display

In standby mode the display can show clock only, clock and the service
provider, or all information.

1.

Press

Menu

, select

and press

OK

.

2.

Select

Display

and press

OK

.

3.

Select

Idle display

and press

OK

.

4.

Select

Clock only

,

Clock & Operator

or

All info

and press

OK

.

Themes

You can select different themes to personalise the phone's texts and
background.

1.

Press

Menu

, select

and press

OK

.

2.

Select

Display

and press

OK

.

3.

Select

Themes

and press

OK

.

4.

Scroll

/

to select a theme.

5.

Press

OK

to confirm or

Back

to discard changes.

LCD backlight

Select the delay time for the display backlight.

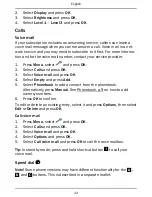
1.

Press

Menu

, select

and press

OK

.

2.

Select

Display

and press

OK

.

3.

Select

LCD backlight

and press

OK

.

4.

Select

15 sec.

,

30 sec.

or

1 min

and press

OK

.

Brightness

You can customize the phone's brightness settings.

1.

Press

Menu

, select

and press

OK

.

22

Summary of Contents for Secure 680

Page 1: ...English Doro Secure 681 ...

Page 2: ...A B C DEF ABC GHI JKL MNO WXYZ TUV PQRS 0 8 4 5 6 7 9 1 2 3 20 ...

Page 3: ...ortcut 9 Arrow buttons 10 End call Power on off 11 Right selection button 12 Red Battery low Charging 13 Green New message Missed call 14 Assistance button 15 Volume control 16 Battery cover 17 Charging socket 18 Headset socket 19 Loudspeaker 20 Lanyard 21 Charging stand Note Depending on phone version some functionality may not be accessible 21 ...

Page 4: ...onebook 6 Receiving a call 6 Volume control 6 Entering text 6 Call options 7 Call waiting 8 Call information 8 Speed dial 8 Silent 9 Headset 9 SOS calls 9 Assistance button 9 Phonebook 9 Creating a phonebook entry 9 ICE entry In Case of Emergency 10 Managing phonebook entries 10 ICE In Case of Emergency 11 Messages 12 Creating and sending SMS 12 Creating and sending voice message 13 Creating and s...

Page 5: ...6 Disconnect the USB cable safely 36 Additional functions 37 Alarm 37 Calendar 37 Calculator 38 FM radio 38 Troubleshooting 40 Safety instructions 42 Network services and costs 42 Operating environment 42 Medical units 42 Areas with explosion risk 43 Li ion battery 43 Protect your hearing 43 Emergency calls 44 Vehicles 44 Care and maintenance 44 Warranty 45 Specifications 45 Hearing aid 45 Specifi...

Page 6: ...ontacts on the SIM card 3 Optional Insert the memory card into the slot under the SIM card holder Make sure that the memory card contacts are facing up wards and push the card in until you hear a click Take care not to scratch or bend the contacts on the card To remove or replace the card push the card in until you hear a click and then pull the card out 4 Insert the battery by sliding it into the...

Page 7: ...o charge the battery connect the mains adapter to a wall socket and to the charging socket y is displayed briefly when the charger is connected to the phone and when it is disconnected The battery charge indicator will be ani mated while charging It takes approximately 3 hours to fully charge the battery is displayed on the screen when charging is completed If the phone is turned off when the char...

Page 8: ...g charging It may take up to 2 minutes of charging before the charge indicator illumi nates if battery is totally empty Display status symbols Network signal strength strong The higher the bar the stronger the signal Network signal strength in sufficient no network Ring only 5 Unread message in Inbox Ring vibration Bluetooth on visible to others Vibration only Bluetooth on invisible to others Sile...

Page 9: ...Warning Speaker on Query Speaker off Done confirmed Incoming call Battery level low Call ended New message Outgoing call Searching Missed call Press Read to see the missed calls Assistance call Call on hold vCard message SOS call Volume control Processing please wait Operation Activating the phone Press and hold the red button on the phone to turn it on off Con firm with Yes to power off 4 ...

Page 10: ...ith OK Start up wizard When starting the phone for the first time you can use the Start up wiz ard to set some basic settings Press Yes to change or No if you do not want to change Standby idle mode When the phone is ready to use and you have not keyed in any charac ters the phone is in standby Left selection button in standby is Menu Right selection button in standby is Name Tip You can always pr...

Page 11: ...to switch off the ring signal and then Reject to reject the call busy signal Alternatively press to reject the call directly 2 Press to end the call Tip Press and hold or to temporary switch off the ring signal without opening the flip Volume control Use the side buttons to adjust the sound volume during a call The volume level is indicated on the display If you use hearing aid or have hearing dif...

Page 12: ...and continue with the next word Alternatively press 0 to continue with the next word Entering text manually If none of the suggested words are correct press to change to manual input mode The icon on the top left of the display indicates the input mode Abc Sentence case with predictive text ABC UPPER CASE with predictive text abc lower case with predictive text Abc Sentence case ABC UPPER CASE abc...

Page 13: ...t a time to talk Switching between talk listen is triggered by the sound of the person talking Loud noises music etc in the background may interfere Call waiting An alert tone will be heard if there is an incoming call while talking To put the current call on hold and answer the incoming call press Options select Answer and then OK Tip Call waiting must be activated see Call setup p 25 Call inform...

Page 14: ...efully when using a headset SOS calls As long as the phone is switched on it is always possible to place an SOS call by entering the main local emergency number for your present loca tion followed by Some networks accept calls to emergency numbers without a valid SIM card Contact your service provider for more information Assistance button This function is described in a separate leaflet Phonebook...

Page 15: ... to have this information as early as possible which can increase the chances of survival All fields are option al but the more information provided the better See ICE In Case of Emergency p 11 on how to configure your ICE information Managing phonebook entries 1 Press Menu select and press OK 2 Select a contact and press Options 3 Select one of the following options and press OK View Show details...

Page 16: ... send the selected phonebook entry as a vCard via SMS Enter the phone number of the recipient Alternatively use the arrow buttons to scroll through the phone book or quick search by pressing the key corresponding to the first letter of the entry see Entering text p 6 Press OK to send Select Send by Bluetooth and press OK to send the selected phonebook entry as a vCard via Bluetooth See Bluetooth p...

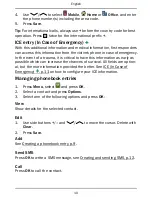
Page 17: ...cts in the phonebook such as ICE Wife Mary Smith Condition Any medical conditions medical devices e g diabetic pacemaker Allergies Any known allergies e g penicillin bee stings Blood type Your blood type Vaccination Any relevant vaccination Medication Any medication that you are treated with Other info Other information e g organ donor living will con sent to treat Messages Creating and sending SM...

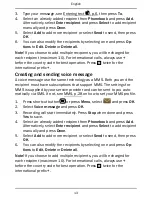
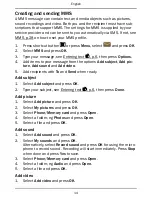
Page 18: ...nt must have subscriptions that support MMS The settings for MMS is supplied by your service provider and can be sent to you auto matically via SMS If not see MMS p 28 on how to set your MMS profile 1 Press shortcut button or press Menu select and press OK 2 Select Voice message and press OK 3 Recording will start immediately Press Stop when done and press Yes to save 4 Select an already added rec...

Page 19: ... Add sound and Add video 5 Add recipients with To and Send when ready Add subject 1 Select Add subject and press OK 2 Type your subject see Entering text p 6 then press Done Add picture 1 Select Add picture and press OK 2 Select My pictures and press OK 3 Select Phone Memory card and press Open 4 Select a folder eg Photos and press Open 5 Select a file and press OK Add sound 1 Select Add sound and...

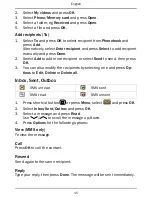
Page 20: ...lect Send to send then press OK 3 You can also modify the recipients by selecting one and press Op tions to Edit Delete or Delete all Inbox Sent Outbox SMS unread SMS sent SMS read SMS unsent 1 Press shortcut button or press Menu select and press OK 2 Select Inbox Sent Outbox and press OK 3 Select a message and press Read Use to scroll the message up down 4 Press Options fot the following options ...

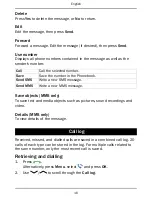
Page 21: ...k Send SMS Write a new SMS message Send MMS Write a new MMS message Save objects MMS only To save text and media objects such as pictures sound recordings and video Details MMS only To view details of the message Call log Received missed and dialled calls are saved in a combined call log 20 calls of each type can be stored in the log For multiple calls related to the same number only the most rece...

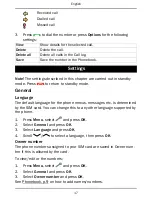
Page 22: ...l Language The default language for the phone menus messages etc is determined by the SIM card You can change this to any other language supported by the phone 1 Press Menu select and press OK 2 Select General and press OK 3 Select Language and press OK 4 Scroll to select a language then press OK Owner number The phone numbers assigned to your SIM card are saved in Owner num ber if this is allowed...

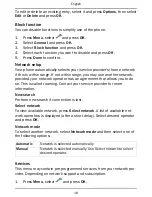
Page 23: ...operator has an agreement that allows you to do so This is called roaming Contact your service provider for more information New search Perform new search if connection is lost Select network To view available network press Select network A list of available net work operators is displayed after a short delay Select desired operator and press OK Network mode To select another network select Networ...

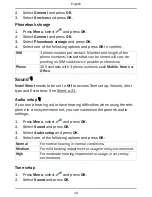
Page 24: ...ce Sound Note Silent needs to be set to Off to access Tone setup Volume Alert type and Extra tone See Silent p 21 Audio setup If you use a hearing aid or have hearing difficulties when using the tele phone in a noisy environment you can customize the phone s audio settings 1 Press Menu select and press OK 2 Select Sound and press OK 3 Select Audio setup and press OK 4 Select one of the following o...

Page 25: ...ming calls can be signalled by a ring tone and or vibration 1 Press Menu select and press OK 2 Select Sound and press OK 3 Select Alert type and press OK 4 Scroll to select signalling mode then press OK Ring only Ring tone only Vib only Vibration only Vib ring Vibration and ring tone Vib ring Starts with vibration and adds ring tone after a short while Extra tone Warning and error tones are used t...

Page 26: ... press OK 2 Select Sound and press OK 3 Select Noise suppression and press OK 4 Select On Off to enable disable 5 Press OK to save Display Wallpaper You can select different display backgrounds 1 Press Menu select and press OK 2 Select Display and press OK 3 Select Wallpaper and press OK 4 Select System or User and press OK 5 System Scroll with to display available wallpapers and press OK 6 User S...

Page 27: ...ect Idle display and press OK 4 Select Clock only Clock Operator or All info and press OK Themes You can select different themes to personalise the phone s texts and background 1 Press Menu select and press OK 2 Select Display and press OK 3 Select Themes and press OK 4 Scroll to select a theme 5 Press OK to confirm or Back to discard changes LCD backlight Select the delay time for the display bac...

Page 28: ... Select Empty and press Add 5 Select Phonebook to add a contact from the phonebook Alternatively press Manual See Phonebook p 9 on how to add names numbers 6 Press OK to confirm To edit or delete an existing entry select it and press Options then select Edit or Delete and press OK Call voice mail 1 Press Menu select and press OK 2 Select Calls and press OK 3 Select Voice mail and press OK 4 Select...

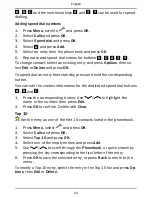
Page 29: ...n edit the contact information for the dedicated speed dial buttons A B and C 1 Press the corresponding button Use to highlight the name or the number then press Edit 2 Press OK to confirm Delete with Clear Top 10 Set the entry as one of the first 10 contacts listed in the phonebook 1 Press Menu select and press OK 2 Select Calls and press OK 3 Select Top 10 and press OK 4 Select one of the empty ...

Page 30: ...nu select and press OK 2 Select Calls and press OK 3 Select Answer mode and press OK for the following settings 4 Select Open to answer and press OK select On and press OK to be able to answer incoming calls by opening cover Select Any key and press OK select On and press OK to be able to answer incoming calls by pressing any button exemption Call setup Depending on network support and subscriptio...

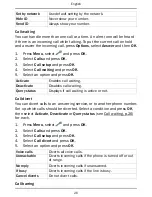
Page 31: ...Deactivate Disables call waiting Query status Displays if call waiting is active or not Call divert You can divert calls to an answering service or to another phone number Set up which calls should be diverted Select a condition and press OK then select Activate Deactivate or Query status see Call waiting p 26 for each 1 Press Menu select and press OK 2 Select Calls and press OK 3 Select Call setu...

Page 32: ...an not call international numbers except to the country associated with the SIM card Incoming calls Press OK then select All calls User can dial out but not receive incoming calls When roaming User can not receive incoming calls while roaming op erating in other networks Cancel all Cancel all call barring password needed Messages 1 Press Menu select and press OK 2 Select Messages and press OK 3 Se...

Page 33: ...to store messages on the SIM card or Phone to store messages in the phone memory 2 Press OK to confirm Cell broadcast You can receive messages on various topics from your service provider such as weather or traffic conditions in a particular region For available channels and relevant channel settings contact your service provider Cell broadcast messages cannot be received when the device is roamin...

Page 34: ... press OK to delete all messages in Inbox Press Yes con firm or No to discard changes Select Outbox and press OK to delete all messages in Outbox Press Yes confirm or No to discard changes Select Sent and press OK to delete all messages in Sent Press Yes con firm or No to discard changes Select Delete all and press OK to delete all messages at the same time Press Yes confirm or No to discard chang...

Page 35: ... device select Off Even if you select Off paired devices can still detect your device Device name Enter the name your phone should appear with for other Bluetooth devi ces and press OK Search device Search for available Bluetooth audio devices If Bluetooth is not enabled you can enable it now by pressing Yes 1 Select from the list of devices and press Bond to connect 2 When connecting to another B...

Page 36: ...on Num ber The phone can be set to ask for the PIN code on startup Select one of the following options and press OK to confirm On PIN code activated you need to enter the PIN code every time the phone is started Off PIN code deactivated Warning if SIM card is lost stolen it is unprotected Automatic You do not need to enter the PIN code when the phone is started the phone remembers it automatically...

Page 37: ...and press Options for the fol lowing settings Add Edit or Delete and press OK Enter PIN2 and press OK to confirm Note You can save parts of phone numbers For example if you save 01234 allows calls to all numbers starting with 01234 It is possible to place an SOS call by entering the main local emergency number followed by even when fixed dial is activated When fixed dial is activated you are not a...

Page 38: ...and press Options for the following options Play audio video music Play file Use to Play use to Stop playback Press Back when done View photos images Single view Press Back when done Send Select an option then press OK Send by MMS Send the file with MMS Press OK to create a message see Creating and sending MMS p 14 Send by Bluetooth Send the file to other Bluetooth devices see Bluetooth p 30 Detai...

Page 39: ...d press OK 4 Select a folder eg Photos and press Options 5 Select Paste and press OK Point the way Your Doro Secure 681 is also a GPS receiver The current location of the Doro Secure 681 user can be determined with the help of the satellite controlled GPS Global Positioning System GPS signals can only be re ceived when there is clear view to the sky the GPS signal will not pene trate walls or othe...

Page 40: ...name of the position then press Save Delete position Confirm with OK Information GPS only work outdoors Compass The built in compass works just like a magnetic needle compass The ac curacy can be affected by magnetic or other environmental interference The compass should only be used for basic navigation assistance and should not be solely relied upon to determine precise locations or direction 1 ...

Page 41: ... disks in the file explorer 3 Drag and drop selected files between the phone and the computer Note When the phone memory card is mounted to the computer the phone cannot access the memory card Some functionality and applications in the phone may not be accessible You can transfer files by using a USB cable on most devices and operating systems supporting a USB Mass Storage interface Disconnect the...

Page 42: ...ess Yes to power on if wireless phone use is prohibited or when it may cause interference or danger When the alarm goes off a signal will sound Press Stop to turn off the alarm or press Snooze to repeat the alarm after 9 minutes Calendar 1 Press Menu select and press OK 2 Select Options 3 Select one of the following options and press OK View Show tasks for the selected date Add task 1 Enter a date...

Page 43: ...ical operations 1 Press Menu select and press OK 2 Enter the first number Use to enter decimal points 3 Use the arrow buttons to select an operation x and press OK 4 Enter the next number and press OK 5 Repeat steps 2 4 as necessary Select and press OK to calculate the result FM radio The FM radio has a frequency range from 87 5 to 108 0 MHz and 9 pre set channels Turning the radio on 1 Connect th...

Page 44: ...nnel list 1 Press Menu select and press OK 2 Select Options 3 Select Channel list and press OK 4 Select the channel you wish to edit and press Options 5 Select one of the following options and press OK Play Play the selected channel Delete Delete the channel Press Yes to confirm or No to return to the channel list Edit Press Edit to edit the channel name Press to edit the frequency use to enter th...

Page 45: ...y for 3 hours Full battery capacity is reached after the battery has been charged 3 4 times Battery incorrectly installed Check the installation of the battery Failure to charge the battery Battery or charger damaged Check the battery and charger Battery should only be charged in temperatures between 0 C and 40 C Improve the charging environment Charger incorrectly con nected to phone or power soc...

Page 46: ...rd Remove the card and reinstall it SIM card dirty or damp Wipe the contact surfaces of the SIM card with a clean cloth Failure to connect to network SIM card invalid Contact your service provider No coverage of GSM service Contact your service provider Weak signal Too far from base station Try again from another location Network congestion Try calling at a later time Echo or noise Regional proble...

Page 47: ...der these holders should not con tain any metal and the product should be placed at the distance from your body speci fied above Make sure that the distance instructions above are followed until the transfer is complete Parts of the unit are magnetic The unit can attract metal objects Do not keep credit cards or other magnetic media near the unit There is a risk that information stored on them can...

Page 48: ...risk for explosion are often but not always clearly marked This also ap plies to below decks on ships the transport or storage of chemicals vehicles that use liquid fuel such as propane or butane areas where the air contains chemicals or par ticles such as grain dust or metal powder Li ion battery This product contains a Li ion battery There is a risk of fire and burns if the battery pack is handl...

Page 49: ...t is prohibited to use the unit in flight Turn off the unit before you board a plane Using wireless telecom units inside a plane can pose risks to air safety and interfere with tele communications It may also be illegal Care and maintenance Your unit is a technically advanced product and should be treated with the greatest care Negligence may void the warranty Protect the unit from moisture Rain s...

Page 50: ...re not included in any guarantee This guarantee does not apply if batteries other than DORO original batteries are used Specifications Network GSM 850 900 1800 1900 MHz Short range RF Social alarm 869 200 869 250 MHz category 3 Dimensions 100 mm x 52 mm x 22 mm Weight 115 g including battery Battery 3 7 V 1000 mAh Li ion battery Bluetooth is a registered trademark of Bluetooth SIG inc eZiType is a...

Page 51: ...English 2011 65 EC RoHS A copy of the Declaration of Conformity is available at www doro com dofc 46 ...

Page 52: ...Secure 681 1031 English Version 1 3 0700 2013 Doro AB All rights reserved www doro com REV 15106 STR STR_20130409 ...

Reviews: