Area of use
This product is intended for indoor and outdoor
use but is not waterproof or resistant to rain. In
ideal conditions (no obstacles between handsets)
the telephone range can extend up to 4km.
Batteries
This unit requires four high quality AAA 1.5V
batteries to function (not included). Call and
standby time vary according to the type of batteries
being used.
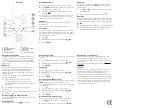
1.
Remove beltclip by lifting the little flap and
sliding the clip upwards, and remove the
battery cover by sliding the lock down and
lifting up the cover.
2.
Insert batteries in accordance with the markings.
Please note!
The battery symbol only has two levels: the completely full
symbol, or the empty flashing symbol.
Switching the Walkie Talkie On/Off
Press and hold the 1 button for a few seconds to
turn the handset on or off.
Volume control
The volume is adjusted using
v
/
V
in standby mode.
To communicate
1.
Make sure that you are both using the same
channel, see below.
2.
Press down
TALK
(the send button) when you are
speaking and release when you are listening.
3.
When necessary send the call signal by pressing
quickly on .
If the handsets are unable to communicate it may be because you
are using different channels, the batteries are running low or the
handsets are too far apart.
Headset
The headset socket is located beside the antenna.
(Headset not supplied).
Adjust the volume control immediately when you connect the headset.
Select channel
All items of equipment transmitting on this frequency
share the available channels. Select a new channel if
others are currently using the same one as you. The
selected channel is displayed in standby mode.
1.
Press
w
.
2.
Scroll to the desired setting using
v
/
V
.
3.
Press
TALK
.
English
Send ringer signal
The ringer signal being sent can be set at several
different levels. (
OF
= off)
1.
Press
w
repeatedly until
CA
is displayed.
2.
Scroll to the desired setting using
v
/
V
.
3.
Press
TALK
.
Key Beep
1.
Press
w
repeatedly until
to
is displayed.
2.
Scroll to the desired setting using
v
/
V
(
OF
=off,
On
=on).
3.
Press
TALK
.
Termination tone (Roger tone)
You can activate a tone sequence which is heard when
you release the
TALK
button. This can be used as a
reminder to the other person that you have finished
talking and are waiting for a response.
1.
Press
w
repeatedly until
ro
is displayed.
2.
Scroll to the desired setting using
v
/
V
(
OF
=off,
On
=on).
3.
Press
TALK
.
Monitor function
If the signal is weak, the monitor function can be used.
1.
Press
for at least five seconds.
2.
Disable the function by pressing
TALK
.
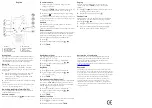
1 On/Off
2 Send button (TALK)
3 Monitor button
4 Channel lock
5 Send ringer signal
6 Microphone
7 Scrolling buttons
8 Light
9 Menu button
10 Headset socket
Paging
You can scan all channels to locate one that is
transmitting. Press
TALK
to stop at the desired
channel.
1.
Press
w
and
V
simultaneously. The display starts
searching among the channels.
2.
Disable the function by pressing
w
.
Channel lock
This function locks the channels and the volume on
the handset to prevent unintentional usage of some
buttons (
w
and
v
/
V
).
1.
Press
l
down until the key symbol is displayed.
2.
Cancel the channel lock by pressing down
l
until the symbol in the display disappears.
Declaration of conformity
Doro hereby declares that the product Doro wt52
conforms to the essential requirements and other
relevant regulations contained in the Directives
1999/5/EC and 2002/95/EC.
A copy of the manufacturer’s declaration is available at
www.doro.com/dofc
Guarantee
This product is guaranteed for a period of 12 months from the
date of purchase. In the unlikely event of a fault occurring during
this period, please contact the place of purchase. Proof of purchase
is required for any service or support needed during the guarantee
period. This guarantee shall not apply to a fault caused by
an accident or a similar incident or damage, liquid ingress,
negligence, abnormal usage, non-maintenance or any other
circumstances on the user’s part. Furthermore, this guarantee
shall not apply to a fault caused by a thunderstorm or any other
voltage fluctuations.


