9
Configuring a PC to Communicate with the DataTrac
To communicate with the DataTrac from a PC, the PC must have a Bluetooth
radio installed (supplied with the Douglas Data Manager product) and be running
the Douglas Data Manager software. Refer to the Douglas Data Manager User’s
Manual for installing the software and the Bluetooth radio.
Testing Communications with the DataTrac
To verify that PC can communicate with DataTrac, prior to installing the DataTrac
on a truck or battery:
1. Gather Tools: DataTrac unit, DC power supply with output of at least 12 volts and
no more than 100 volts (such as bench power supply or 12V DC transformer), PC
with Douglas Data Manager software and Bluetooth radio.
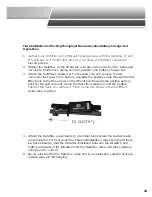
2. Attach the red wire power lead of the DataTrac unit to the positive connection
of the DC power supply and the black wire power lead to the negative
connection. Apply power to the DC supply.
3. The red and green LEDs will blink rapidly as the DataTrac unit powers up. After a
delay of several seconds, you will see the green light of the unit begin to blink,
indicating that it is collecting data and ready to communicate with a host PC.
Note:
Only the green LED should be blinking on the DataTrac unit. If the DataTrac unit
is configured with an Electrolyte level sensor and the sensor is either not installed
or detects a low Electrolyte level, the red LED will blink steadily. Any other blink
patterns are indicative of an error. If the unit displays any of the following LED
patterns, please call customer service:
• Red and green LED flashing simultaneously – Real time clock error (Battery may
need to be replaced)
• Red and green LED flashing alternating – Unit has not been calibrated or has lost
calibration
• Red LED flashing 3 short bursts, followed by long burst - hardware error.
Section 4: Setup and Initialization


