background image

8100, 8611

POWER PLOW™ Snowplow

77750, 77755, 77850, 77850‑1, 77850‑3

Installation Instructions

TrynEx International, LLC, 531 Ajax Drive, Madison Heights, MI  48071‑2429 • www.snowexproducts.com

July 15, 2020

Lit. No. 52238, Rev. 05

 A DIVISION OF DOUGLAS DYNAMICS, LLC

 CAUTION

Read this document before installing the 

snowplow.

 CAUTION

See your SnowEx

®

 outlet/website for specific 

vehicle application recommendations before 

installation. The Power Match selection 

system has specific vehicle and snowplow 

requirements.

Summary of Contents for 77750

Page 1: ...48071 2429 www snowexproducts com July 15 2020 Lit No 52238 Rev 05 A DIVISION OF DOUGLAS DYNAMICS LLC CAUTION Read this document before installing the snowplow CAUTION See your SnowEx outlet website...

Page 2: ...e hitch pins in receivers Release lock lever to engage lock pin into hole in lock pin bracket 6 Move power switch to LEFT or PLOWING position 1 From inside the cab lower snowplow onto ground with blad...

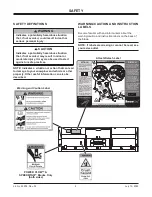
Page 3: ...injury If you are injured by hydraulic fluid get medical attention immediately SAFETY PRECAUTIONS Improper installation and operation could cause personal injury and or equipment and property damage R...

Page 4: ...x 3 50 M36 x 4 00 2101 2701 1468 1952 325 M16 x 2 00 231 167 M18 x 2 50 318 222 Recommended Fastener Torque Chart Size Size Torque ft lb Grade 5 Grade 8 Metric Fasteners Class 8 8 and 10 9 These torqu...

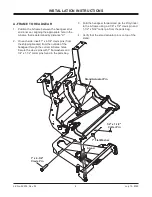
Page 5: ...emove and discard shipping brackets both sides Remove and discard cap screw and locknut Remove and retain 1 x 4 3 4 clevis pins Remove and retain 1 x 4 clevis pins A FRAME HOLE POSITION IMPORTANT Befo...

Page 6: ...the shipping bracket from the outside of the headgear through the correct A frame holes Secure the clevis pins with 1 flat washers and 1 4 x 1 1 2 cotter pins found in the parts bag 1 x 4 3 4 Clevis P...

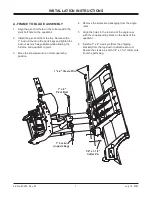
Page 7: ...le allowing the A frame and quadrant to pivot 3 Move the snowplow into a normal operating position 1 x 4 Clevis Pins 1 x 9 Pivot Bolt 1 4 x 1 1 2 Cotter Pin 1 Locknut in parts bag 4 Remove the protect...

Page 8: ...alled hose wrap Loosen the socket cap screws but leave the hoses within the clamps INSTALLATION INSTRUCTIONS HYDRAULIC HOSE CONFIGURATION Hydraulic Unit Hose Fittings Socket Cap Screws A B C D To PS W...

Page 9: ...was previously removed reinstall the hose wrap on the repositioned hoses 4 Install additional hose wrap as needed on the portion of the hoses extending beyond the hose clamps maintaining the hose posi...

Page 10: ...Lit No 52238 Rev 05 10 July 15 2020 INSTALLATION INSTRUCTIONS 5 16 x 1 Cap Screws 5 16 Locknuts Blade Guide FINAL BLADE ASSEMBLY 1 Install the blade guides...

Page 11: ...under the slotted holes Hand tighten 5 Connect the headlamp wires to the headlamps 6 Aim the headlamps according to the Snowplow Headlamp Beam Aiming Instructions Lit No 27769 For LED headlamps tight...

Page 12: ...ully on the ground 5 Replace and tighten the breather HYDRAULIC UNIT The hydraulic unit comes from the factory preassembled partially filled and fully tested 1 Attach the snowplow to the vehicle accor...

Page 13: ...oils of the springs are separated slightly 2 Adjust the trip springs by tightening the top nuts until the coils of the springs begin to separate a piece of paper such as this instruction sheet should...

Page 14: ...e vehicle model vehicle DRL system and type of Isolation Module installed Due to the variations in the OEM DRL systems and the different Isolation Module options available checking the functionality o...

Page 15: ...iately the Owner s Manual should be reviewed with and given to the purchaser according to the snowplow checklist If the snowplow is completed prior to delivery to the purchaser attach the Owner s Manu...

Page 16: ...require or recommend optional equipment for snow removal Do not exceed vehicle ratings with a snowplow TrynEx International offers a limited warranty for all snowplows and accessories See separately p...

Reviews: