General Programming Instructions
This covers mode programming using the onboard DIP and Dial switches.
***NOTE***
•
Start with the PIR Sensitivity at Medium (DIP 5 DOWN)
•
To set the light level at which you want to prevent the sensor from turning light ON, rotate Light Level
Dial to adjust the light level
•
To enable Restroom Mode , ensure that DIP 8 is UP. In this mode Pole 2 will remain on 50%
longer than Pole 1 (time is set with the Time Dial) and Pole 2 cannot be Photo Inhibited
Factory Defaults
All DIP switches in DOWN position. Time delay: 10 minutes; Natural Daylight level: 50% (200 lux).
Diversa Occupancy Sensors with a “P” in the model number contain a Photo Sensor that is
controlled by DIP 6. The factory default for Natural Daylight Mode = ENABLED (DIP 6 DOWN).
This mode disables the Manual Override Button. To test sensor functionality, you may need
to disable Natural Daylight Mode (DIP 6 UP) to test sensor functionality.
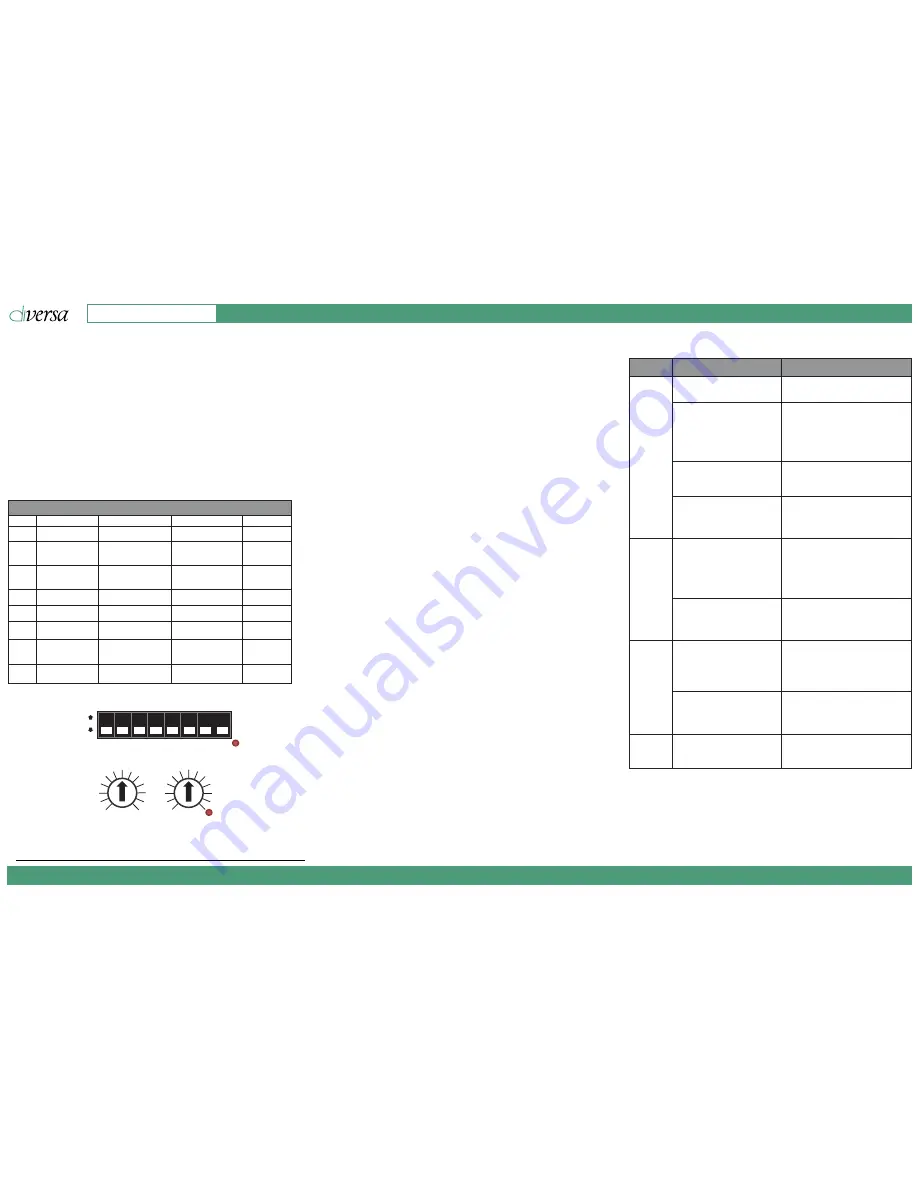
DIP Switches & Dial Settings
Factory DIP & Dial Settings
UP
DOWN
1
2
3
4
5
6
7
8
TEST
Time Delay Dial
(=LED ON)
1
5
10
20
30
Auto Time
Hi
Lo
Light Level Dial
Photo Sensor “P” models only
Test Mode LED
Some DIP Switches C ontrol Optional Features Not Found on All Products
DIP #
Function
UP
DOWN
Default
1
PIR LED
Disabled
Enabled
DOWN
DOWN
DOWN
DOWN
DOWN
DOWN
DOWN
DOWN
2
Walk-Through
Mode
Enabled
Disabled
3
Manual Override
Disabled
Enabled
4
Sensor Mode
Manual ON (Vacancy)
Auto ON (Occupancy)
5
PIR Sensitivity
High
Medium
6
Natural Daylight
Mode (”P” models)
Disabled
Enabled
7
Light Level Mode
(”DP” models)
Light Level Dial
Sets Photo Sensor
Light Level Dial
Sets Dimming Level
8
Restroom Mode
(2-pole models)
Synchronized
Offset
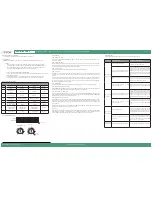
Troubleshooting
Before calling Technical Support, please review the following Troubleshooting Guide.
Issue
Possible Cause
Recommended Solution
This only applies to Photo Sensor (”P”) models. Check DIP
6. If DOWN, sensor is in Natural Daylight Mode, therefore
lights will only turn ON if there is insufficient natural
daylight. Rotate the Light Level Dial clockwise pressing
the Manual Override Button until the Lights turn ON.
Natural Daylight mode can be disabled by moving DIP 6
UP.
Check DIP 4. Move DOWN for Auto ON.
Sensor is set to Manual ON Mode.
Sensor is in Auto Time Mode.
Lights will not turn
ON automatically
Lights will not turn
OFF automatically
Lights will not turn
OFF Manually
Lights will not turn
ON Manually
Sensor is set to Natural Daylight Mode (Photo
Inhibit) and Sufficient Natural Light is Present.
This only applies to Photo Sensor “P” models. Check DIP 6.
If DOWN, sensor is in Natural Daylight Mode; therefore,
lights will only turn ON if there is insufficient natural
daylight. Rotate the Light Level Dial clockwise pressing
the Manual Override Button until the lights turn ON.
Natural Daylight mode can be disabled by moving DIP 6
UP.
Sensor is set to Natural Daylight Mode (Photo
Inhibit) and Sufficient Natural Light is present.
Manual Override Button was used to turn lights
OFF.
Wait for OFF Time Delay to count down, then with
motion detected lights will turn ON. Manual Override
Button can be disabled by moving DIP 3 UP.
Power has been interrupted or wiring
connection is intermittent.
Power has been interrupted or wiring
connection is intermittent.
Sensor is being activated by a heat source other
than occupant.
Sensor may be detecting heat from HVAC registers or
other heat sources. Check Installation location for heat
source. Reduce PIR sensitivity by moving DIP 5 DOWN.
Move sensor location – see guidelines.
Manual Override Button has been disabled.
Check the wiring diagram. Ensure ground is connected.
With DIP 1 DOWN, check for motion detection by waving
hand in front of sensor lens. Activation LED will blinnk
green.
Check the wiring diagram. Ensure ground is connected.
With DIP 1 DOWN, check for motion detection by waving
hand in front of sensor lens. Activation LED will blinnk
green.
If the Sensor is in AUTO Mode, it may take longer than
expected to turn the lights off. Set the Time Delay to 5
minutes and leave space to determine if the Sensor is
functioining. The maximum Time Delay is 30 minutes.
Move DIP 3 DOWN to enable Manual Override Button.
DIP Switch Modes
DIP 1 - PIR Detection LED
LED in Sensor’s PIR window flashes GREEN when PIR detects motion. LEDs can be turned OFF with DIP switch. Sensor
continues to function.
DIP 2 - Walk-Through Mode
When Enabled and Occupancy switches lights to ON and sensor does not detect motion after 30 seconds of light ON,
an OFF Time Delay of 3 minutes is used (OFF Time Delay must be greater than 3 minutes). If motion is detected after
30 seconds of lights ON, the configured OFF Time Delay is followed.
DIP 3 - Manual Override
Manual Override Button can be disabled with DIP switch to prevent manual ON/OFF.
DIP 4 - Sensor Mode
Vacancy Mode
- Lights must be turned ON manually when entering a room and are automatically turned OFF when
occupancy no longer detected. Maximizes energy s avings because lights are only turned on when lighting is
required.
Occupancy Mode
- Automatically turns lights ON when occupancy is detected in a room and automatically turns
lights OFF when occupancy is no longer detected. This is a very convenient mode as lighting controls never have to
be touched. Because lights are always turned on when Occupancy is detected regardless of the need for lighting,
this is less energy efficient than Vacancy Mode.
DIP 5 - PIR Sensitivity
Can be moved from Medium sensitivity (default) to High sensitivity if sensor is not recognizing Occupancy.
DIP 6 - Natural Daylight Mode (”P” models)
When ENABLED, lights ON when Occupancy detected AND daylight level is below Light Level Dial setting. With lights
ON, an increase in daylight above the Light Level Dial setting will not force lights OFF.
DIP 7 - Light Level Mode (”DP” models)
This mode allows the light function to be set and controlled to support Natural Daylight Mode and Closed Loop
dimming. WIth DIP UP the light level dial is used for setting the light level for Natural Daylight Mode. With DIP DOWN,
the light level dial is used for setting Closed Loop Dimming.
DIP 8 - Restroom Mode (2-pole models)
Pole 1 and Pole 2 are set to synchronize to the same Photo and Time Delay settings. With Restroom Mode = Offset,
Pole 2 will activate at the same moment as Pole 1 when Occupancy detected; however, Pole 2 will be offset so that
OFF delayed 50% longer than Pole 1. (e.g. Light is Pole 1 and Fan is Pole 2. Fan would stay ON 50% longer than light).
Auto Time Mode
Activated when Time Delay Dial is set to Auto Time. Red LED indicator will be ON. In this mode, time delay will start
automatically set by the sensor learning occupancy patterns.
Test Mode
Activated when Time Delay Dial is set to TEST. Test Mode LED will flash red for 5 minutes, providing a short Time Delay
when testing the installation to determine if the sensor is working as intended or requires adjustments. After 5
minutes, LED will stop flashing and Time Delay reverts to Factory Time Delay setting (10 minutes).
Line Voltage Passive Infrared (PIR) Occupancy / Vacancy Sensor
Installation Guide
Diversa Occupancy & Vacancy Sensors - Recessed Ceiling, Passive Infrared (PIR), 24Vac
www.douglaslightingcontrols.com
Diversa by Douglas Lighting Controls
14040200-B


