(BLANK)
19
TROUBLESHOOTING
5.
Press UP/DOWN to modify the setpoint value. Then press
PRG to save the setting and return to the menu.Caution: if
the PRG button is not pressed, the new setting will not be
saved.
6.
Press UP/DOWN to select ESC and press PRG to return to
the parameter categories;
7.
Press DOWN to move to the next category and follow steps
4 to 6 to set the other parameters.
8.
Once the settings have been made, to exit the categories
select ESC and press PRG.
9.
To access more advanced parameters, after step 3., press
UP/DOWN to navigate to the category “PSD” and Press
PRG
10.
Insert the service password “22” by pressing UP/DOWN
and confirm with PRG. Now more advanced parameters
can be set.
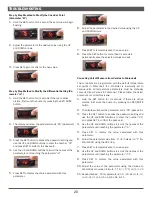
Step by Step Method to Modify the Case Set Point on MIDA8
case controller (Parameter “St”)
1.
Press PRG to enter display active actuators/functions
mode
2.
Press PRG for 3 sec to access direct activation of loads
and functions
3.
Press PRG to enter programming mode, the first category
of parameters “dir” will be displayed
4.
Press UP/DOWN until reaching the parameter category
Ctl (=control) and press PRG to display the first parameter
“St” from the “Ctl” category
Summary of Contents for Hillphoenix MIDA
Page 5: ...3 TECHNICAL DATA MIDA Mobile Single Deck Self Contained Mercchandiser 3 X3 4 X4 4 X8 ...
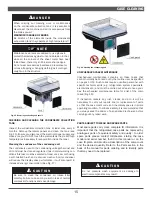
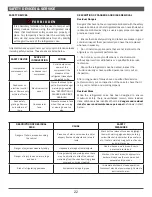
Page 18: ...CASE CLEANING 16 SCHEDULED MAINTENANCE TABLE Fig 17 Recommended Cleaning Schedule ...
Page 26: ...24 PARTS ORDERING THIS PAGE LEFT BLANK ...
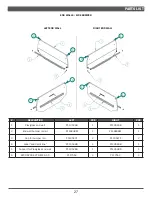
Page 36: ... BLANK 34 PARTS LIST MIDA 4x4 MIDA 4x8 PARTS ORDERING NOTES ...
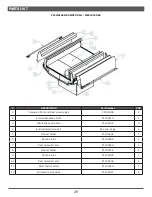
Page 43: ... BLANK 41 PARTS LIST MIDA 3X3 PARTS ORDERING NOTES ...
Page 44: ...42 APPENDIX MIDA 3X3 MIDA 4X4 ...
Page 45: ......
Page 46: ...44 APPENDIX MIDA 4X8 ...
Page 47: ......
Page 48: ...46 MIDA 3X3 WIRING DIAGRAM ...
Page 49: ...47 MIDA 4X4 WIRING DIAGRAM C SERIAL NUMBER ...
Page 51: ... BLANK 49 MIDA 4X8 WIRING DIAGRAM C SERIAL NUMBER ...
Page 52: ... BLANK 50 MIDA 4X8 WIRING DIAGRAM C SERIAL NUMBER ...
Page 54: ...52 MIDA 4X8 WIRING DIAGRAM D SERIAL NUMBER ...
Page 56: ...54 ...

