INSTALLATIONS
INSTALACIÓNES
H
S
I
N
A
P
S
H
S
I
L
G
N
E
INSTRUCTIONS FOR INSTALLING
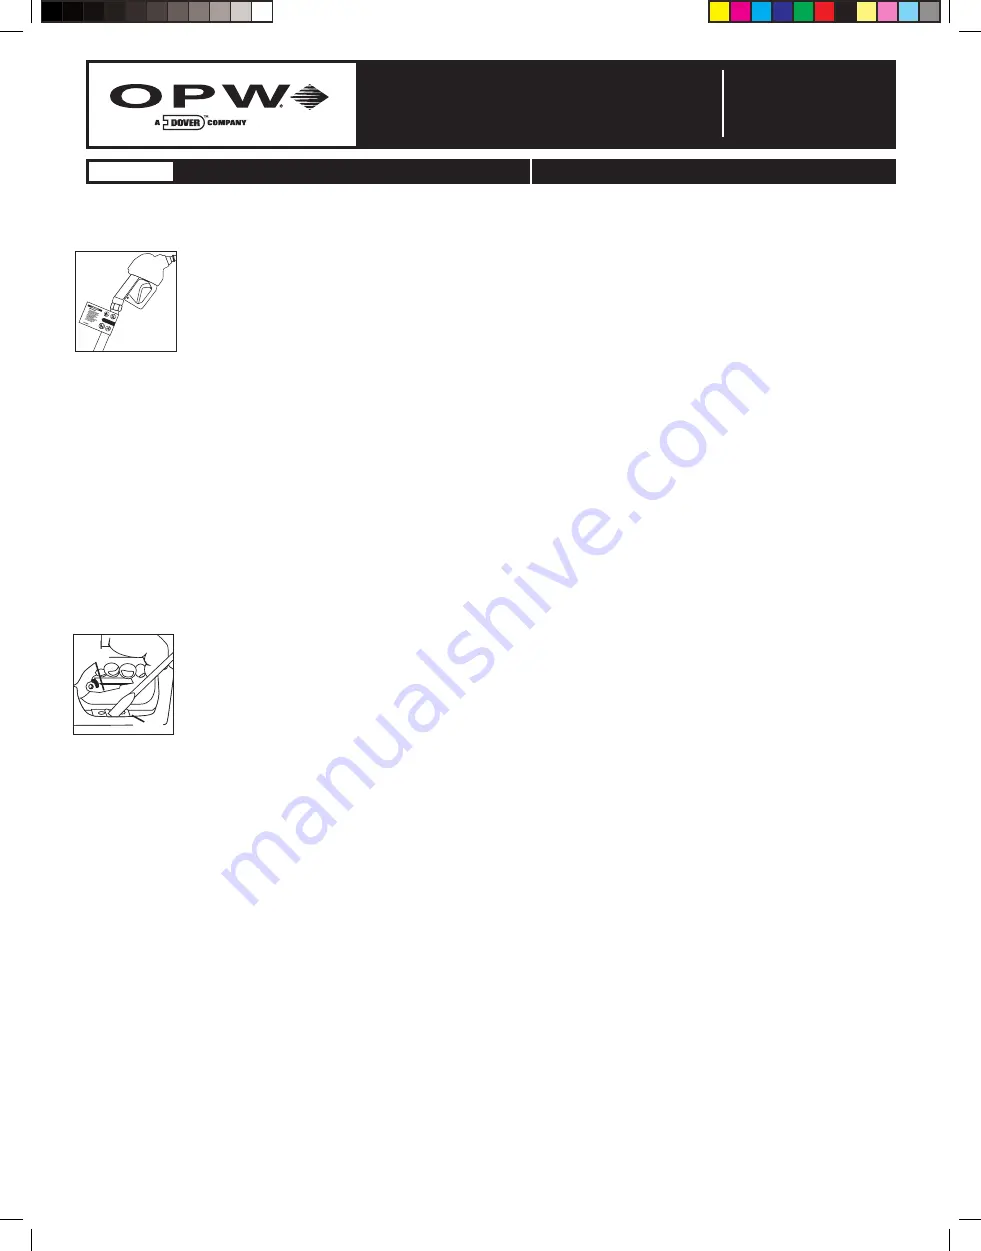
THE HOSE TAG LABEL
• Clean the outside of hose at the nozzle end with a
mild soap and water; wipe dry.
• Peel the adhesive backing from the label.
• Loop the label around the hose, being careful not to
allow the adhesive to contact the hose.
• Align the front edges of the label and press the two
halves together.
• Slide fingers down the label toward the hose,
clamping the hose with the label.
(See Figure 19)
Contact your OPW Distributor for additional
labels. Request information on other available
languages of the labels.
REMOVAL OF THE HOLD-OPEN LATCH ON
AN OPW NOZZLE
• If local codes require that the nozzle cannot have a
hold-open latch, please follow these instructions to
remove the hold-open latch.
• Verify dispenser is turned off.
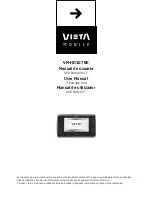
• Place the nozzle on a flat surface. Hold lever in
open position and insert a flat-bladed screwdriver
along side of the hold-open rack. Pry the rack
upward and off the rivets.
(See Figure 20)
CAUTION: Protect your face and other exposed
body parts; wear safety glasses.
• Make sure broken rivets are removed from
the guard. Throw away old parts.
• Do not alter the trigger or rack mechanism from
its original configuration. The nozzle shut-off
mechanism could be impaired as a result. Only
use authorized OPW repair kits.
H15890PAE
info@opw-fc.com
Figure 20
(Ilustración 20)
Figure 19
(Ilustración 19)
Trigger
6
Please see OPW’s website:
www.opw-fc.com for further information
O N E C O M P A N Y . O N E W O R L D . O N E S O U R C E .
™
Rack
INSTRUCCIONES PARA INSTALAR EL RÓTULO
DE LA MANGUERA
• Limpie la parte externa de la manguera en el extremo de
la pistola surtidora con agua y jabón suave; seque con un
trapo.
• Retire la cinta adhesiva de la etiqueta.
• Enrosque la etiqueta alrededor de la manguera, con
cuidado de no tocarla con la parte de adhesivo.
• Ponga en línea los bordes enfrentados de la etiqueta y
presione las dos mitades para unirlas.
• Deslice los dedos por la etiqueta hacia la manguera,
sujetando la manguera con la etiqueta.
(Vea la ilustración 19)
Comuníquese con su distribuidor OPW si desea obtener
etiquetas adicionales. Pida información sobre otros
idiomas disponibles para las etiquetas.
REMOCIÓN DE LA TRABA DE SUJECIÓN EN UNA
PISTOLA SURTIDORA OPW
• Si los códigos locales exigen que la pistola no tenga una
traba de sujeción, siga las instrucciones a continuación
para retirarlo.
• Controle que el surtidor esté apagado.
• Coloque la pistola sobre una superficie plana. Mantenga la
palanca en posición abierta e inserte un destornillador de
punta plana por el lado del soporte desobturador. Levante
el soporte y saque los remaches.
(Vea la ilustración 20)
PRECAUCIÓN: Proteja la cara y demás partes del cuerpo
expuestas; use gafas protectoras.
• Asegúrese de retirar los remaches rotos del dispositivo de
protección. Deseche las piezas obsoletas.
• No altere el mecanismo del gatillo o desobturador de su
configuración original. El mecanismo de cierre de la
pistola podría verse afectado. Use únicamente los kits de
reparación OPW.
79958_Vrs 3.indd 6
8/5/05 3:22:11 PM
SEPTEMBER 2010


