7
60
BRAKE
PORT
81
59
55
66
62
94
61
54
57
56
58
67
64
95
69
66
67
52
53
50
68
16
65
16
If a complete tear down is not
necessary, make sure the
input shaft (21) does not
move during removal of the
drum. If the shaft is allowed
to move,
the input spacer
(104) will fall into the gear set
ultimately causing failure to
the gear section of the winch.
The gear cover (3) will have to
be removed to re-position the
spacer on the input shaft.
B. BRAKE SECTION DISASSEMBLY
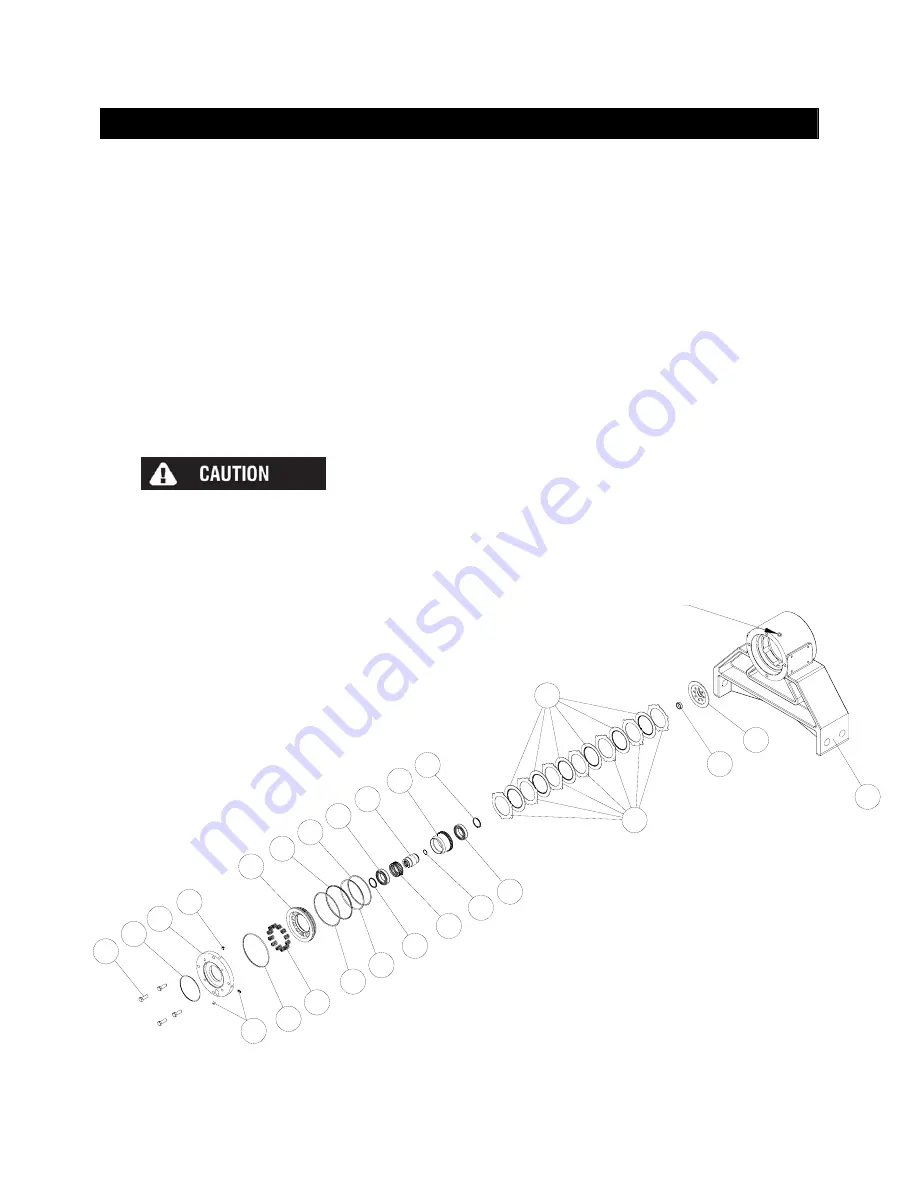
1. Evenly remove the four cap screws (60)
that hold the brake cover (18) in place.
Spring pressure will raise the cover up as
the cap screws are loosened. Carefully
remove the cover (18) from the brake
housing (16). Inspect the o-ring (61) for
damage.
2. Remove the springs (59) from the piston
(54) and check the free height. Each
spring should measure at least 1.240
inches with no force on them.
3. Remove the piston (54) by installing two
pieces of 3/8”-16NC all thread into the two
holes in the top of the piston and run in
evenly until the piston is clear of the
housing. An alternate way of removing the
piston is to use shop air to slowly
pressurize the brake port to remove the
piston from the brake housing (16).
4. Inspect o-rings (55, 57) and back up rings
(56, 58) on the piston. Grasp the brake
driver/clutch assembly (assembled items
64, 65, 66, 67, 69) and remove it from the
brake housing.
(Continued on page 8)
Summary of Contents for RUFNEK 100
Page 10: ...10 CLUTCH INSPECTION...
Page 27: ...27 VISCOSITY CHART...


