26
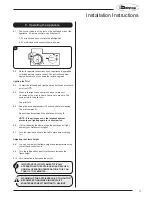
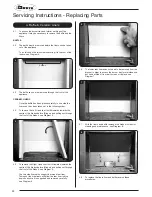
12.6 Refit the new sensor ensuring the plastic spacers are
located between the bracket and the sensor.
12.7 Refit the leads.
12.8 Feed the cable back through the hole as you replace the
bracket.
When the bracket is located correctly it sits flush with the
back panel without force. If not positioned correctly the
bracket sits at an angle, see Diagram 23.
23
13. Primary Aeration Plate
NOTE: Not all models have aeration plates. Please refer
to the Technical Specification.
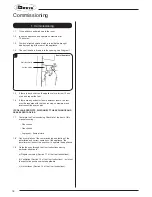
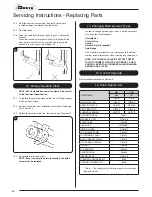
13.1 To replace the primary aeration plate turn off the gas supply
at the isolation device.
13.2 Remove the burner, see Installation Instructions, Replacing
Parts, Section 5.
13.3 Detach the aeration plate from the venturi, see Diagram 12.
12
13.4 Reassemble in reverse order.
NOTE: Even if no aeration plate is required, the small
screw must be replaced.
Servicing Instructions - Replacing Parts
14. Changing Between Gas Types
In order to change between gas types, it will be necessary
to change the following items:
Pilot Injector
Control Valve
Injector
Aeration Plate (if required)
Data Badge
A kit of parts is available for this, always quote the Model
number and Serial number when ordering any spare parts.
NOTE: THE CONTROL VALVE IS FACTORY PRESET
FOR THE CORRECT GAS TYPE AND MODEL, A NEW
UNIT WILL NEED TO BE ORDERED WHEN CHANGING
BETWEEN GAS TYPES.
15. Control Upgrade
See Installation Instructions, Section 2.
16. Short Spares List
COMPONENT
NG
LPG
G20
G31
20mb
37mb
MAIN INJECTOR
IN0001
IN0065
AERATION PLATE
GZ3270
GZ2025
PILOT INJECTOR
PI0026
PI0015
BURNER ASSEMBLY
GZ9712
GZ9713
THERMOCOUPLE
PI0011
MAGNETIC UNIT
GC0166
ELECTRODE
PI0053
GAS VALVE
GC0088K**
IGNITION LEAD
GC0090
LH CERAMIC PANEL
CE1013
RH CERAMIC PANEL
CE1014
BACK CERAMIC PANEL
CE1015
TOP CERAMIC PANEL
CE1016
LOG SET
CE0960
TTB SENSOR
EL0001
SENSOR LEAD
EL0064
INTERRUPTER
GC0026
STANDARD UPGRADE KIT
8455
THERMO UPGRADE KIT
8456
** Note :- The control valve is factory preset for correct gas
type and model.
Summary of Contents for 280
Page 28: ...E O E ...


