DV425TR DIRECT VENT ROOM HEATER
02/01 Page 19 250-5533
Four types of direct vent system installations are
approved for use with the DV425TR.
1. Horizontal Termination (Fig. 1, page 22)
2. Vertical Termination (Fig. 2, page 23)
3. Into a Class A Metal Chimney (Fig. 3, page 24)
USA installations only
4. Into a Masonry Chimney (Fig. 4, page 25) USA
installations only
Do not connect to a chimney serving a separate solid-
fuel burning appliance.
In each of these installation methods, it is very important
to maintain a balance between the combustion air
intake and the flue gas exhaust venting system.
Note: Certain limitations as to vent and vertical
termination configurations apply, and must be strictly
adhered to.
When planning your installation, it is necessary to
select the proper length of vent pipe for your particular
requirements.
1. For installations with any horizontal vent run or
horizontal termination, refer to the Vent Graph on page
27. This graph will show the relationship between
vertical and horizontal side wall venting, and help you
to determine the amount of vertical rise necessary
for “vertical-to-horizontal” type installations. NOTE: Be
sure to take into consideration the wall thickness when
calculating your venting needs.
2. To determine the length of pipe required for vertical
installations, measure the distance from the stove flue
outlet to the ceiling, the ceiling thickness, the vertical
rise in an attic or second story, and allow for sufficient
vent height above the roofline. Refer to the vertical
vent termination tables on page 35 for this information.
For two-story applications, fire stops are required at
each floor level. If an offset is needed in the attic,
additional pipe and elbows will be required. When
INSTALLATION METHODS & NOTES
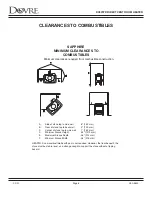
determining the position of the stove, be sure to
adhere to minimum clearance to combustibles to the
appliance itself. (See page 8, Minimum Clearances to
Combustibles.)
3. When installing this appliance into an existing
masonry chimney, it is important to carefully measure
the length of flex needed to reach from the appliance
outlet to the termination cap. If the flex length is too
short, a flex coupler will be needed to attach an
additional length of flex liner to make up the difference.
If the flex length is too long, the liner could sag below
the appliance outlet, which could result in an airflow
restriction causing flow reversal or flame lift.
SAFETY PRECAUTIONS FOR THE INSTALLER
Wear gloves and safety glasses for protection when
installing this stove. Exercise extreme caution when
using ladders or on rooftops around power lines.
Be aware of electrical wiring locations in walls and
ceilings.
!! IMPORTANT !!
INSERT TOP GRILL ONTO STOVE
TOP
PRIOR
TO COMPLETING
VENTING INSTALLATION !!

