background image

Printed in USA

PRICES SUBJECT TO CHANGE WITHOUT NOTICE.  NOT RESPONSIBLE FOR TYPOGRAPHICAL ERRORS.

Booklet Part # --------15

3/29/2016  

 Rev A

Owner's Name :

Dealer :

Purchase Date :

              /              /

Phone :

(           ) 

-

Trailer Part # :

Weight # 

empty :

Serial #

Rated 

capacity :

Other:

Payload :

    Owner's Information:

OWNER'S & OPERAT

O

R'S MANUAL 

Contact your local dealer or distribut

o

r for replacement parts and technical 

support or visit

www.downeastermfg.com

DED LP DUMP BODY SCISSOR HOIST SERIES

Summary of Contents for DED LP

Page 1: ...29 2016 Rev A Owner s Name Dealer Purchase Date Phone Trailer Part Weight empty Serial Rated capacity Other Payload Owner s Information OWNER S OPERATOR S MANUAL Contact your local dealer or distributor for replacement parts and technical support or visit www downeastermfg com DED LP DUMP BODY SCISSOR HOIST SERIES ...

Page 2: ...oper care and operation of the unit will assure years of dependable service Your local DownEaster Dealer will instruct you in its general operation Ordering Repair Parts When service is necessary your local DownEaster dealer can provide assistance Always obtain original DownEaster replacement parts from your dealer Substitute items could affect the performance and warranty of the unit Dealers in y...

Page 3: ...ware KIT Scissor Sub frame 1 DEDP376 Hardware kit sill plate to chassis 1 DEDP378 Hardware kit for dump body rear frame 1 DEDP380 Hardware kit Cab Shield 2016 models 1 DEDP384 Hardware kit Mud Flap Brackets 2016 models 1 DEDP390 Hardware kit Ring Chain and bump stop 1 N A Rivet shims 10GA HR Bare finish 2 TPE187 Dump body cable set 0 1 GA 1 DEDP248 Chain kit dump body tailgate CHECK LIST Your Down...

Page 4: ...any procedure in this book these safety instructions must be read and understood by all workers who have any part in the preparation or use of this equipment SAFETY Carefully read this manual Learn how to safely operate the DownEaster body and how to use the controls properly Do not allow anyone to operate the body without proper training and instruction Unauthorized modification to the DownEaster...

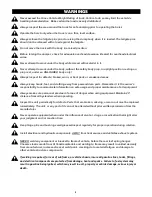
Page 5: ...ed with a load against the tailgate Before raising the dumper check for adequate overhead clearance Be alert for overhead electrical wires WARNINGS Never exceed the Gross Vehicle Weight Rating of truck Failure to do so may limit the vehicle s handling characteristics Make certain the load is evenly distributed NEVER weld any component or bracket to frame of vehicle before the rear leaf spring hang...

Page 6: ...6 WARNING LABEL LIGHTING LOCATIONS LBL110 LBL112 LBL140 LBL131 LBL110 LBL146 ...

Page 7: ...7 WARNING LABEL LIGHTING LOCATIONS FRONT DRIVER SIDE SIDE DRIVER SIDE REAR LBL146 ...

Page 8: ...r start solenoid to one terminal on the 250 amp fuse breaker with a 0 gauge battery cable at 20 Connect the 16 0 gauge cable to the other side terminal of the fuse breaker to the Positive side terminal of the battery Grounding of the power unit can be completed only through a second battery cable If a vehicle chassis ground is used or inline circuit breaker provided is not installed warranty will ...

Page 9: ...he rubber grommets in the holes provided in the rear pillars and the rear rub rail Mount the amber reflectors on the 45 deg front corner Mount the red reflectors near the rear on the side posts and on the rear valance near the side ends MOUNT DECALS IN THE PROPER PLACES See Figure ___ for decal identification and placement Typical Pendant control wiring ELECTRICAL Locate the push button control in...

Page 10: ... Upfitter s Guide for frame cutting and modification procedures The body comes with optional rear bolt kit if welding is not desired applicable or an option See the drill layout below Fig 1 A for drilling template Grade 8 1 2 hardware is utilized Requires a 1 2 or 17 32 drill If an obstruction prevents the drilling of both holes the provided sill plates must be used as close as to the rear of the ...

Page 11: ... mounting plate that extends out from the sub frame Do not remove the rivet heads If rivets are the round style they may be ground flush with the rivet shim These plates are to be placed over the rivet heads for proper weight distribution Failure to install Rivet Shim Plate will result in improper load distribution and will VOID WARRANTY On certain brands of trucks some electronic modules located ...

Page 12: ...ame Chassis brackets to hoist saddle pads protruding out from sub frame The chassis brackets have 3 tabs for multiple brands and one may have to be cut off for clearance Example Most GM and Ford applications will require the center tab to be removed and Ram trucks may need to have the forward tab removed on both sides to clear front spring perch hanger Install 2 1 2 x 1 1 2 Grade 8 Bolts washers a...

Page 13: ...ing sure cab shield is parallel to body and close all gaps Tighten accordingly Torque values INSTALLATION Cab Shield Using the hardware kit provided loosely mount the cab shield starting with the outer bolts to the side plates with the 3 8 16 stainless hex head bolts lock washers and flat washers 3 8 Stainless Hex Bolts 3 8 Carriage Bolts 4 B 4 A ...

Page 14: ... chain through bottom angle keeper of the gate and into the rearward facing banjo hole for spreading 5 C For lowering the gate in the down position Remove chain from bottom keeper and insert end into the side facing banjo slot on top and adjust accordingly 5 D INSTALLATION Connect cables as shown in the electrical section of this manual Cycle body up and down and check for leaks and any clearance ...

Page 15: ...erious injury to yourself and to others do not operate this equipment if you are fatigued Thoroughly inspect the dump body for loose or damaged parts before each use Do not use until adjustments or repairs are made Keep all bystanders especially children and pets well away from the area where the machine will be operated There are two buttons on the hoist pendent control The UP button can be press...

Page 16: ...16 Rev C PUMP PRESSURE BULLETIN ...

Page 17: ...or proper fluid level approximately 1 2 from top of tank when dumper is down If fluid must be added use clean Dextron lll Please keep in mind when servicing this unit that the most common cause of system failure is dirt Keep service area clean In most cases a leaking relief valve is caused by dirt Unscrewing relief valve and cleaning thoroughly can often correct this 1 If unit does not operate at ...

Page 18: ... Hose 45 13 HP116 Dump hinge Bolt on stainless bodies N A DEDP502 Battery cable set 0 1 Gauge 14 HD 512B Hoist 9 body 5 x 16 stroke no cylinder 39 DEDP265 3 4 LED marker light RED round w grommet N A DEDP217 Cylinder 5 x 16 stroke 40 DEDP222 Reflector 2 3 8 round Amber 16 HD 515B Hoist 10 11 body 5 5 x 20 stroke no cylinder 41 DEDP102 Reflector 2 3 8 round Red N A DEDP218 Cylinder 5 5 x 20 stroke ...

Page 19: ...19 MATERIAL CHART ...

Page 20: ...F Owners manuals Dump Body Owner s manual Excel Dump body Manual 2016 Contact your local dealer or distributer for replacement parts and technical support or visit www downeastermfg com ...

Reviews: