background image

PROGRAMMING 

1.


Position the gate half way between open/closed. Lock the Arm using the   

           Key in front of Motor.

2.


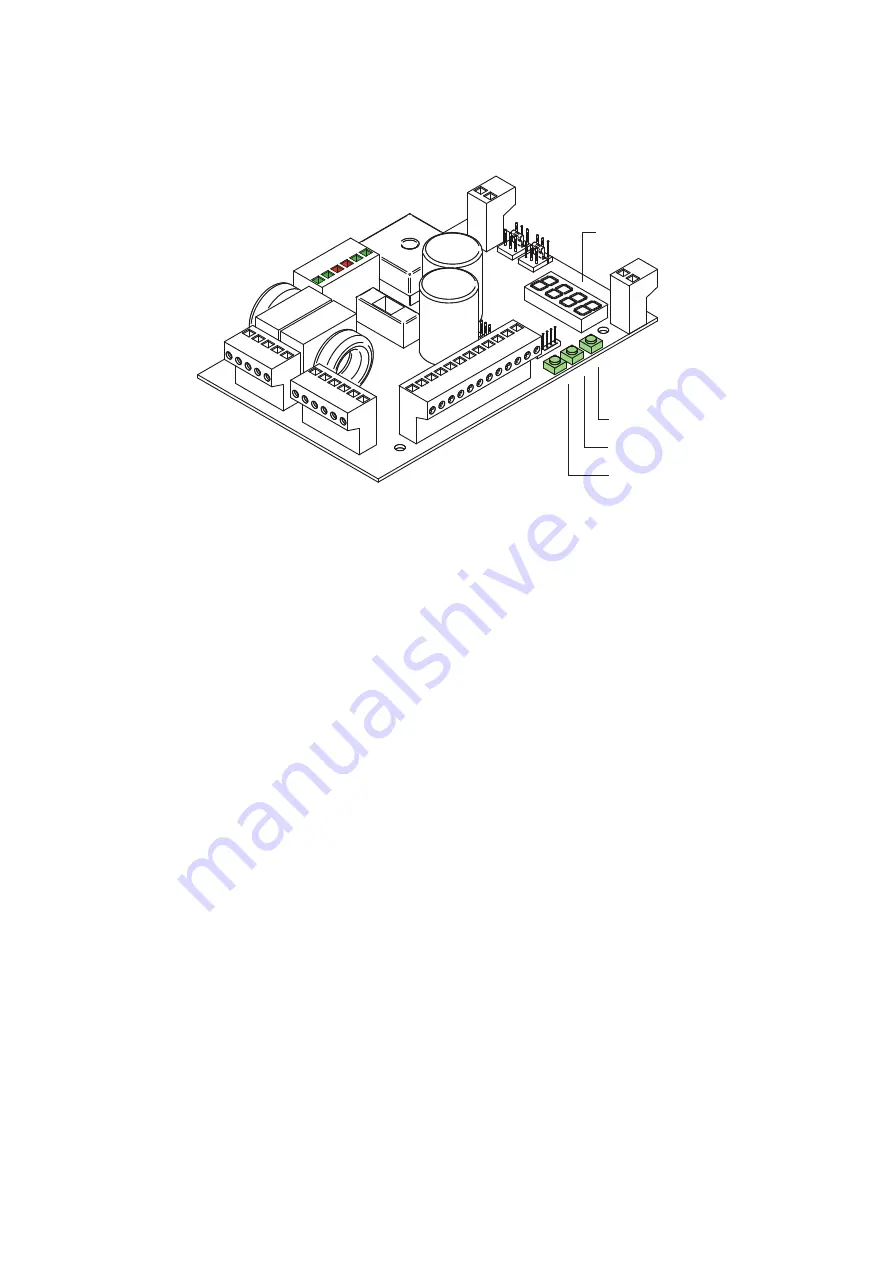
Using the buttons (above) on the Control Board, Scroll to 

P030 

& press  


OK


3.


Scroll to 

d002 

& press 

OK. 

Display will show 

P030

4.


Scroll to 

P003

.

5.


Press middle button once (1) 

APPr

 flashes. 

6.


Press & hold the middle button till 

APPr

 stops flashing. 

7.  

The gate will fully open & close automatically to find where the Stops 

           are placed. The gate should finish in the closed position.

8.  


                 This symbol is for ‘Gate Closed’. It shows on screen when 


done.


_|  |_ 

If you see this, the ‘Gate Open’ symbol, swap the brown and blue  


wires between the terminals.

_ _ _ _

PROGRAMMING IS FINISHED! 

Scroll up

Programming  
Buttons

OK
Scroll down

Digital  
Display

Control Board

8

Summary of Contents for SPRINT GATE

Page 1: ...All business No bullsh t 09 01 16 INSTALL MANUAL SPRINT GATE SOLAR DOUBLE GATES Read this manual before starting install IMPORTANT ...

Page 2: ...he meaty bits you need to get a gate system rocking in record time Don t feel like reading No worries Video versions of Short Cut manuals are in the Tech Area page for this motor on our website TROUBLESHOOTING 1800 241 733 Call our Tech Team INDEX PAGE Gates Motor Position Brackets Battery Box Solar Panel Post Solar Panel Stop Limits Power Up Motor One Connect Motor Two Programming Connect the Rem...

Page 3: ...6 1 NOT SUPPLIED Angle Brackets for Battery Box Gate Post Cap for Panel Post Tek Screws 2 Core Cable 8 Solar Controller 12V 22Ah Batteries Battery Box with high security key 3 Booster Aerial 30W Solar Panel 4 2 Motor Two 24V Motor Motor One 24V Motor with Control Board 1 Ziggy Remotes ...

Page 4: ... the Gate Stay If there s no stay mount on the gate frame 4 Mark the posts at the bottom of the Motor TIPS A B These steps apply to both motors Best position for a Motor is halfway up the Gate Post MOTOR POSITION CODE S8 AT CODE G7 BBAT DELUXE HINGES Gates with automation need heavy duty hinges to handle the load Designed for Sprint Gate Deluxe bearing hinges are the finest farm gate hinges availa...

Page 5: ...f a motor to find which one houses the electronic Control Board 4 Bolt both Motors to Post Brackets 5 Bolt the Arms to Motors Pin the thin arm Arm onto the thick arm The thin arm fits left or right hand gates 6 Pin the Universal Gate Bracket to the Thin Arm and mount it to the gate stay The bracket clamp rotates to fit any angle BRACKETS GATE THIS SIDE 3 ...

Page 6: ...anel Post 2 Place the Cap Post onto the top of the gate post It may be a tight and may need some gentle encouragement with a hammer Keep it in place with self tappers or tek screws Steel Post Cap not supplied in this kit Measure the diameter of your gate post to match a Post Cap Position the bolt holes east west for the solar panel to face north Not sure which direction north sits Download a free ...

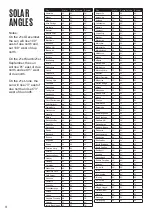
Page 7: ...anel s angle to suit the location will give maximum charging rate PANEL ANGLE STOP LIMITS 1 Use the Motor Key to unlock the Motor Arm 2 Close the gate Bolt a Stop in place where the Arm will sit against it when closed 3 Open the gate and add a Stop for the gate s open position 4 Adjust as needed then tighten all bolts SOLAR PANEL 90 0 80 70 60 50 4 0 3 0 2 0 10 Adelaide 34 Perth 31 Brisbane 27 Dar...

Page 8: ...x to motor via the new hole Then divert wire to left side through the hole used to route wires in the grey plastic base 4 Strip the ends of the brown blue wires white outer cable 5 Remove two black wires from the 22VAC INPUT terminals and pull them through and out of the way 6 Connect the brown blue wires from the battery into the 22VAC INPUT terminals Bottom View Control Board 22VAC INPUT 6 ...

Page 9: ...depth NOTE CONNECT MOTOR TWO 7 Motor One 4 Place the fuse inside Battery Box door into the fuse holder on the red power cable The batteries are fully charged so it may spark That s OK 24V is completely safe 5 With the carton still covering the solar panel connect the black and red power cables to the Solar Panel and Battery The digital screen on the motor s control board and solar controller scree...

Page 10: ...once 1 APPr flashes 6 Press hold the middle button till APPr stops flashing 7 The gate will fully open close automatically to find where the Stops are placed The gate should finish in the closed position 8 This symbol is for Gate Closed It shows on screen when done _ _ If you see this the Gate Open symbol swap the brown and blue wires between the terminals _ _ _ _ PROGRAMMING IS FINISHED Scroll up...

Page 11: ...rate the inner outer wires Twist the outer wire 3 Strip end off the clear inner insulation Trim wires so both are same length 4 Attach wires to the Control Board shown Something not working the way it should Call our Tech Team SOS 1800 241 733 Aerial Terminals Control Board CONNECT THE REMOTE 1 Scroll to P005 press OK 2 When LEAr shows press the remote button r000 shows a remote is connected Repea...

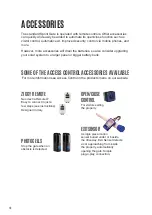
Page 12: ...nel or bigger battery bank ZIGGY REMOTE Need extra Remotes Easy to connect in just a few steps see instructions Designed in Italy EXITSENSOR A single piece motion sensor buried under or beside the driveway Exit Sensor detects a car approaching from inside the property automatically opening the gate Simple plug n play connection OPEN CLOSE CONTROL For visitors exiting the property SOME OF THE ACCES...

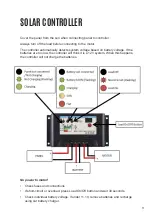
Page 13: ...tage based on battery voltage If the batteries are too low the controller will think it is a 12V system When this happens the controller will not charge the batteries No power to motor Check fuses and connections If short circuit or overload press Load On Off button and wait 30 seconds Check individual battery voltage If under 11 1V remove batteries and recharge using car battery charger ...

Page 14: ...omba 32 56 80 Kwinana 34 58 82 Launceston 26 49 72 Lismore 38 61 84 Liverpool 32 56 80 Logan City 38 62 86 Mackay 46 69 92 Mandurah 34 57 80 Maroubra 32 56 80 Marrickville 32 56 80 Maryborough 40 64 88 Melbourne 28 52 76 Melton 28 52 76 Mildura 32 56 80 Mooloolaba 40 63 86 Mornington 28 52 76 Morphett Vale 32 55 78 Mosman 32 56 80 Mount Gambier 28 52 76 Mount Isa 46 69 92 Murray Bridge 32 55 78 Ne...

Reviews: