background image

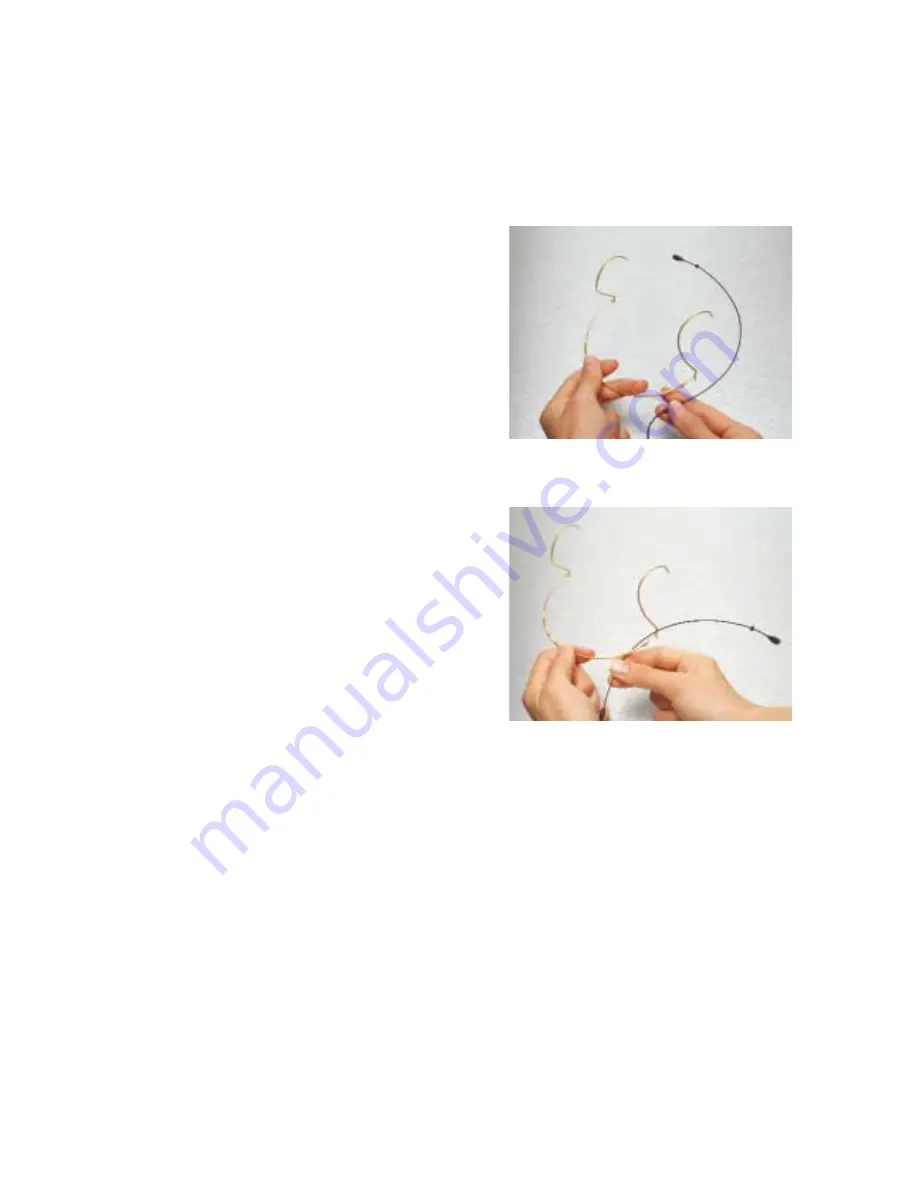
Adjusting the Type 4066 Headband

The size of the headband mount may easi-
ly be adjusted. Change the standard bend
by carefully expanding the distance
between the earhooks.

The 4066 Adjustable Miniature Microphone
Headband is supplied with the boom mounted.
To change sides simply click the boom out
of the clips and follow the instructions
below.

• Hold the boom in your right hand when
mounting on the right side and vice versa.
Hold the boom by the cable relief.

• Position your hand with the boom between
the ear hooks and turn the boom around in
the loop. Take your hand with the boom
under the headband and draw it towards you.

• Secure the microphone boom into the
two clips next to the ear hook beneath
which the boom is to be mounted. Next,
secure the boom in the clip in the middle of
the headband. This clip is movable and should
be placed near the end of the microphone
boom, before the cable relief (where the
soft cable begins to be visible). The remaining
two clips are not used (unless two booms
are to be mounted on the same headband.)
The soft cable should not be attached into
the clips.

9

Summary of Contents for 4065

Page 1: ...e of the Miniature Microphone 4 Miniature Microphone Headbands 8 Specifications 12 Accessories Available 14 Service Repair 16 Warranty 16 CE Standard 16 USER S MANUAL Type 4060 Type 406 1 Type 4062 Type 4065 Type 4066 Miniature Microphones ...

Page 2: ...NING GUIDE The cable and protection grid are the only parts that may be cleaned if necessary Do not use any kind of cleaning fluid other than distilled water Use of ultra sonic baths must be avoided Avoid all kinds of spray or fluids which contain chemical components to remove static electricity on or close to the microphone as this could cause damage to the electret layer When mounting the Miniat...

Page 3: ...ironments where the microphone is exposed to make up or dusty materials the grid may get clogged up Remove the microphone grid from the microphone element and clean the grid using a soft cloth and distilled water only Make sure the grid is dry before remount ing it on the microphone element Cleaning the microphone cable Residue from tape glue or make up on the cable must be removed after use Leavi...

Page 4: ...lean or wipe the sides of the element facing away from the perfo rated protection grid only CORRECT USE OF THE MINIATURE MICROPHONE It is important to observe the following guidelines concerning the daily use of the microphone Correct use of microphone grids The two different protection grids that are supplied with the Miniature Microphones Type 4060 4061 4062 and Adjustable Miniature Microphone H...

Page 5: ...hed Correct use of the microphone element The diaphragm in the microphone element is the most sensitive part of the unit and as emphasized earlier it must be left untouched to preserve its original charac teristics Do not spray any substances such as hair spray directly into the micro phone and avoid getting make up or paint on the microphone element and housing The protection grids are available ...

Page 6: ... the cable might show signs of wear at this point As a preventive maintenance pro cedure it may be advisable to replace the connector in this instance Contact the nearest DPA Microphones repre sentative for maintenance advice or assistance Correct use of adapters and MicroDot connectors To provide users with safe and compact mounting of connectors all Miniature Microphones from DPA are fitted with...

Page 7: ...um possible tensile strength in the design In case of failure MicroDot spare parts assembly tool and assembly guide can be acquired Various wireless systems require the use of electronic components inside the adapter to optimise the signal level the DC offset filtering and powering of the built in micro phone preamplifier Using the adapters from DPA Microphones ensures the correct electronic circu...

Page 8: ...end the steel tube near the microphone element or near the cable exit as you may risk breaking the tube The microphone element is per fectly omnidirectional and does not need to point directly towards the mouth of the performer Avoid posi tioning the microphone in the air stream from nose or mouth Do not bend near these parts of the headband When bending the steel tube please treat with care The s...

Page 9: ...the cable relief Position your hand with the boom between the ear hooks and turn the boom around in the loop Take your hand with the boom under the headband and draw it towards you Secure the microphone boom into the two clips next to the ear hook beneath which the boom is to be mounted Next secure the boom in the clip in the middle of the headband This clip is movable and should be placed near th...

Page 10: ...a highly detailed and clean sound by using the specially designed DPA grids Please see page 4 Now take up the 4066 and adjust the size of the headband so that it fits the size of your head Start with an oversized head band and use both hands simultaneously holding your index fingers on the back of the headband while pushing in the ear hook parts inwards with your thumbs If you want the position of...

Page 11: ... positions Using the boom separately It is possible to use the MMB4066 Miniature Microphone Boom separately in applications where the headband is not needed No electronic components are incorporated in the headband which serves purely as a mount for the boom In applications where the miniature micro phone needs to be invisible e g when mounted in hair or wigs it can be useful to have a hard steel ...

Page 12: ...ominally 6 mV Pa 44 5dB re 1V Pa Equivalent noise level A weighted 4060 Typ 23dB A re 20µPa max 26dB A 4061 Typ 26dB A re 20µPa max 28dB A 4062 Typ 33dB A re 20µPa max 37dB A 4065 Typ 26dB A re 20µPa max 28dB A 4066 Typ 26dB A re 20µPa max 28dB A Equivalent noise level CCIR 468 1 4060 Typ 35dB max 38dB 4061 Typ 38dB max 40dB 4062 Typ 45dB max 49dB 4065 Typ 38dB max 40dB 4066 Typ 38dB max 40dB Max ...

Page 13: ...or 4065 4066 14g 0 49oz incl cable and MicroDot connector Finish 4060 4061 Black beige or white 4062 4065 4066 Black or beige dB 30 20 10 200 Hz 500 2 20 A B C Lin 0 10 20 10 dB 100 50 20 1 5 10 40 D On axis frequency response of Miniature Microphones Please notice that Type 4065 only utilizes the soft boost frequency response ...

Page 14: ...Miniature Grids 5pcs Soft Boost Beige DUA6004 Miniature Grids 5pcs High Boost Beige DUA6005 Miniature Grids 5pcs Soft Boost White DUA6006 Miniature Grids 5pcs High Boost White Windscreens DUA0560 Miniature Windscreens 5pcs Black DUA0561 Miniature Windscreens 5pcs Red DUA0562 Miniature Windscreens 5pcs Blue DUA0563 Miniature Windscreens 5pcs Yellow DUA0564 Miniature Windscreens 5pcs Green DUA0566 M...

Page 15: ...T101 System U100 Lectrosonics UHF systems for low SPL DAD6022 Adapter Audio Technica ATW T51 1400 Series DAD6024 Adapter MicroDot to 3 pin XLR P48 w Mid Range Attenuation DAD6025 Adapter Micron TX700 DAD6026 Adapter Beyerdynamic TS500 600 Trantec DAD6027 Adapter for Beyerdynamic OPUS 100 200 DAD6028 Adapter Audio Technica ATW T75 7000 Series Miniature Power Supplies MPS6010 Miniature Battery Suppl...

Page 16: ...eady to return it to you Please contact DPA Microphones for your nearest representative on TEL 45 48 14 28 28 FAX 45 48 14 27 00 You can also get in touch with DPA Microphones via the internet using e mail info dpamicrophones com or visit our website at www dpamicrophones com WARRANTY All products from DPA Microphones are covered by a two year limited warranty on both mechanical functionality and ...

Reviews: