10
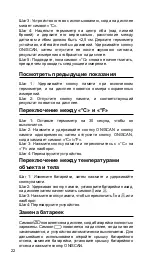
Switching Between “°C” and “°F”
Step 1: Leave the thermometer for 30 seconds for it to turn off.
Step 2: Press and hold the ON/SCAN button and the memory
button at the same time, then release the ON/SCAN button when
the symbol “°C”/“°F” is flashing.
Step 3: Press the memory button and switch from “°C” to “°F”
or vice versa.
Step 4: Restart the device.
Switching Between Object and Body
Temperatures
Step 1: Remove the batteries, then press and hold the memory button.
Step 2: While holding the memory button, reinstall the batteries,
then or will start blinking on the display.
Step 3: Press the memory button to switch to or vice versa.
Step 4: Restart the device.
Battery Replacement
The
symbol appears on the display when the batteries are
fully charged. The
symbol appears on the display when
the power is off, and the device shuts off automatically. For fur
-
ther use, please open the battery cover, replace the batteries,
put the battery cover back and press the ON/SCAN button.
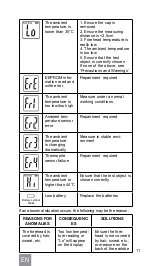
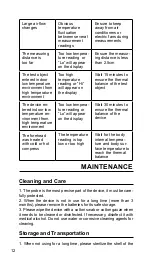
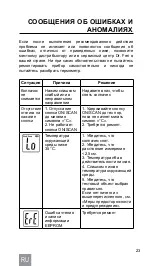
ERROR MESSAGES
AND ANOMALIES
If you follow the recommended action but the problem persists or
error messages other than the ones below appear, please call your
local distributor or Dr. Frei service centre in your country. Do not
attempt to repair by yourself and never try to disassemble the ther-
mometer under any circumstances.
Situation
Reason
Solution
The cap
cannot be
removed
Push is too weak
or applied in a
wrong direction
Push down to remove
the cap
No reac-
tion upon
pressing
the button
1. Release of
the ON/SCAN
button before
the symbol ”°C”
twinkling
2. The ONSCAN
button is broken
1. Hold the ON/SCAN
button until the symbol “°C”
twinkling
2. Repairment required
Summary of Contents for MI-200
Page 1: ...dr frei com MODEL MI 200 USER MANUAL d dr frei c INFRARED FOREHEAD THERMOMETER...
Page 2: ......
Page 16: ...16 DR FREI Dr Frei MI 200 Dr Frei Dr Frei ON SCAN...
Page 17: ...RU 17 18 18 MI 200 19 19 20 20 20 21 21 21 22 C F 22 22 22 23 25 25 26 26 27 28...
Page 19: ...RU 19 34 7 C 37 3 C 36 6 C 38 C MI 200 6 1 2 100 3...
Page 20: ...20 1 2 3 4 5 5 C 40 C 25 C 6 85 7 8 2 5 9 30 10 15 11 12...
Page 21: ...RU 21 ON SCAN 1 35 0 C Lo 44 0 C Hi 2 5 C 40 C ER1 3 2 6 0 2 V 4 30 1 2 ON SCAN...
Page 22: ...22 3 C 4 2 5 ON SCAN 5 C 1 2 C F 1 30 2 ON SCAN ON SCAN C F 3 C F 4 1 2 3 4 ON SCAN...
Page 23: ...RU 23 Dr Frei 1 ON SCAN C 2 ON SCAN 1 ON SCAN C 2 35 C 1 2 2 5 3 4 5 EEPROM...
Page 24: ...24 44 C Lo...
Page 25: ...RU 25 c Lo 2 5 Hi 15 c Lo 30 1 2 3 3...
Page 26: ...26 1 2 3 85 0123 E B...
Page 29: ...BG 29 DR FREI Dr Frei MI 200 Dr Frei IR Dr Frei ON SCAN...
Page 30: ...30 31 31 MI 200 32 32 33 33 34 34 34 34 35 C F 35 35 35 36 38 38 39 39 40 41...
Page 31: ...BG 31 15 3 0 2 36 4 C 38 C 3 10 36 1 C 37 8 C 11 65 35 9 C 37 6 C 65 35 8 C 37 7 C...
Page 32: ...32 35 8 C 38 C 35 5 C 37 5 C 34 5 C 38 C 34 7 C 37 3 C 36 6 C 38 C MI 200 6 LCD...
Page 33: ...BG 33 1 2 100 3 1 2 3 4 5 5 C 40 C 25 C 6 85 7 8 2 5 9 30 10 15 11 12...
Page 34: ...34 1 35 0 C Lo 44 0 C Hi 2 5 C 40 C ER1 3 2 6 0 2 V 4 30 1 2 ON SCAN LCD ON SCAN...
Page 35: ...BG 35 3 C 4 2 5 ON SCAN 5 C 1 2 C F 1 30 2 ON SCAN ON SCAN C F 3 C F 4 1 2 3 4 ON SCAN...
Page 36: ...36 Dr Frei 1 ON SCAN C 2 ON SCAN 1 ON SCAN C 2 35 C 1 2 2 5 cm 3 4 5 EEPROM...
Page 37: ...BG 37 44 C Lo...
Page 38: ...38 Lo 2 5 Hi 15 Lo 30 1 2 3 3...
Page 39: ...BG 39 1 2 3 85 0123...
Page 55: ......

