background image

 CALL 

TOLL-FREE 

1-800-DR-OWNER         

iii


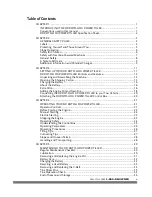
Table of Contents 

CHAPTER 1............................................................................................................................. 1 

INTRODUCING THE DR ROTO-HOG POWER TILLER ................................................ 1 

Conventions used in this manual ................................................................................... 1 

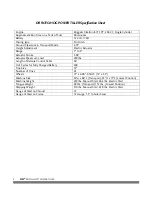
DR ROTO-HOG POWER TILLER Specification Sheet.................................................... 2 

CHAPTER 2............................................................................................................................. 3 

GENERAL SAFETY RULES............................................................................................... 3 

Labels ............................................................................................................................... 3 

Protecting Yourself and Those Around You ................................................................... 5 

Slope Operation............................................................................................................... 6 

Safety for Children ........................................................................................................... 6 

Safety with Gasoline-Powered Machines........................................................................ 7 

General Safety .................................................................................................................. 8 

A Note to All Users .......................................................................................................... 9 

Additional Information and Potential Changes.............................................................. 9 

CHAPTER 3........................................................................................................................... 11 

SETTING UP YOUR DR ROTO-HOG POWER TILLER ................................................ 11 

DR ROTO-HOG POWER TILLER Controls and Features............................................. 12 

Unpacking and Assembling the Machine..................................................................... 13 

Opening the Shipping Carton ....................................................................................... 13 

Charging the Battery ...................................................................................................... 16 

About the Battery ........................................................................................................... 16 

Extra Wire....................................................................................................................... 16 

Adding the Engine Oil and Gasoline............................................................................. 18 

Connecting the DR ROTO-HOG POWER TILLER to your Tow Vehicle....................... 20 

Attaching the DR ROTO-HOG POWER TILLER Control Box....................................... 20 

CHAPTER 4........................................................................................................................... 21 

OPERATING YOUR DR ROTO-HOG POWER TILLER................................................. 21 

Operator Controls.......................................................................................................... 21 

Before Starting the Engine............................................................................................. 22 

Manual Starting ............................................................................................................. 22 

Electric Starting.............................................................................................................. 23 

Stopping the Engine ...................................................................................................... 23 

Operating Safety ............................................................................................................ 24 

Understanding the Control Box .................................................................................... 25 

Operating Parameters ................................................................................................... 26 

Operating Procedures ................................................................................................... 26 

Tilling Tips...................................................................................................................... 27 

Cultivating Tips.............................................................................................................. 27 

Slopes and Uneven Terrain ........................................................................................... 28 

Handling and Transporting........................................................................................... 28 

CHAPTER 5........................................................................................................................... 29 

MAINTAINING THE DR ROTO-HOG POWER TILLER............................................... 29 

Regular Maintenance Checklist..................................................................................... 29 

Lubrication ..................................................................................................................... 30 

Removing and Replacing the Engine Oil ...................................................................... 31 

Battery Care.................................................................................................................... 32 

Charging the Battery ...................................................................................................... 32 

Recycling a Used Battery ............................................................................................... 33 

Removing and Replacing the V-Belt.............................................................................. 34 

Tine Shear Pins .............................................................................................................. 35 

Tine Operation Check.................................................................................................... 35 

End of Season and Storage ........................................................................................... 36 

Summary of Contents for ROTO-HOG

Page 1: ...READ AND UNDERSTAND THIS MANUAL AND ALL INSTRUCTIONS BEFORE OPERATING THIS TILLER DR ROTO HOG POWER TILLER SAFETY OPERATING INSTRUCTIONS ...

Page 2: ...Technical Support Representatives will be happy to help you We also hope to hear from you on how much you like your new helper In addition please tell your friends about your new DR ROTO HOG POWER TILLER Having DR Owners spread the word about our products and our way of doing business is the best advertising we can have and the best way to help us provide even better service in the years to come T...

Page 3: ...y 16 Extra Wire 16 Adding the Engine Oil and Gasoline 18 Connecting the DR ROTO HOG POWER TILLER to your Tow Vehicle 20 Attaching the DR ROTO HOG POWER TILLER Control Box 20 CHAPTER 4 21 OPERATING YOUR DR ROTO HOG POWER TILLER 21 Operator Controls 21 Before Starting the Engine 22 Manual Starting 22 Electric Starting 23 Stopping the Engine 23 Operating Safety 24 Understanding the Control Box 25 Ope...

Page 4: ...AND WARRANTY 40 Parts List Main Assembly 40 Schematic Diagram Main Assembly 41 Parts List Tine Drive Transmission Assembly 42 Schematic Diagram Tine Drive Transmission Assembly 43 Parts List Axle Assembly 44 Schematic Diagram Axle Assembly 45 Wiring Diagram Manual Start model 46 Wiring Diagram Electric Start model 47 Warranty 49 ...

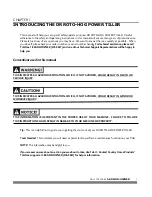
Page 5: ...Conventions used in this manual THIS INDICATES A HAZARDOUS SITUATION WHICH IF NOT AVOIDED COULD RESULT IN DEATH OR SERIOUS INJURY THIS INDICATES A HAZARDOUS SITUATION WHICH IF NOT AVOIDED COULD RESULT IN MINOR OR MODERATE INJURY THIS INFORMATION IS IMPORTANT IN THE PROPER USE OF YOUR MACHINE FAILURE TO FOLLOW THIS INSTRUCTION COULD RESULT IN DAMAGE TO YOUR MACHINE OR PROPERTY Tip This is a helpful...

Page 6: ... 2 Actuator Stroke 3 94 Actuator Maximum Load 250 lbs Length of Remote Control Cable 46 of Cycles for Fully Charged Battery 400 Tine Size 12 Number of Tines 24 Wheels 15 x 6 00 6 NHS 14 x 5 5 Machine Size 39 w x 66 L Transport 35 H x 77 L Lowest Position Machine Weight 259 lbs Manual Start 264 lbs Electric Start Tongue Weight 90 lbs Transport 112 lbs Lowest Position Shipping Weight 310 lbs Manual ...

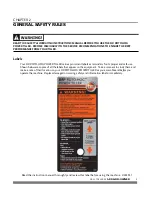
Page 7: ... ROTO HOG POWER TILLER carries prominent labels as reminders for its proper and safe use Shown below are copies of all the labels that appear on the equipment Take a moment to study them and make a note of their location on your DR ROTO HOG POWER TILLER as you assemble and before you operate the machine Replace damaged or missing safety and information labels immediately Read the instruction manua...

Page 8: ...4 DR ROTO HOG POWER TILLER NEVER operate the DR ROTO HOG POWER TILLER without the guards and shields in place 224511 NEVER place your hands or feet near the rotating Tines 224521 ...

Page 9: ... ARE UNFAMILIAR WITH THESE RULES AND INSTRUCTIONS TO USE YOUR MACHINE HAVE A COMPLETE WORKING KNOWLEDGE OF YOUR TOW VEHICLE AND KNOW HOW TO HANDLE IT WITH THE DR ROTO HOG POWER TILLER ATTACHED NEVER PLACE YOUR HANDS FEET OR ANY PART OF YOUR BODY NEAR OR UNDER ANY MOVING PART WHILE THE DR ROTO HOG POWER TILLER ENGINE IS RUNNING KEEP BYSTANDERS AWAY FROM YOUR WORK AREA AT ALL TIMES TO BE SAFE DO NOT...

Page 10: ...ATE ON WET OR SLIPPERY SLOPES REDUCED TRACTION COULD RESULT IN TIPPING OVER YOUR TOW VEHICLE AND OR THE DR ROTO HOG POWER TILLER NEVER PARK THE TOW VEHICLE ON A STEEP GRADE OR SLOPE Safety for Children TRAGIC ACCIDENTS CAN OCCUR IF THE OPERATOR IS NOT ALERT TO THE PRESENCE OF CHILDREN CHILDREN CAN BE ATTRACTED TO THE DR ROTO HOG POWER TILLER AND ITS TILLING ACTIVITY NEVER ASSUME THAT CHILDREN WILL...

Page 11: ...L COMPLETELY BEFORE STORING IN ANY ENCLOSURE NEVER STORE THE MACHINE WITH GAS IN THE TANK OR WITH GAS IN A FUEL CONTAINER NEAR AN OPEN FLAME OR SPARK SUCH AS A WATER HEATER NEVER MAKE ADJUSTMENTS OR REPAIRS WITH THE ENGINE RUNNING BEFORE MAKING AN ADJUSTMENT OR REPAIR SHUT OFF THE DR ROTO HOG POWER TILLER ENGINE WAIT FIVE 5 MINUTES TO COOL THEN DISCONNECT THE SPARK PLUG WIRE AND KEEP THE WIRE AWAY...

Page 12: ...RE DO NOT USE SUBSTITUTE HARDWARE ALWAYS SHUT OFF THE TOW VEHICLE AND DR ROTO HOG POWER TILLER ENGINE WAIT FIVE 5 MINUTES TO COOL AND DISCONNECT THE SPARK PLUG WIRE BEFORE ATTEMPTING TO CLEAR ANY OBSTRUCTIONS USE THE DR ROTO HOG POWER TILLER ONLY IN DAYLIGHT AND GIVE COMPLETE AND UNDIVIDED ATTENTION TO THE JOB AT HAND DO NOT HURRY OR TAKE THINGS FOR GRANTED WHEN USING THE DR ROTO HOG POWER TILLER ...

Page 13: ...equipment in compliance with state regulations is a misdemeanor under California law and may be in violation of other state and or federal regulations Contact your local fire marshal or forest service for specific information in your area Additional Information and Potential Changes Country Home Products Inc reserves the right to discontinue change and improve its products at any time without noti...

Page 14: ...10 DR ROTO HOG POWER TILLER ...

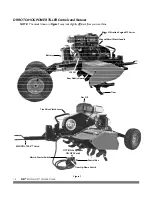
Page 15: ...new machine before you use it It may be helpful to familiarize yourself with the controls and features on your new machine by reviewing Figure 1 on the following page before beginning the steps outlined in this chapter If you have any questions at all please feel free to contact our Technical Support Representatives at our Toll Free number 1 800 DR OWNER 376 9637 ...

Page 16: ...gure 1 may look slightly different from your machine Figure 1 Tine Drive Clutch Lever Briggs Stratton Engine 875 Series Manual Recoil Start Handle Gas Fill Electric Starter Switch Battery SMOOTH TRAK Hitch Tines Rear Debris Guard Control Box OPTIONAL Spreader ON OFF Switch Tines Up Down Switch Oil Fill ...

Page 17: ... 3 1 Safety Operating Instructions Manual 1 Briggs Stratton Engine Manual 1 Hook Loop Strap 1 Battery Strap 2 Bolt 1 4 x 7 1 2 2 Lock Nut 1 4 1 Clevis Pin 3 8 x 4 1 Hair Cotter Pin 08 x 1 58 2 Wheels Tow Bar w SMOOTH TRAK Hitch Battery w Battery Bar Opening the Shipping Carton Tool Needed Pliers Knife 2 7 16 Wrench 1 2 Wrench or Socket Hammer or Mallet Gloves 2 5 16 Wrench STABILIZE THE SHIPPING C...

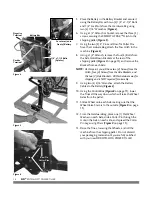
Page 18: ...kets All this hardware was for shipping and is NOT required for assembly 9 Using two 2 5 16 Wrenches attach the Battery Cables to the Battery Figure 4 10 Using the Control Box Figure 8 on page 15 lower the Tines all the way down which will raise the Wheel Axles from the pallet 11 Slide a Wheel onto each Axle making sure that the Wheel Valve Stem is to the outside Figure 9 on page 15 12 From the Ha...

Page 19: ...CALL TOLL FREE 1 800 DR OWNER 15 Figure 7 Figure 8 Figure 9 Axle Hold Down Brackets 2 Bolts each side Push to lower the unit raise the Axles Valve Stem Flat Wheel Washer Cotter Pin Legs spread apart ...

Page 20: ...ING IT COULD RESULT IN SERIOUS INJURY NEVER ALLOW CHILDREN TO CHARGE THE BATTERY THE ELECTRICITY INVOLVED IN CHARGING THE BATTERY COULD CAUSE SEVERE INJURY EXAMINE THE CHARGER ITS CONNECTORS AND THE BATTERY FOR EXCESSIVE WEAR OR DAMAGE EACH TIME YOU CHARGE THE BATTERY IF YOU SEE ANY EXCESSIVE WEAR OR DAMAGE DO NOT USE THE CHARGER OR THE BATTERY REPLACE THEM NEVER LIFT OR CARRY THE BATTERY BY THE C...

Page 21: ...ure when not using your DR ROTO HOG POWER TILLER Once the Battery is charged pull the plug from the wall outlet and then remove the Charger from your Battery However you can leave your Battery plugged in and charging for an extended period Store the Charger in its self locking plastic shipping bag Keep the Charger in a dry location If the Battery does not hold its charge for very long under normal...

Page 22: ...n 1 Place the machine on a level surface and initially add 16 oz 1 2 quart of SAE 30 High Detergent oil recommended by the Engine Manufacturer and wait one minute for the oil to settle Figure 10 page 19 2 Continue adding a few ounces of oil at a time until the oil reaches just below the threads Be careful not to overfill Figure 10 page 19 3 Fill the Gas Tank with fresh unleaded gas with a minimum ...

Page 23: ...CALL TOLL FREE 1 800 DR OWNER 19 Figure 10 Gas Fill Oil Fill Drain Recoil Starter Handle Air Filter Choke Throttle Drain Oil Fill Fuel Shut Off ...

Page 24: ...ow Vehicle goes into the Clevis Set the Parking Brake on the Tow Vehicle and reinstall the Clevis Pin and Hair Clevis Pin Figure 11 Attaching the DR ROTO HOG POWER TILLER Control Box The following procedure includes the steps necessary for attaching the DR ROTO HOG POWER TILLER Control Box to your Tow Vehicle There are two 2 options for attaching the Control Box Hang the Control Box by the attache...

Page 25: ... SERIOUS INJURY CONTACT WITH INTERNAL ROTATING PARTS WILL CAUSE SERIOUS PERSONAL INJURY NEVER PUT HANDS FACE FEET OR CLOTHING UNDER OR NEAR THE DEBRIS SHIELD WITH THE ENGINE RUNNING BEFORE PERFORMING ANY MAINTENANCE PROCEDURE OR INSPECTION STOP THE ENGINE AND WAIT FIVE 5 MINUTES TO ALLOW ALL PARTS TO STOP AND COOL DISCONNECT THE SPARK PLUG WIRE KEEPING IT AWAY FROM THE SPARK PLUG Operator Controls...

Page 26: ...ith the Tines engaged 6 Turn the Fuel Shut Off to the ON position see Figure 10 on page 19 Manual Starting NOTE You may use this starting method even though the DR ROTO HOG POWER TILLER may be equipped with Electric Starting however make sure the Key is in the RUN position 1 When starting a cold Engine push the Choke Control Lever to the right CHOKE and the Throttle Control Lever to the far right ...

Page 27: ... on page 19 Wait until the Engine runs smoothly before each Choke adjustment For optimum performance of the DR ROTO HOG POWER TILLER you should operate the Engine with the Throttle in the Fast RABBIT position Figure 10 on page 19 Stopping the Engine Manual Start model Move the Throttle Figure 10 on page 19 all the way back to the STOP position Electric Start model Move the Throttle Figure 10 on pa...

Page 28: ...NG PANTS AND GLOVES WHILE USING THIS MACHINE BE SURE THE GLOVES FIT PROPERLY AND DO NOT HAVE LOOSE CUFFS OR DRAWSTRINGS WE RECOMMEND WEARING SAFETY SHOES WHEN USING THIS MACHINE WEAR SHOES WITH NON SLIP TREADS TO IMPROVE FOOTING ON SLIPPERY SURFACES DO NOT USE THE MACHINE WEARING OPEN SANDALS OR WHILE BAREFOOT WE RECOMMEND THE USE OF EAR PROTECTORS OR EAR PLUGS RATED FOR AT LEAST 20 DBA TO PROTECT...

Page 29: ...ises the Wheels When you release the Switch it will return to center or OFF position Figure 15 The Control Box also contains the Engine Electric Start Key Switch for the Electric Start model and the Optional Spreader ON OFF Switch Figure 15 U Bolt for Hanging the Control Box Raise Lower For alternate attachment using the Hook and Loop see Figure 12 on page 20 Electric Start Key Switch OPTIONAL Spr...

Page 30: ...ck wetness in the soil to determine if clumping will require slower Tow Vehicle speeds Food Plot Installation and Sod Busting 1 Clear the work area of objects such as glass large sticks and stones roots metal objects wire rope and string like materials 2 Cut all vegetation to the lowest possible height 3 Remove the cut vegetation by either rake vacuum blowing OR allow it to dry several days and re...

Page 31: ...low tillage to dry for several hours in sunny and or windy conditions Listen to your DR ROTO HOG POWER TILLER Engine When the Engine RPM decreases or stalls overloaded condition raise the Tines for shallower tilling If the Engine is lightly loaded lower the Tines to increase the tilling depth If the soil is extremely hard and dry it may be desirable to cross till an area at a shallow depth first t...

Page 32: ... HAS RUTS BUMPS AND OTHER DEPRESSIONS Handling and Transporting NEVER LIFT THE MACHINE WHILE THE ENGINE IS RUNNING We recommend using two 2 people to lift the DR ROTO HOG POWER TILLER Lift the machine by the SMOOTH TRAK Hitch to connect and disconnect from your Tow Vehicle To transport the machine with your Tow Vehicle first raise the tines to the MAX position lower the Wheels using the Control Bo...

Page 33: ... the service intervals shown are the maximum under normal operating conditions Increase frequencies under extremely dirty or dusty conditions Procedure Before Each Use Every 8 10 Hours Every 35 Hours Check the Engine Oil Level Clean the Tines and Debris Shield After each use Check the general condition of the machine e g nuts bolts welds etc Clean Engine Exterior Cooling Fins Check the Tines Shear...

Page 34: ...nes Shaft is required Supplies Needed Grease Gun w General purpose grease NEVER OIL OR GREASE PIVOT POINTS VISCOUS LUBRICANTS WILL ATTRACT DUST AND DIRT THAT CAN CAUSE WEAR ON PIVOT POINTS IF YOU FEEL YOU MUST LUBRICATE THEM USE ONLY DRY POWDERED GRAPHITE TYPE LUBRICANTS Tines Shaft Grease the Tines Shaft using a Grease Gun with General Purpose grease every 8 10 hours Apply about ten 10 pumps of t...

Page 35: ... oil when the engine is warm Warm oil flows quickly and completely 1 Using a Flat Head Screw Driver remove the Oil Fill Cap and vacuum the oil from the Engine through the Oil Fill Figure 10 on page 19 using a Vacuum Pump Oil Drainer 2 Replace the oil by following the instructions on page 18 NOTE Use SAE 30 High Detergent oil classified For Service SF SG SH SJ or higher Do not use special additives...

Page 36: ...N OR EYES FLUSH WITH COOL WATER FOR AT LEAST 15 MINUTES AND CALL A PHYSICIAN IF YOU INGEST ACID CALL A PHYSICIAN IMMEDIATELY Charging the Battery Operate the Engine for at least 45 minutes to maintain proper Battery charge Electric Start model only If the Battery loses its charge you will need to use a trickle Charger like the DR Battery Charger to recharge it The Charger should have an output of ...

Page 37: ...Do not dispose of a lead acid Battery in your regular household trash Law in most areas prohibits incinerating disposing in a landfill or mixing a sealed lead acid Battery with household trash Recycling a Used Battery PLEASE DISPOSE OF USED BATTERIES RESPONSIBLY ACCORDING TO YOUR LOCAL HAZARDOUS MATERIALS REGULATIONS NEVER THROW AWAY USED BATTERIES IN YOUR HOUSEHOLD TRASH Please dispose of your us...

Page 38: ...O THE CORRECT SETTING OF 6 1 4 VERTICAL INCHES FROM THE FENDER TO THE BOTTOM OF GUIDE FIGURE 20 Tools and Supplies Needed Screwdriver 7 16 Socket 1 Remove the Screw from the top of the Belt Guard Figure 19 2 Remove the Hex Nut from the rear of the Belt Guard using a 7 16 Socket and remove the Belt Guard Figure 19 3 Disengage the Tine Clutch Lever Figure 19 and remove the worn Belt Tip Lifting up o...

Page 39: ... will shear or break and the drive components of the DR ROTO HOG POWER TILLER will not sustain damage Two 2 extra sets of Tine Shear Pins are included with the DR ROTO HOG POWER TILLER The design of the Tine Shear Pin is to loosely fit when properly installed NEVER ATTEMPT TO USE A BOLT OR PIN THAT IS LARGER OR HARDER THAN THE ORIGINAL GRADE 5 SHEAR PIN Tine Operation Check BEFORE PERFORMING THIS ...

Page 40: ...nce This will coat the Piston and seat the Valves to prevent moisture buildup Clean or replace the Engine Air Filter Reference the Engine Owner s Manual Clean dirt and debris from the Engine Cylinder Head Cooling Fins Debris Screen and Muffler Clean out residual debris from the under the Debris Shield and Tine Assemblies Lubricate the Tine Assemblies See page 30 Touchup all rusted or chipped paint...

Page 41: ...ow out any oil in the Cylinder Wipe off the Spark Plug and reinstall it The Recoil may be broken or jammed Call 1 800 DR OWNER 376 9637 for assistance The Engine will not start manually Please refer to the Engine Owner s Manual for Engine specific procedures Check that the Tine Drive Clutch is disengaged Check that the Spark Plug Wire is attached Make sure that the Fuel Shut Off is in the ON posit...

Page 42: ...sure a good connection to the Frame The Battery may not be charged Check the voltage yourself or at a service station If it is low charge it with a 12 volt 1 to 2 Amp trickle charger If you do not use your machine for at least 45 minutes at a time the Battery may need to be periodically charged See the Battery Care section on page 32 If the Battery is charged and your DR ROTO HOG POWER TILLER stil...

Page 43: ...kes call 1 800 DR OWNER 376 9637 for assistance The Engine runs well but the Tines won t move The Tine Drive Clutch is not engaged The Tine Drive V Belt is off the pulleys or broken See page 34 The Engine runs well but labors when tilling Operator is being too aggressive raise the Tines Be sure the Engine Throttle is set on the Fast RABBIT position Excessive bounce and difficult handling The area ...

Page 44: ...Pin Hair 5 32 x 3 32 233181 Assembly Tongue 33 233001 Pin Clevis 3 8 x 4 34 232861 Nut Hex 5 16 18 Lock 3 Way 35 233201 Assembly Hitch Bracket 36 232951 Washer 10 37 232660 Clutch Lever Ref Part Description 38 233381 Screw 5 16 18 x 5 16 39 233551 Pulley 4 5 OD 40 233361 Key 3 16 x 1 3 4 41 233111 Rod Guide V Belt 42 233061 Bolt Hex 5 16 24 x 1 w Lock 43 232871 Washer 5 16 Std 375 x 875 44 231231 ...

Page 45: ...CALL TOLL FREE 1 800 DR OWNER 41 Schematic Diagram Main Assembly 070718 ...

Page 46: ...y Drive Housing Side LH 07 233491 Gasket Drive Housing 08 233431 Plug Oil 09 233511 Cap Bearing 10 233501 Bearing Roller 11 233051 Nut Hex 1 4 20 w Lock Washer 12 233251 Assembly Tine Shaft Sprocket 13 233451 Chain Roller Short 14 233441 Assembly Idler Shaft 15 233461 Assembly Input Shaft 16 233541 Seal 17 233411 Chain Roller Long 18 233521 Assembly Drive Housing Side RH 19 233471 Bracket Belt Gua...

Page 47: ...CALL TOLL FREE 1 800 DR OWNER 43 Schematic Diagram Tine Drive Transmission Assembly 070718 ...

Page 48: ... Flange Hex 1 4 20 X 3 1 2 07 104831 Battery 17AH 12V 08 101551 Solenoid Electric Start 09 232981 Pin 3 16 x 2 10 232831 Washer Flat 11 233291 Wheel 15 x 6 3 4 12 232901 Pin 1 8 X 1 1 2 13 231321 Axle Pivot 14 233191 Assembly Wheel Mount 15 223831 Cord Assembly Manual Start 223841 Cord Assembly Electric Start 16 125411 Charger Battery 17 113041 Clips Alligator 18 231471 Washer Star 19 232841 Bolt ...

Page 49: ...CALL TOLL FREE 1 800 DR OWNER 45 Schematic Diagram Axle Assembly 070718 ...

Page 50: ...46 DR ROTO HOG POWER TILLER Wiring Diagram Manual Start model 070725 ...

Page 51: ...CALL TOLL FREE 1 800 DR OWNER 47 Wiring Diagram Electric Start model 070725 ...

Page 52: ...48 DR ROTO HOG POWER TILLER Notes ...

Page 53: ...warranty period warranty parts will ship by standard method at no charge to the warranty holder Expedited shipping of warranty parts is the responsibility of the warranty holder SOME STATES DO NOT ALLOW LIMITATIONS ON THE LENGTH OF IMPLIED WARRANTIES SO THE ABOVE LIMITATIONS MAY NOT APPLY TO YOU Country Home Products Inc shall not be liable under any circumstances for any incidental or consequenti...

Page 54: ...nd when busting sod you will need to make several passes in order to reach maximum tilling depth If the Engine stalls you trying to till too deeply DO A SOIL TEST if you creating a garden or food plot in a new area it is very important to do a soil test to determine the nutritional needs of your new plot and to add the necessary amendments before planting Daily Checklist for the DR ROTO HOG POWER ...

Reviews: