

Step 3. Identify the left and right side panels, the (3) notches at the top face forward. Bolt either side to
the Cart Base using (3) supplied 1/2" Long (1/4" x 20") Hex/Phillips Head Screws. Then install the
(3) screws that fasten the Panel to the Back Panel. Repeat this sequence on the remaining panel.
DO NOT FULLY TIGHTEN yet.
Step 4. Secure the Front Door Support Beam to the Left and Right Panels using (4) supplied 1/2" Long
(1/4" x 20") Hex/Phillips Head Screws. Now all the screws that have been installed so far can be
firmly tightened. However DO NOT OVER TIGHTEN and possibly damage the threaded inserts.
Step 5. Locate the Tank Interference Bar and install with (2) supplied 1/2" Long (1/4" x 20") Hex/Phillips
Head Screws. It mounts to the Base and spans back to the Back Panel. The Back Panel Screw
Fastener comes from the outside, into the threaded insert on the Interference Bar.
Step 6. Locate the (4) Shelf Mounting Brackets and install each with (3) supplied 1/2" Long (1/4" x 20")
Hex/Phillips Head Screws. TIGHTEN SECURELY. Shelves will be mounted later.
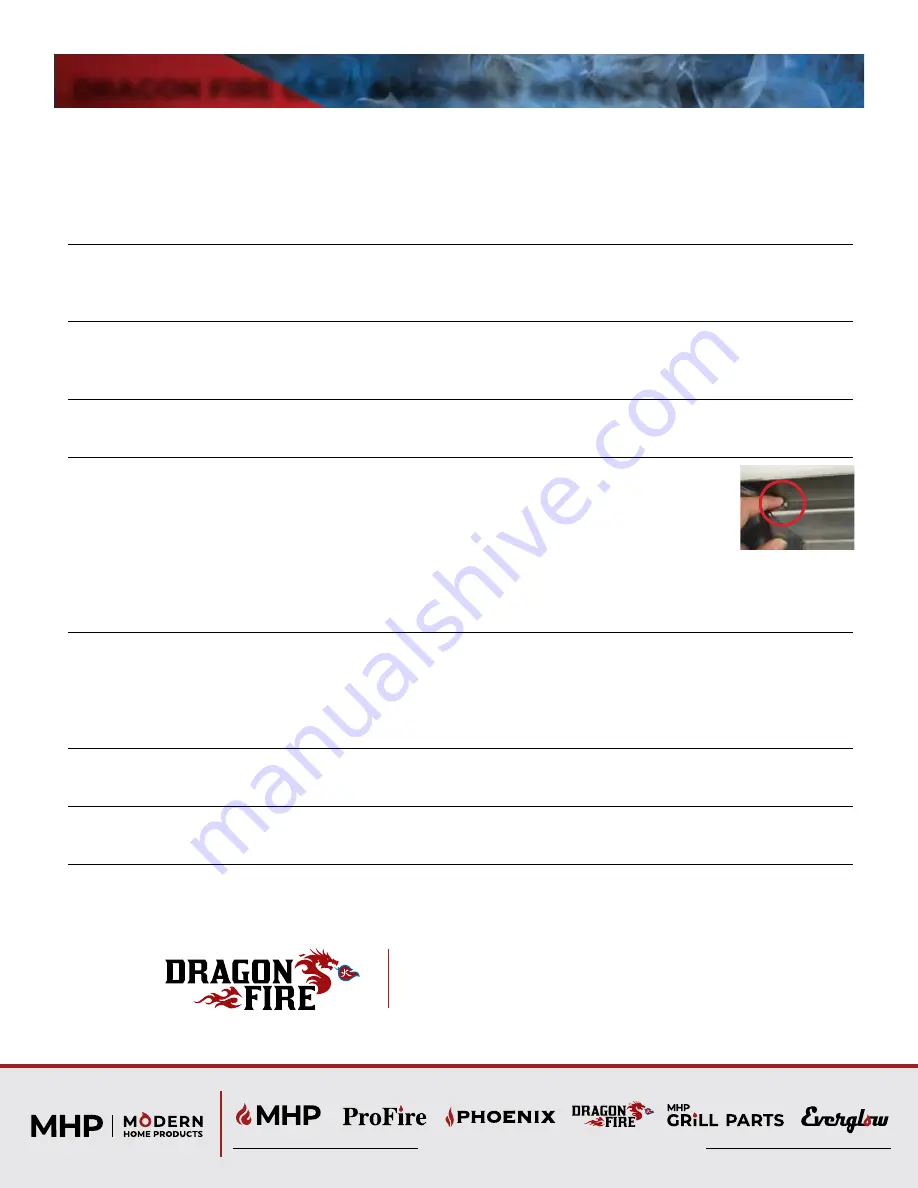
Step 7. The Left and Right Doors can be easily installed by setting the door into the frame
and inserting the lower door pin on each door into the corresponding hole located
in the lower cart base. Once inserted into the lower cart frame hole, depress the
top door pin with your finger and tilt the door back toward the door frame sliding
the upper pin into the hole located on the top door support beam. The door is
secure when you hear the top pin pop into place.
Once your doors are installed correctly into your cart you can attach your door
handles with the shoulder bolts that are included with your handles.
Step 8. The Grill Head gets slipped into the finished cart and fastened with (2) 1/2" Long (1/4" x 20")
Hex Head Screws. Always use a second person when lifting the grill. Removing the Cooking Grids,
Burners and Heat Plates first will reduce the weight. The Grill slides back into the cart until the
holes in the Grill’s body on the left and right side are aligned with the threaded inserts. Then the
1/2" Long (1/4" x 20") Thread Hex/Phillips Head Screws are installed and tightened.
Step 9. Mount each side shelf with the supplied (4) Shoulder Bolts and Nylock Nuts. Tighten. Shelves
can be folded up and down. Lastly install the (3) supplied utensil holders on each shelf.
Step 10. Thread the supplied tank holder into the threaded insert on the right side of the Cart Base.
Tighten against the L.P. Tank after the Tank is installed.
DRAGON FIRE CART ASSEMBLY INSTRUCTIONS
Depress the pin
to install the door
into the frame
For customer service please contact your authorized dealer immediately.
If you need additional information and/or assistance, please contact:
ProFire Grills
5565 North 124th Street • Butler, WI 53007
Toll Free: 1-888-781-4657 • Fax: 1-888-781-3965
© MHP 2020, All Rights Reserved
Family Owned & Operated Since 1957
DFCART 1121


