4 Installation
SETUP and OPERATION
Locating the ALT 72
Prior to connection and adjustments, decide on a
location for the ALT 72 that will provide a reliable signal
to the receivers throughout the intended listening area.
Generally, for the best transmitted signal coverage,
locate the ALT 72 in an area that is free of metal
obstructions and closest to the intended listening area.
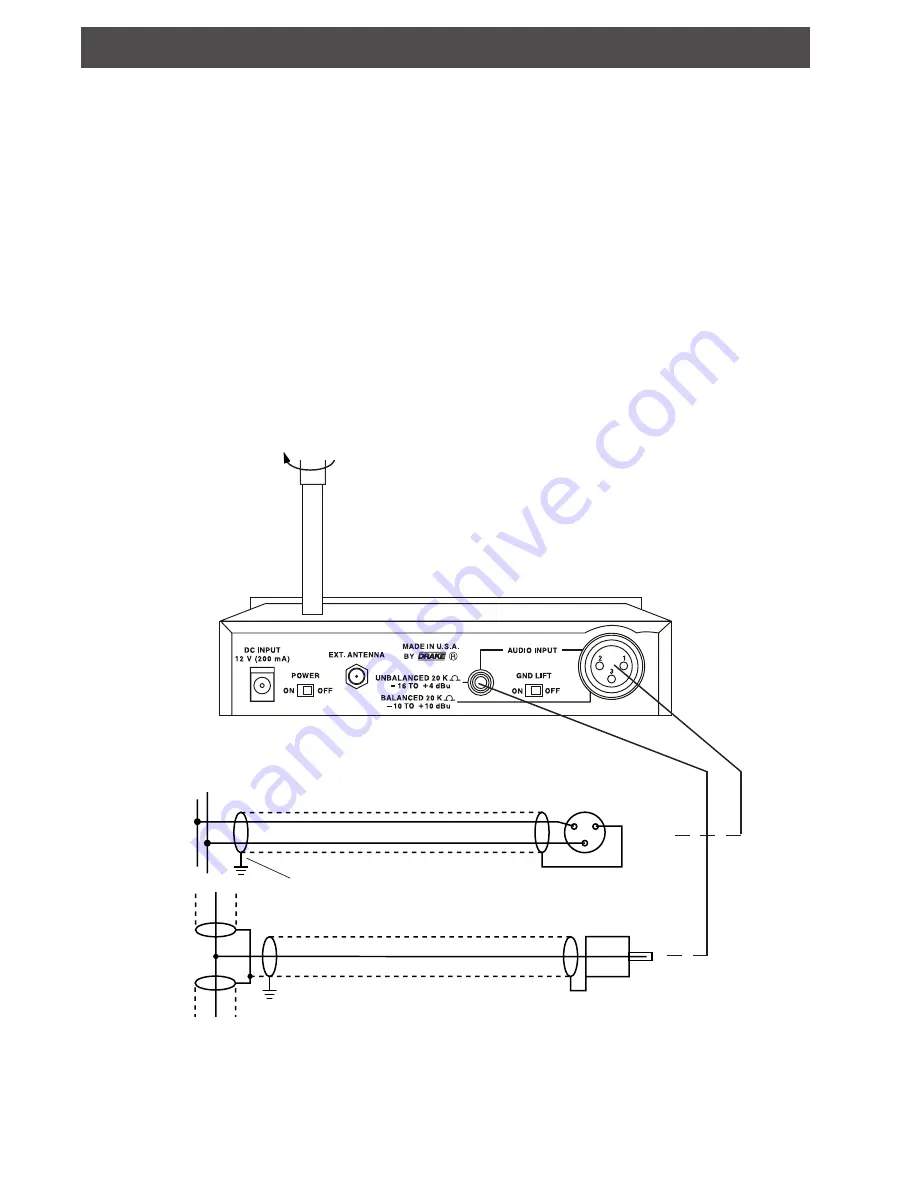
If the supplied “rubber duck” antenna is to be used, do
not locate the ALT 72 in a metal cabinet.
1. Install the antenna
The “rubber duck” antenna fits into the hole on top of
the transmitter and threads onto a mounting stud inside.
Guide the antenna onto the stud and turn it clockwise to
tighten. Do not use excessive force to tighten the
antenna; it only needs to be finger-tight.
If the optional magnetic-mount antenna is more
appropriate, contact your dealer or the R.L. Drake
Company. The magnetic-mount antenna installation
and placement is detailed on page 5 of this manual.
2. Make audio connections
The ALT 72 will accept line level audio inputs. The best
sources for a signal from a sound system are as
follows:
1. TAPE OUT or LINE OUT
2. BOOSTER or BRIDGING
3. Speaker Transformer tap
Use XLR connectors to connect balanced audio signals
to the ALT 72 AUDIO INPUT. Use RCA phono
connectors to connect unbalanced audio signals to the
ALT 72 AUDIO INPUT. The following diagrams
illustrate balanced and unbalanced audio wiring details:
Male XLR Connector To
ALT 72 Input
RCA Phono Connector
To ALT 72 Input
Shield Grounded As Required
1
2
3
-
+
Tighten
Balanced
Line
Unbalanced
Line
- OR -
*Do not use both
inputs at once.


