background image


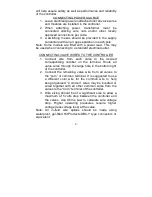
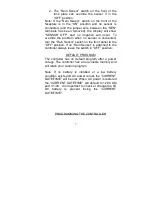
4.  The  day  will  be  flashing.  Use  the  +  and  – 

buttons to select the current date. Push the 


button to set current time. 

5.  The  time  will  be  displayed.  Use  the  +  and  – 

buttons  to  select  the  current  AM,  PM  or  24 hr 
notation.  Press  the 

  button  to  go  to  hours. 

Hours will be flashing. Use the + and – buttons 
to  set  the  current  hour.  Push  the 

  button  to 

set minutes. Use the + and – buttons to select 
current time in minutes. 

6.  Rotate dial to “RUN” to enter new data into the 

controller. 


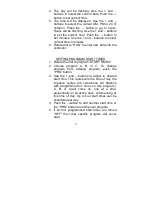
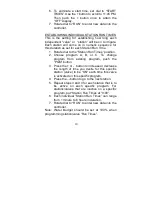
SETTING PROGRAM START TIMES 

1.  Rotate the dial to program “START TIMES”. 
2.  Choose  program  A,  B,  or  C.  To  change 

program  from  existing  program,  push  the 
“PRG” button. 

3.  Use  the  +  and  –  buttons  to  adjust  to  desired 

start  time.  This  represents  the  time of  day  the 
irrigation  cycles  will  commence.  All  Stations 
with  programmed  run  times  on  this  program  ( 
A,  B,  or  C)will  come  on,  one  at  a  time, 
sequentially on all active days, commencing at 
this  time of  day.  Up  to  four  start  times  can  be 
scheduled per day. 

4.  Push the 

button to add another start time or 

the “PRG” button to set the next program. 

5.  If  all  four  programmed  start  times  are  turned 

“OFF”  then  that  specific  program  will  never 
start. 

Summary of Contents for Rain Pro Expandable

Page 1: ...1 Rain Pro Expandable Expandable Controller 3 7 11 15 stations Installation and Programming Guide ...

Page 2: ...r wiring 6 Default program 7 Programming the controller 8 Input current date and time 8 Program start times 9 Station run times 10 Water calendar days on off 11 through 13 Dial position functions 14 Run Rain off Manual station Manual Program Quick step manual start Water Budget 15 Master valve Pump start options 16 Rain Delay 16 Pause between stations 17 Resetting or erasing memory 17 Trouble shoo...

Page 3: ...ching to drywall or masonry Do not over tighten Outdoor 1 Select desired location that is at least 15 feet away from a pump pump start relay or any high voltage junction boxes or electric motors 2 Choose desired location and install one screw for top keyhole into wall Use screw anchors if attaching to drywall or masonry 3 Hang controller on this screw Mark wall for two remaining screw holes and in...

Page 4: ...each valve to the desired corresponding number on the terminal Route all valve wires through the large hole in the bottom right of the controller 2 Connect the remaining valve wire from all valves to the com or common terminal It is suggested to use a different color wire for the common wire to help keep organized Common wires may be bundled or wired together with all other common wires from the v...

Page 5: ...AC Properly sized for your application Hit Products offers a wide range of pump start relays for most applications that are compatible with the Rain Pro controller Note DO NOT connect controller directly to pump Controller will be damaged if controller is connected directly to a pump INSTALLING STATION MODULES The Rain Pro controller is shipped from the factory with one 3 station module installed ...

Page 6: ...ammed without being attached to the controller or any AC power source The AC power source is required before any valve activation will commence The 9V DC battery is necessary to keep the Current Date Time active Without the 9V DC battery power loss will lose Current Date Time and Current Date Time will have to be reset upon power resumption SENSOR WIRING A rain sensor or any type of normally close...

Page 7: ...r switch on the front panel to the OFF position If no Rain Sensor is attached to the controller always leave the switch in OFF position DEFAULT PROGRAM The controller has no default program after a power outage The controller has a non volatile memory and will retain your custom program Note If no battery is installed or a low battery condition exists and AC power is lost the CURRENT DATE TIME wil...

Page 8: ...n that is flashing The subject or flashing display is in sequence and can be scrolled forward or backwards to access all desired programming options BASIC PROGRAMMINMG FEATURES 1 Three independent programs are available A B and C 2 Four program start times per program are available 3 Calendar schedule days of the week ODD EVEN or individual interval scheduling options 4 Individual station runtimes...

Page 9: ...ING PROGRAM START TIMES 1 Rotate the dial to program START TIMES 2 Choose program A B or C To change program from existing program push the PRG button 3 Use the and buttons to adjust to desired start time This represents the time of day the irrigation cycles will commence All Stations with programmed run times on this program A B or C will come on one at a time sequentially on all active days comm...

Page 10: ...ose program A B or C To change program from existing program push the PGM button 3 Press the or button to increase or decrease the length of time you desire for this specific station valve to be ON each time this valve is activated on this specific program 4 Press the button to go to the next station 5 Repeat steps 3 and 4 for each station that is to be active on each specific program For stations...

Page 11: ...ze different same schedule option UTILIZING THE SPECIFIC DAYS OF THE WEEK TO IRRIGATE 1 Choose program A B or C To change program from existing program push the PRG button 2 Using the and buttons will make a day either active or inactive indicates an active day or non circled Press the button to change to a circled day which indicates an inactive day The days of the week will automatically advance...

Page 12: ... and the number of Days Left will flash Use the or buttons to choose the number of days until you desire this irrigation cycle to start Number of Days Left will not exceed the Interval schedule selected 4 Rotate dial to Run to enter this data in controller UTILIZING ODD OR EVEN DAY SCHEDULING Odd or Even day scheduling is typically used to comply with regulatory watering rules ODD EVEN scheduling ...

Page 13: ...er reasons 1 Rotate dial to Calendar Schedule 2 Press the button until the cursor is on Sunday This will change the program to Interval Day schedule 3 Press the button and the Interval will flash 4 Push the button again and the days of the week Mon will flash 5 Press the button until the day you desire as a No Water Day is flashing 6 Press the button to designate this day as a No Water Day This sp...

Page 14: ...time 4 Rotate dial to RUN position 5 Upon completion of this station operating manually for length of time input the controller will revert back to RUN and operate as previously programmed 6 MANUAL PROGRAM To manually activate one complete cycle of either program A B or C 1 Rotate dial to Manual Program 2 Choose program A B or C To change program from existing program push the PRG button 3 Push th...

Page 15: ...r 2 seconds 2 Program A values will be displayed 3 Push the or to view the different stations and their programmed run times Individual station run times may be adjusted using the or buttons 4 Push the button to desired station to commence cycle Station will start in 2 seconds and then sequence through all remaining stations 5 This will allow for a Quick Review of programmed station run times by p...

Page 16: ...3 To check the current water budget level setting or to get the 100 original setting base setting rotate the dial to the RUN position Press either the up or down arrow The current setting will be displayed BONUS FEATURES Activate or De activate Master Valve Pump Start by Station 1 Rotate dial to Pump Master Valve ON OFF ON will be highlighted 2 Push the button to change from ON to OFF 3 Push the b...

Page 17: ...on operation Range of programmable delay is 1 second to 4 00 four hours and zero minutes 5 Rotate dial back to the RUN position to enter this new data in controller NOTE Pump Start Master Valve circuit will not operate during PAUSE RE SETTING OR ERASING CONTROLLER MEMORY To reset the clock and calendar push the RESET button located in the recessed hole on the panel back This will reset the clock t...

Page 18: ...or circuit breaker Check 9V DC battery Display reads ERR Master Module not installed properly Turn off AC Power Restart after 30 seconds See Remote Control Wiring Instructions Display Reads P ERR Check for short or bad wire connections in the pump start or Master Valve wiring or solenoid wiring Display Reads Station ERR Check for short or bad wire connections in that station s field wiring or sole...

Page 19: ...ill blink at a rate of 0 5 second on and 0 5 second off until AC power returns At this time the normal display will return 9V DC battery must be installed When there is a low battery situation under normal AC power The display is to show LO BA blinking at a rate of 0 5 second on and 0 5 seconds off for 10 seconds followed by normal display blinking at the same rate for 10 seconds This blinking cyc...

Page 20: ... display will be blank and the end user will have to reset the real time clock and date when the power returns If there is no battery installed or the battery is totally dead the display will blink LO BA The Rain Pro controller will operate normally if there is AC power although no battery is installed or the battery is totally dead The battery will last 2 weeks with no power under normal conditio...

Reviews: