background image

IMPORTANT:

 PLEASE READ THESE INSTRUCTIONS CAREFULLY TO ENSURE THE 

SAFE AND EFFECTIVE USE OF THIS PRODUCT.

INSTRUCTIONS 

These instructions accompanying the product are the original instructions. This document is part of the product, 
keep it for the life of the product passing it on to any subsequent holder of the product. Read all these 
instructions before assembling, operating or maintaining this product.
This manual has been compiled by Draper Tools describing the purpose for which the product has been 
designed, and contains all the necessary information to ensure its correct and safe use. By following all the 
general safety instructions contained in this manual, it will ensure both product and operator safety, together 
with longer life of the product itself.
AlI photographs and drawings in this manual are supplied by Draper Tools to help illustrate the operation of the 
product.
Whilst every effort has been made to ensure the accuracy of information contained in this manual, the Draper 
Tools policy of continuous improvement determines the right to make modifications without prior warning.

PETROL

HEDGE

TRIMMER

32319

Summary of Contents for 32319

Page 1: ... the purpose for which the product has been designed and contains all the necessary information to ensure its correct and safe use By following all the general safety instructions contained in this manual it will ensure both product and operator safety together with longer life of the product itself AlI photographs and drawings in this manual are supplied by Draper Tools to help illustrate the ope...

Page 2: ...IS MANUALS SAFETY CONTENT WARNING Information that draws attention to the risk of injury or death CAUTION Information that draws attention to the risk of damage to the product or surroundings 1 4 COPYRIGHT NOTICE Copyright Draper Tools Limited Permission is granted to reproduce this publication for personal and educational use only Commercial copying redistribution hiring or lending is prohibited ...

Page 3: ...DGE TRIMMER 8 1 TRAINING 10 8 2 PREPARATION 10 8 3 FUELLING 11 9 OPERATING INSTRUCTIONS 9 1 COLD STARTING THE ENGINE 12 9 2 WARM STARTING THE ENGINE 13 9 3 STOPPING THE ENGINE 14 9 4 HORIZONTAL ROTATING REAR HANDLE 14 9 5 ENGINE IDLE SPEED ADJUSTMENT 14 9 6 HOLDING THE HEDGE TRIMMER 15 9 7 HEDGE CUTTING TECHNIQUES 16 Vertical Cutting 16 Horizontal Cutting 16 10 MAINTENANCE AND TROUBLESHOOTING 10 1...

Page 4: ... hired out when the guarantee period is 90 days from the date of purchase The guarantee is extended to 12 months for parts only This guarantee does not apply to normal wear and tear nor does it cover any damage caused by misuse careless or unsafe handling alterations accidents or repairs attempted or made by any personnel other than the authorised Draper warranty repair agent Note If the tool is f...

Page 5: ...WA 110dB A Vibration level 7 0 1 5m s2 Dimensions assembled L W H 1070 230 240mm Weight machine only 5 5kg A weighted sound pressure level in accordance to 2000 14 EC Use semi synthetic 2 stroke oil 4 3 HANDLING AND STORAGE Care must still be taken when handling and lifting Dropping this machine will have an effect on the accuracy and may also result in personal injury This machine is not a toy an...

Page 6: ...n tight Vibration from normal use can cause them to loosen over time Never operate this machine with defective or missing guards Warning Use of this product can pose a danger to wildlife Before attempting to use this machine check the area particularly long grass and under bushes for signs of life if necessary relocate Note Not all animals will be deterred by the noise of the product alone Do not ...

Page 7: ...that have an immediate toxic effect and may cause permanent damage to your health Take all precautionary measures to prevent your body from absorbing any of these substances Tank and siphon fuels only outdoors or in well ventilated rooms Do not inhale fuel fumes Avoid contact with eyes and skin Wear gloves when transferring fuel When fuel has come into contact with your clothes change them immedia...

Page 8: ...e Blade comb Hand guard Front handle Spark plug cap Recoil starter cord Lock on button ON OFF switch Throttle trigger lockout Throttle trigger Primer bulb Choke lever Air filter cover Fuel tank Fuel tank cap Blade covers Handle rotation button Rear handle 8 ...

Page 9: ...se the machine The packaging material should be retained at least during the guarantee period in case the machine needs to be returned for repair Warning Some of the packaging materials used may be harmful to children Do not leave any of these materials in the reach of children If any of the packaging is to be thrown away make sure they are disposed of correctly according to local regulations 7 2 ...

Page 10: ...s Use of sturdy gloves non skid footwear and safety glasses is recommended f Use extra care when handling fuels They are flammable and the vapours are explosive The following points should be observed Only use fresh clean and good quality fuel oil mix in the hedge trimmer Use only an approved container Never remove the fuel cap or add fuel with the power source running Allow engine and exhaust com...

Page 11: ... stroke oil into 1 litre of unleaded fuel Attention Always handle fuel with caution Pour the fuel oil mixture into a specifically designed mixing receptacle before replacing the cap and shaking gently Remove the fuel tank cap by turning it anti clockwise To prevent identification problems or accidents the fuel tank cap is stamped with the symbol With the aid of a funnel pour the fuel oil mixture i...

Page 12: ...des are not touching any objects Pull the starter cord using short sharp movements Note Do not use the full length of the recoil starter cord as this can cause breakage or premature failure Do not release the starter cord to recoil on its own Damage will occur to the mechanism Slide the choke lever forward to the closed position Pump the primer ten times until fuel is visible in the bubble This mo...

Page 13: ... a period after the throttle has been released 6 6 9 OPERATING INSTRUCTIONS 9 2 WARM STARTING THE ENGINE FIGS 7 8 Rest the hedge trimmer on a stable surface Press the ON OFF switch to the I ON position Pump the primer ten times until fuel is visible in the bubble This moves the fuel up the line to the head Ensure the choke lever is in the open position 1 2 3 Fig 7 Fig 8 1 3 2 Press the hedge trimm...

Page 14: ...Fig 9 1 14 2 9 4 HORIZONTAL ROTATING REAR HANDLE FIGS 10 11 The rear handle can be rotated horizontally through 180º in three 90º incremental positions ergonomically beneficial when carrying out vertical cutting duties To change the handle angle first pull the rotating rear handle locking lever Twist the handle to the required angle The locking lever can be pressed forward to lock the handle into ...

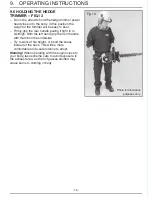
Page 15: ...it tight in to hip thigh With the left hand grip the front handle with thumb on the underside Try to work at hip height or bend the knees instead of the back This will be more comfortable and a safer stance to adopt Warning When operating with the engine close to your body take extreme care to avoid exposure to the exhaust area as the hot gasses emitted may cause burns to clothing or body Fig 13 P...

Page 16: ... floor Warning Do not attempt to cut a hedge higher than chest height without using a safe platform Warning If working on a platform do not attempt to stretch or over reach When cutting with the blade set straight tilt the cutting side of the blades toward the hedge by approximately 0 10º This hedge trimmer will enable you to cut or trim bushes and hedges Branches which are too thick for the hedge...

Page 17: ...m air filter element Wash the element in warm soapy water to clean it Do not use solvents to clean it Allow the filter to dry 100 before refitting it on to the engine Refit cover Insert screw and turn clockwise to tighten Replace the filter if it appears worn or damaged 10 2 SPARK PLUG MAINTENANCE FIGS 18 19 Over time the spark plug can become contaminated This can be due to adverse running condit...

Page 18: ...the spark plug thread in to the engine before screwing it clockwise in to the head Fig 19 2 3 0 6mm to 0 7mm 2 3 10 3 CLEANING AND LUBRICATION FIGS 20 22 Blades should be cleaned of any organic matter sap debris and resin before and after each use to maintain optimum performance Use an environmentally friendly oil to lubricate the cutting blade before storing Operate the cutting blades to allow th...

Page 19: ...efuel tank 2 Put the switch in the START position 3 Move the choke lever to open If the motor is flooded see the following point 4 Unscrew the plug dry it pull the start cable several times and replace the spark plug 5 Clean the tank with petrol and then refill it with new 2 stroke that does not contain water 6 Clean the spark plug 7 Reset spark plug electrode gap to 0 6 0 7mm 1 Clean the filter 2...

Page 20: ...ry 1 Check clean replace air filter element 1 See section 10 1 2 Visual inspection testing 3 Visual inspection testing 4 Visual inspection 5 Visual inspection 1 Check clean replace spark plug 1 See section 10 2 1 Inspect the entire machine and tubes for damage including loose or missing components and repair as necessary 2 Replace spark plug 1 Visual inspection 2 See section 10 2 1 See section 10 ...

Page 21: ... children Single value noise marking Maximum declared A Weighted sound power level in decibels 11 1 EXPLANATION OF SYMBOLS Warning Wear suitable face protection Warning Wear suitable head and ear protection 21 Warning Wear suitable protective clothing and suitable gloves Fuel 2 stroke oil mixture ratio Strictly no naked flames or smoking near the appliance Choke closed Choke open ...

Page 22: ...ording to national regulations Contact your local authority for details of collection schemes in your area In all circumstances Do not dispose of power tools with domestic waste Do not incinerate Do not abandon in the environment When decommissioning preparing the machine to be scrapped drain any remaining fuel and oil for separate disposal ...

Page 23: ...NOTES 23 ...

Page 24: ...Service Warranty Repair Agent For aftersales servicing or warranty repairs please contact the Draper Tools Helpline for details of an agent in your local area YOUR DRAPER STOCKIST KCCH0317 Published by Draper Tools Limited No part of this publication may be reproduced stored in a retrieval system or transmitted in any form or by any means electronic mechanical photocopying recording or otherwise w...

Reviews: