background image

Overview -

 Components

Contents

Overview -

 Components .......................................................................................1

PLEASE READ -

 Important Safety and Installation Information ....................2

PLEASE READ -

 Field Adjustments, Cleaning and Maintenance ...................2

Section 1 -

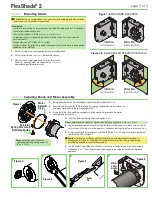
 Mounting Shade ................................................................................3

Section 2 -

 Installing Shade and Motor Assembly ...........................................3

Section 3 -

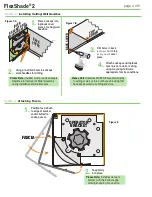
 Installing Ceiling/Wall Headbox .....................................................4

Section 4 -

 Attaching Fascia ...............................................................................4

Section 5 -

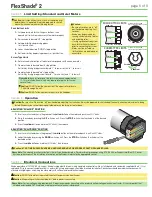
 Limit Setting: Standard and Quiet Motors ....................................5

Section 6 -

 Operation............................................................................................5

Section 7 -

 Electrical Connections .....................................................................5

Section 8 -

 Electrical Connections .....................................................................6

Section 9 -

 Dimensions ........................................................................................8

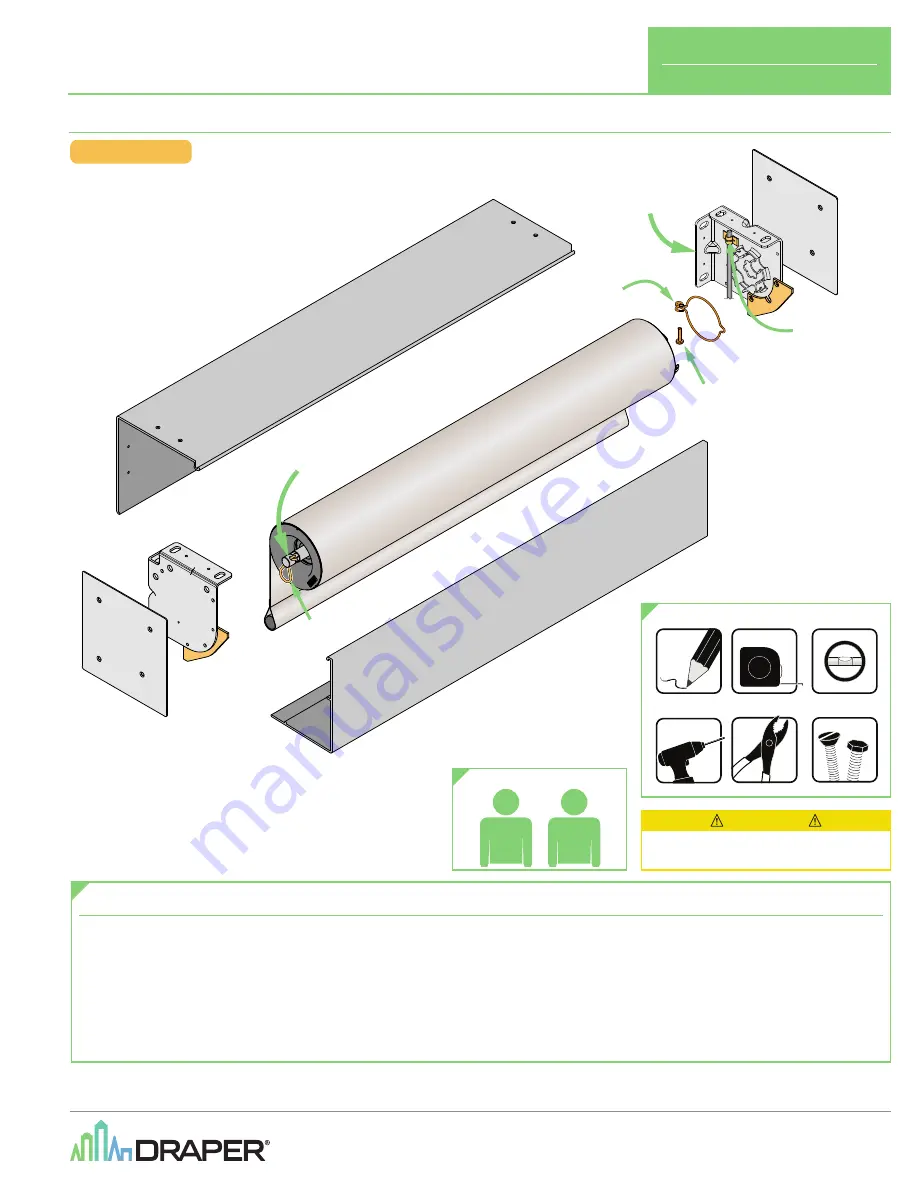
FAS

CIA

SH

AD

E F

AB

RIC

COVE

R, H

EADB

OX T

OP/B

ACK

HE

M B

AR

Idle

r En

MOT

OR

BRA

CKE

T

MOT

OR 

RET

AIN

ER

 RIN

G

Reta

ining

 Spr

ing S

crew


& Re

taini

ng S

prin

g

MOUN

TING

  PLAT

E

Cot

ter P

in

Moto

r Ca

ble

Guid

e

MOUN

TING

  PLAT

E

  IDLE

R

BRACK

ET

 CAUTION 

Read and understand all warnings 

before beginning installation.

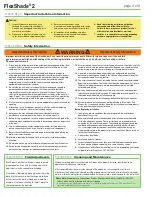
FLEXSHADE 2

Draper, Inc.  |  411 S. Pearl St. Spiceland, IN 47385 

draperinc.com  |  765.987.7999  |  800.238.7999  

© 2021 All Rights Reserved 

FORM: FS_MO_FS2_Inst21

FlexShade

®

 2

 Maximized coverage for large, tall areas, while also reducing light gap

INSTRUCTIONS

INSTALLATION & OPERATION

If you have any difficulties installing or servicing your  

FlexShade 2, call your dealer or Draper, Inc. 

2

1

PERSONNEL REQUIRED

POWER DRILL

PENCIL

TAPE MEASURE

HARDWARE


(by others) 

LEVEL

PLIERS

TOOLS REQUIRED

Summary of Contents for FLEXSHADE 2

Page 1: ...DBOX TOP BACK H EM B A R Idler End MOTOR BRACKET MOTOR RETAINER RING RetainingSpringScrew RetainingSpring MOUNTING PLATE Cotter Pin MotorCable Guide MOUNTING PLATE IDLER BRACKET CAUTION Read and understand all warnings before beginning installation FLEXSHADE 2 Draper Inc 411 S Pearl St Spiceland IN 47385 draperinc com 765 987 7999 800 238 7999 2021 All Rights Reserved FORM FS_MO_FS2_Inst21 FlexSha...

Page 2: ...m including all sensors should be carefully tested to ensure safe and normal operation Extreme care should be taken during testing to remain clear of moving parts to avoid possible injury 14 Operation of unit should be performed only by authorized and qualified personnel who have been trained in the safe and effective operation of the unit and understand its safety features 15 The safety features ...

Page 3: ...motor end bracket Fig 2 Section 2 Installing Shade and Motor Assembly 4 Install the Retaining Spring Screw and tighten Fig 2 Please note Maximum torque for tightening Retaining Spring Screw is 5 lb in 22 24 Nm 5 Use the provided spanner wrench to rotate the idler until the holes in the idler match up with the vertical holes in the idler mounting bracket as seen when looking straight up into the ca...

Page 4: ...g 1 Position fascia flush to edge of bracket and or butted to endcap cover 2 Snap firmly into place 3 Drill holes in back wall mount or in top ceiling mount cover piece 4 Attach endcaps and top back cover piece to wall or ceiling using mounting hardware appropriate for site conditions 1 Place endcaps into top back cover piece of ceiling wall headbox Please Note Install fascia top to bottom with th...

Page 5: ...W TYPE LIMITS Standard right hand motor configuration shown Section 7 Electrical Connections Shade operates on 110 120V 60 Hz current Shade is shipped with internal wiring complete and control switch es fully boxed and standardly supplied with a 6 1 82m cable lead Wire to connect shade to switch es and switch es to power supply should be furnished by installer Connections should be made in accorda...

Page 6: ... Connector M12 Connector for 3 Wire Motors 2 WHITE 2 WHITE 1 BLACK 4 GREEN 3 NOT USED 2 WHITE 2 WHITE 2 WHITE 1 BLACK 3 NOT USED 4 GREEN 2 WHITE To Switch 120VAC To Motor 60 1 5 m Standard 12 30 5 cm Standard W B G Ø 0 61 15 5 mm 2 WHITE 2 WHITE 1 BLACK 3 RED 4 GREEN 2 WHITE 2 WHITE 2 WHITE 1 BLACK 3 RED 4 GREEN 2 WHITE W B R G To Switch 120VAC To Motor 60 1 5 m Standard 12 30 5 cm Standard M12 Co...

Page 7: ...tor Network Device Connector Network Device Connector Handheld Remote Wireless Gateway Wall Switch AV Gateway Network Device Connector Contact Closure Interface Controls System Overview 120VAC Motors M12 Connectors B W G 110 120V Line B W G 110 120V Line RS485 120VAC Motor RS485 120VAC Motor Overview C Motors Data Cable Pin Out RJ45 Connector 1 ORANGE WHITE 2 ORANGE 3 GREEN WHITE 4 BLUE 5 BLUE WHI...

Page 8: ... A1 6 5 8 168mm B1 6 5 8 168mm C1 NA NA D1 NA NA E1 1 25mm FASCIA WITH ENDCAPS A1 6 1 2 165mm B1 6 1 2 165mm C1 NA NA D1 NA NA E1 1 25mm BRACKETS A2 5 7 16 138mm B2 5 7 16 138mm C2 3 1 4 83mm D2 3 1 4 83mm E2 1 3 8 3 5mm B B D Shade Width E Fabric Width for Fascia or Headbox Shade Width 2 51 mm Brackets Only Fabric Width Shade Width 1 48 mm E B idth ox Shade Width 2 51 mm Shade Width 1 48 mm A Hea...

Reviews: