Overview -
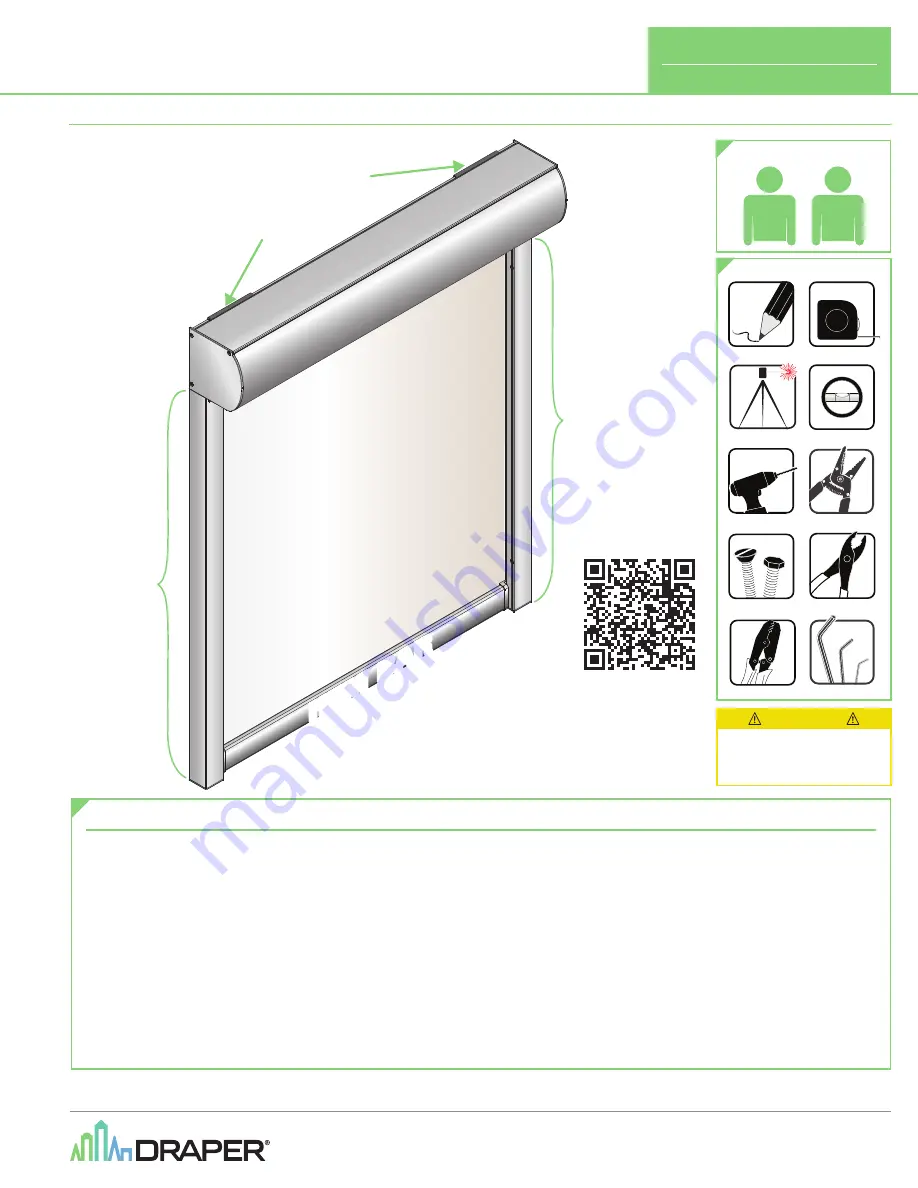
Components
Contents
Overview -
Components .......................................................................................1
PLEASE READ -
Important Safety and Installation Information ....................2
PLEASE READ -
Cleaning and Maintenance .....................................................2
Section 1 -
Site Preparation ................................................................................3
Section 2 -
Curved or Square Headbox Mounting ..........................................3
Section 3 -
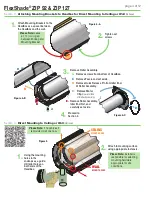
Attaching Mounting Brackets to Headbox ...................................4
Section 4 -
Direct Mounting to Ceiling or Wall .................................................4
Section 5 -
Installing Side Channels ..................................................................5
Section 6 -
Mounting Angled Headbox ..............................................................6
Section 7 -
Mounting Headbox in a Recessed Pocket ....................................6
Section 8 -
Mounting Side Channels Into a Recessed Pocket ......................7
Section 9 -
Channel Adaptors .............................................................................7
Section 10 -
Anti-Insect Brush Seals .................................................................7
Section 11 -
Limit Setting: RTS Obstacle Detection Motors ..........................8
Section 12 -
Limit Setting: Standard and Quiet Motors ..................................9
Section 13 -
Complete Electrical Connection ..................................................9
Section 14 -
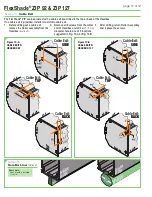
Cable Exit ........................................................................................10
Section 15 -
Hem Bar Liner ................................................................................10
Section 16 -
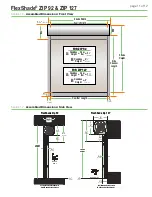
Assembled Dimensions: Front View ..........................................11
Section 17 -
Assembled Dimensions: Side View ............................................11
Section 18 -
Component Dimensions ..............................................................12
POWER DRILL
PENCIL
2
1
TAPE MEASURE
HARDWARE
(by others)
LEVEL
PLIERS
CRIMPING TOOL
WIRE STRIPPERS
CAUTION
Read and understand
all warnings before
beginning installation.
LASER LEVEL
HEX WRENCH
TOOLS REQUIRED
PERSONNEL REQUIRED
HEA
DBO
X
SHA
DE
FAB
RIC
MOUNTING
BRACKETS
(W
all M
oun
t sho
wn)
HE
M B
AR
END
CAP
SIDE
CHANNEL
SIDE
CHANNEL
Draper, Inc. | 411 S. Pearl St. Spiceland, IN 47385
draperinc.com | 765.987.7999 | 800.238.7999
© 2020 All Rights Reserved
|
FORM: FS_ZIP_Inst20
FlexShade
®
ZIP 92 & ZIP 127
Exterior shading system, ZIP detail creates weather/shading barrier
protects against wind, sun, snow, and insects to maintain a comfortable space
INSTRUCTIONS
INSTALLATION & OPERATION
If you have any difficulties installing or servicing your
FlexShade ZIP, call your dealer or Draper, Inc.
Scan code with your
smartphone to view a playlist
of FlexShade
®
ZIP installation
videos. These videos do not
replace the written instructions,
but offer valuable help.


