background image

- 7 -

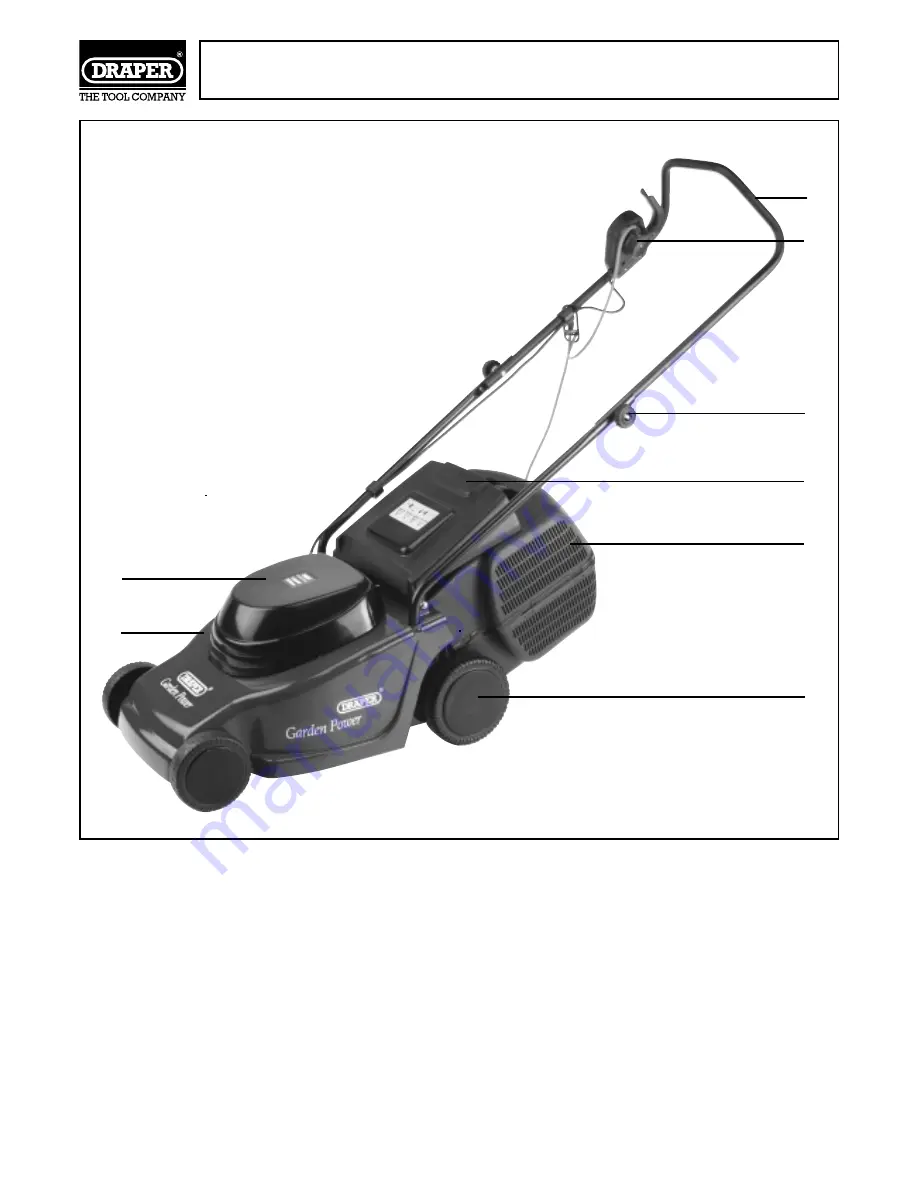
GETTING TO KNOW YOUR
ROTARY MOWER

A. Handle

B. Switch with safety button

C. Handle knob

D. Grass flap

E. Motor cover

F. Deck

G. Adjustable wheel

H. Grass box

✪✌

✫✌

✬✌

✭✌

✮✌

✰✌

✱✌

✯✌

PART No. LM1200 SHOWN                                                                                                                                                                                FIG B

Summary of Contents for LM1200

Page 1: ...e its correct and safe use We recommend that this manual is read before any operation of the machine before performing any kind of adjustment to the machine and prior to any maintenance tasks By following all the general safety instructions contained in this manual it will ensure both machine and operator safety together with longer life of the tool itself All photographs and drawings in this manu...

Page 2: ...ions 8 Adjustments and Operations 9 Maintenance and Trouble Shooting 10 1 We Draper Tools Ltd Hursley Road Chandler s Ford Eastleigh Hampshire SO53 1YF England Declare under our sole responsibility that the product Part Number LM900 LM1200 Stock No 60604 60605 Description Rotary Lawn Mower To which this declaration relates is in conformity with the following directive s 98 37 EC 89 336 EEC 73 23 E...

Page 3: ...uld the machine develop any fault please return the complete tool to your nearest authorized warranty repair agent or contact Draper Tools Limited Chandler s Ford Eastleigh Hampshire S653 1YF England Telephone 023 8026 6355 If upon inspection it is found that the fault occurring is due to defective materials or workmanship repairs will be carried out free of charge This guarantee does not apply to...

Page 4: ...completely excluded by safety mechanisms Power tools must therefore always be operated with caution GENERAL SAFETY INSTRUCTIONS FOR POWER TOOLS 1 KNOWYOUR POWER TOOL Read and understand the owner s manual and labels affixed to the tool Learn its application and limitations as well as the specific potential hazards peculiar to this tool 2 KEEP WORK AREA CLEAN Cluttered areas and benches invite acci...

Page 5: ...ne the blade and nut for damage Repair or replace any damaged parts before restarting and operating the mower 15 Always disconnect your mower from the electrical supply before lifting or carrying 16 Stop the blade if the mower has to be tilted up for transportation when crossing surfaces other than grass 17 Do not tilt the mower when starting the motor The only exception is when the mower will not...

Page 6: ...ug is not suitable it should be cut off and destroyed The end of the cable should now be suitably prepared and the correct type of plug fitted See below WARNING A plug with bare flexible wires exposed is hazardous if engaged in a live power socket outlet WARNING THIS APPLIANCE IS DOUBLE INSULATED Blue Neutral Brown Live As these colours may not correspond with the coloured markings identifying the...

Page 7: ...ose items from the carton Fig A illustrates the mower and all the loose parts packed in the carton Referring to Fig A check that all the parts are present 6 If any parts are missing or damaged please contact the stockist where your purchase was made or call the Draper Power Helpline on 023 8049 4344 1 Mower 1 2 Top handle 1 3 Switch 1 4 Bolts caps and knobs 2 5 Lower handles 2 6 Handle screws 2 7 ...

Page 8: ... 7 GETTING TO KNOWYOUR ROTARY MOWER A Handle B Switch with safety button C Handle knob D Grass flap E Motor cover F Deck G Adjustable wheel H Grass box PART No LM1200 SHOWN FIG B ...

Page 9: ... the square under the bolt head engages with the square in the handle Put the second bolt into the left hand side of the handle from the inside so the bolt only just protrudes through the handle Fig 2 Make sure the motor lead is inside the handles and feed the first bolt through the right lower handle and then push the other bolt through the other lower left handle Fit both caps onto the bolts so ...

Page 10: ...raper Tools recommends that the mower is used with a Residual Current Device RCD 1 The top handle is equipped with a hooked cable restraint which holds the cable to prevent it being pulled out of the switch Hook the cable into the restraint to protect the lead from accidental tears Fig 6 2 Adjust the wheel height if required 3 Fit the grass box 4 Connect the mower to a suitable power supply 5 The ...

Page 11: ...k the blade rotates there is some friction due to the brake If the blade does not move contact a service repair agent Mower vibrates in use Stop using immediately Disconnect the mower from the power supply wait until the blade has stopped and then check to see if the blade bolt is loose tighten if necessary If the blade bolt is already tight contact a service repair agent Mower does not pick up th...

Page 12: ...x 023 8026 0784 YOUR DRAPER STOCKIST Published by Draper Tools Ltd No part of this publication may be reproduced stored in a retrieval system or transmitted in any form or by any means electronic mechanical photocopying recording or otherwise without prior permission in writing from Draper Tools Ltd ...

Reviews: