background image

3

Power Supply Box

19

4

Epi-fluorescence Device

22

5

Eyepiece

2

6

Objective

13

7

Mercury Lamp

8

Ultraviolet Bar

20

9

Other Parts

Install all necessary parts together as Fig.1 before using.

1. Unpack the microscope and its parts carefully, check and sort out all parts according to the

packing list

2. Loose the screw(7) in the Epi-fluorescence device, and open the door of the lamp house

Remove the nylon rod, and instead of mercury lamp.

Caution: Ensure the mercury lamp in

correct position.

Finally, shut the door, and fix the screw (7).

Caution: Don’t leave any dust and fingerprints on the mercury lamp to affect its life and

illuminating efficiency. Clean it with soft cloth and gasoline promptly.

Remove the plastic cover away from the Epi-fluorescence device (22), and install it on the

microscope body (14) with the screw (11)

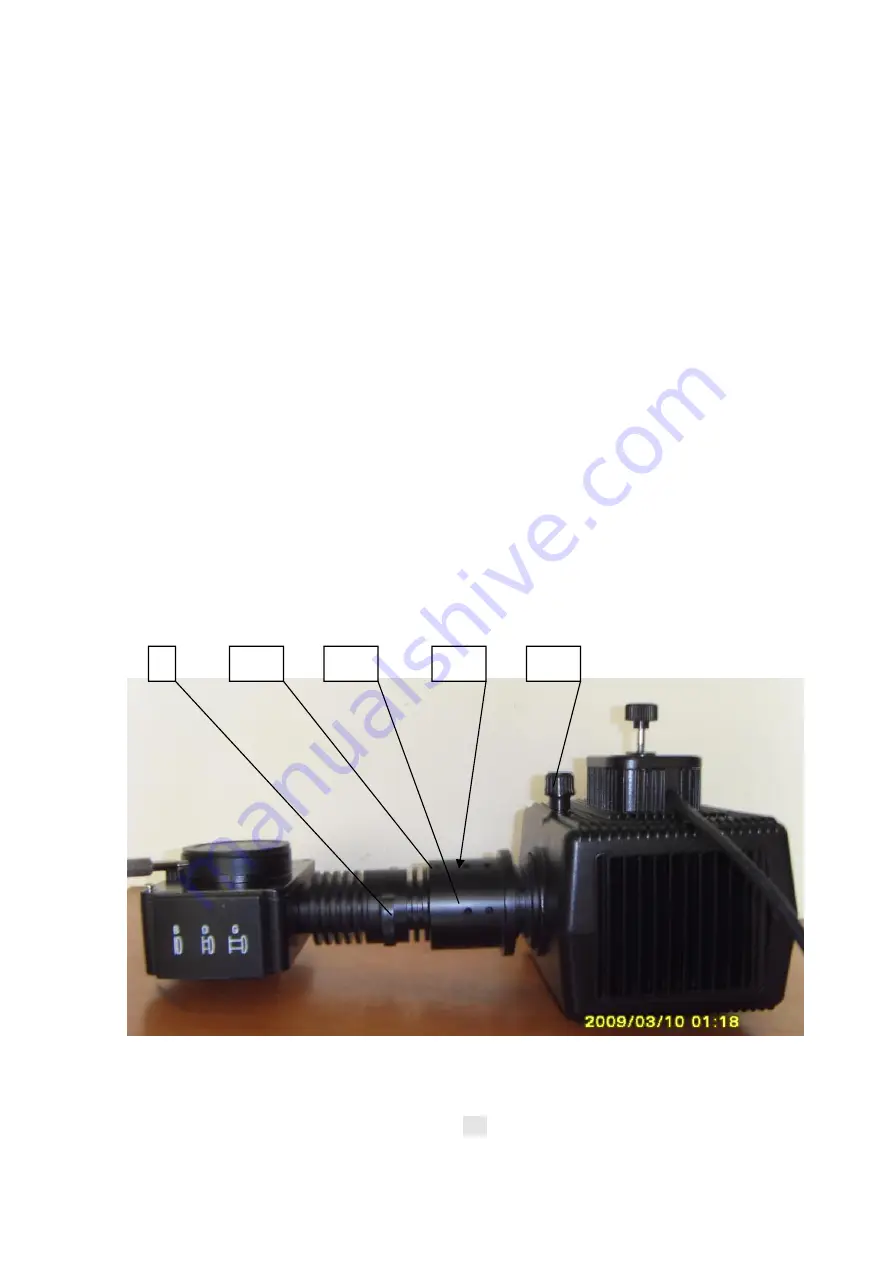
Usually, the lamp house in the Epi-fluorescence device (22) is vertical, showed in Fig.1. To suit

for some microscope body sometimes, it is necessary to readjust the lamp house horizontal by

yourself, showed as Fig.2. It is very easily: Loose 4 screws (23) remove the insulated pipe (24) to

the left and rotate it to find 3 screws through the cooling holes (25) and loose them. Then turn the

lamp house 90°and fix it with 3 screws. Finally replace the insulated pipe (24) and fix it with the

screws (23). Showed in Fig. 2 and Fig. 3

23. Screws to Fix the Insulated Pipe

24. Insulated Pipe

25. Cooling Holes

26. Focusing Rod for Condenser

Fig.2 Epi-fluorescence Device

Lamp house is turned 90°

P.2

23

24

25

26

6

Summary of Contents for DW-2002H

Page 1: ...EPI FLUORESCENT MICROSCOPE SERVICE MANUAL Read it carefully before operating and keep it with the microscope...

Page 2: ...oscope It is not only used for fluorescent microscopy observation but also used for general biological microscopy observation 2 No dismantle the equipment Unless you are a microscopic expert or there...

Page 3: ...the microscope otherwise it will damage the circuit and bulb even lead to insecurity 5 Protecting optical parts Never try to contact directly the optical surface of objectives eyepieces and other opt...

Page 4: ...Microscope P 2 C The Principle Function and Main Technical Parameters of the Fluorescence Microscope P 3 D How to Use the Fluorescence Microscope P 4 E Use Scope of the Fluorescent Filter P 5 F How t...

Page 5: ...let Bar 13 Fluorescent Objective 14 Microscope Body 15 Brightness Adjustor 16 Tension Guide Line 17 Switch 18 Accumulator 19 Power Supply Box 20 Ultraviolet Bar 21 Observation Window 22 Epi fluorescen...

Page 6: ...with soft cloth and gasoline promptly Remove the plastic cover away from the Epi fluorescence device 22 and install it on the microscope body 14 with the screw 11 Usually the lamp house in the Epi fl...

Page 7: ...the power supply box 19 and fix it 5 If the objectives are packed in plastic bottles please take them out and spin them in the nosepiece 6 Install the viewing head 3 on the Epi fluorescence device 22...

Page 8: ...lar head 1Set Eyepiece Wide field plane scope eyepiece WF10X 18 WF16X 13 1Pair each Objective Achromatic objective for fluorescence device 4X 10X 40X s 100X s oil 1Set Power supply box In AC90 254V Ou...

Page 9: ...lect the different spectrum range Pull the selector 5 out to the limiting position for G green light exciting state Push the selector 5 into the limiting position for B blue light exciting state Put t...

Page 10: ...nsequence Select appropriate lens Immersion oil produces the fluorescence Use special immersion oil The lamp in base is not turned off Turn off the lamp The lenses in collector reflect ambient light t...

Page 11: ...place Disconnect it with the power source and put the dust cover over it after using If it will be not used for a longer time it is the best way to screw the objectives out and place them into the le...

Reviews: