background image


Vigor2760 Series Quick Start Guide


1

1

1

.

.


I

I

n

n

t

t

r

r

o

o

d

d

u

u

c

c

t

t

i

i

o

o

n

n


The Vigor2760 series are the routers with high speed in data transmission 
through DSL port and LAN ports. 

With the development of NGN (Next Generation Network), you may 
recently hear the news about FTTx deployment in your local area or even 
have already subscribed the unbundling last mile service (e.g. VDSL2) from 
local ITSP for FTTx. As adopting FTTx, the main question for end users is 
whether your legacy router could fully utilize its bandwidth or not.   

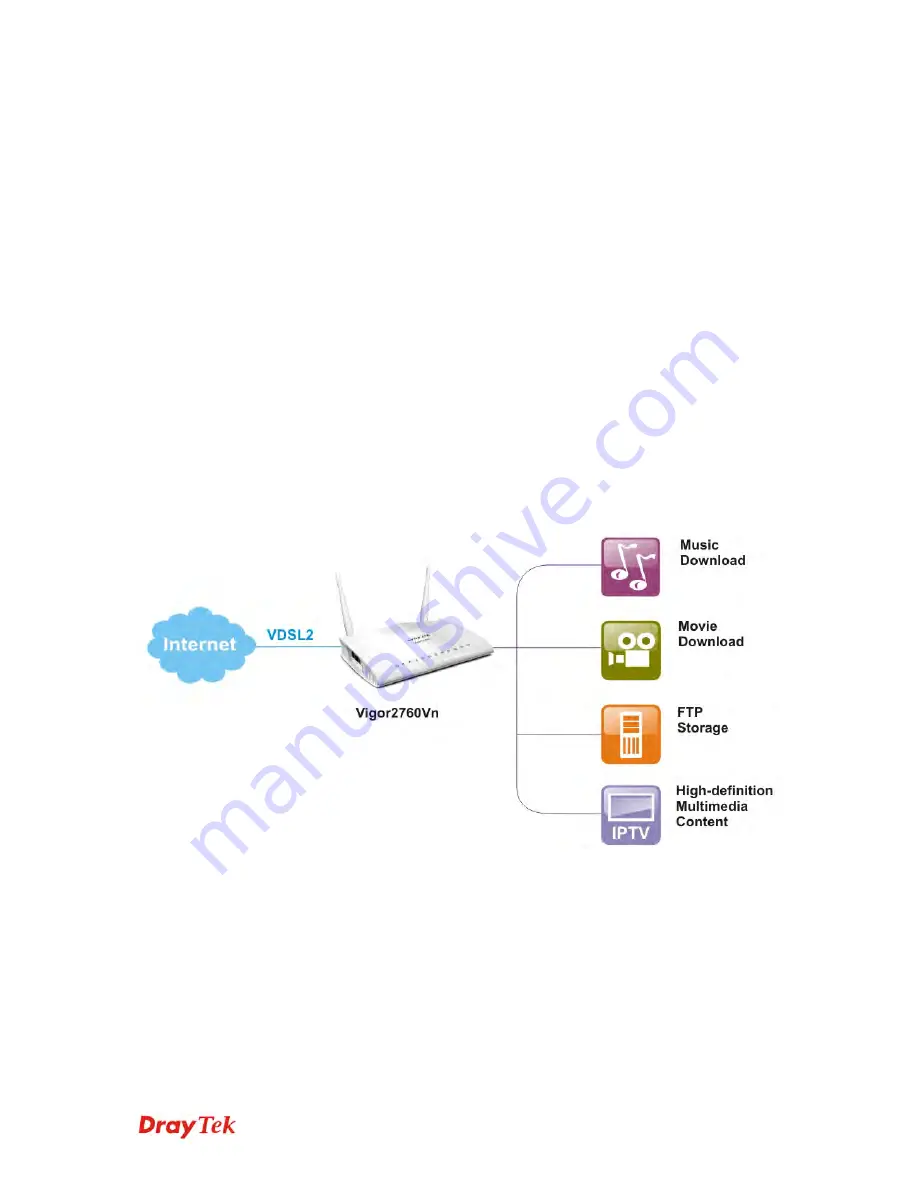
DrayTek launches Vigor2760 series – High speed router, perfectly complied 
with VDSL2 environment including Vigor2760, Vigor2760n and 
Vigor2760Vn for speed-wanted customers. With high throughput 
performance and secured broadband connectivity provided by Vigor2760 
series, you can simultaneously engage these bandwidth-intensive 
applications, such as high-definition video streaming, online gaming, and 
Internet telephony / access. 


Vigor2760 supports up to 2 VPN tunnels using advanced protocols such as 
IPSec/PPTP (for remote dial-in only) with AES/3DES for encryption and 
MD5/SHA-1 for authentication.   

Vigor2760 ‘n’ models comply with 802.11n standards. They support 
WEP/WPA/WPA2 encryption and MAC Address Control.   

Vigor2760 ‘V’ models provide two analogue phone connectors. It supports 
multiple SIP registrars with high flexible configuration and call handing 
options. 

Summary of Contents for Vigor 2760 Series

Page 1: ...Vigor2760 Series Quick Start Guide i ...

Page 2: ...Vigor2760 Series Quick Start Guide ii ...

Page 3: ...igor2760 Series Quick Start Guide iii Vigor2760 Series High Speed VDSL2 Router Quick Start Guide Version 1 03 Firmware Version V3 7 5 1 For future update please visit DrayTek web site Date August 15 2014 ...

Page 4: ......

Page 5: ...s on conservation of the environment Warranty We warrant to the original end user purchaser that the router will be free from any defects in workmanship or materials for a period of two 2 years from the date of purchase from the dealer Please keep your purchase receipt in a safe place as it serves as proof of date of purchase During the warranty period and upon proof of purchase should the product...

Page 6: ...ot occur in a particular installation If this equipment does cause harmful interference to radio or television reception which can be determined by turning the equipment off and on the user is encouraged to try to correct the interference by one of the following measures Reorient or relocate the receiving antenna Increase the separation between the equipment and receiver Connect the equipment into...

Page 7: ...guration Quick Start Wizard 20 3 2 1 For WAN1 ADSL VDSL2 22 3 2 2 For WAN2 Ethernet 26 3 2 3 For WAN3 USB 34 3 3 Wireless Configuration 36 3 3 1 Basic Wireless LAN Concept 36 3 3 2 Wireless Wizard 37 4 Trouble Shooting 39 4 1 Checking If the Hardware Status Is OK or Not 39 4 2 Checking If the Network Connection Settings on Your Computer Is OK or Not 40 4 3 Pinging the Router from Your Computer 43 ...

Page 8: ...Vigor2760 Series Quick Start Guide iv ...

Page 9: ...ly complied with VDSL2 environment including Vigor2760 Vigor2760n and Vigor2760Vn for speed wanted customers With high throughput performance and secured broadband connectivity provided by Vigor2760 series you can simultaneously engage these bandwidth intensive applications such as high definition video streaming online gaming and Internet telephony access Vigor2760 supports up to 2 VPN tunnels us...

Page 10: ...xp pl la an na at ti io on n 1 1 1 1 1 1 F Fo or r V Vi ig go or r2 27 76 60 0 LED Status Explanation Blinking The router is powered on and running normally ACT Off The router is powered off On The DSL port is connected Blinking Slowly The router is ready DSL Green Blinking Quickly The connection is training On The port is connected LAN1 2 3 4 Green Blinking Green The data is transmitting USB1 2 O...

Page 11: ...ter ACT LED is blinking Press the hole and keep for more than 5 seconds When you see the ACT LED begins to blink rapidly than usual release the button Then the router will restart with the factory default configuration VDSL ADSL Connector for accessing the Internet USB 1 2 Connector for USB storage device or printer or 3G backup LAN 1 4 Connectors for local network devices ...

Page 12: ...en The data is transmitting via wireless connection Blinking Orange Blinks with one second cycle for two minutes The WPS function is active Wireless LAN On Off WPS Off The wireless access point is turned off On The DSL port is connected Blinking Slowly The router is ready DSL Green Blinking Quickly The router is trying to connect to Internet On The port is connected LAN1 2 3 4 Blinking The data is...

Page 13: ...e the button Then the router will restart with the factory default configuration WLAN ON OFF WPS WLAN WPS Press this button for 2 seconds to wait for client device making network connection through WPS When the LED lights up the WPS connection will be on WLAN ON OFF Press the button once to enable WLAN LED on or disable WLAN LED off wireless connection VDSL ADSL Connector for accessing the Interne...

Page 14: ...ff The phone connected to this port is on hook Phone1 Phone2 Blinking A phone call comes On Green The wireless access point is ready Blinking Green The data is transmitting via wireless connection Blinking Orange Blinks with one second cycle for two minutes The WPS function is active Wireless LAN On Off WPS Off The wireless access point is turned off On The DSL port is connected Blinking Slowly Th...

Page 15: ...efault configuration WLAN ON OFF WPS WLAN WPS Press this button for 2 seconds to wait for client device making network connection through WPS When the LED lights up the WPS connection will be on WLAN ON OFF Press the button once to enable WLAN LED on or disable WLAN LED off wireless connection VDSL ADSL Connector for accessing the Internet USB 1 2 Connector for USB storage device or printer or 3G ...

Page 16: ...dapter Firmware Updates Firmware updates for your product ensure that you have the latest set of features security updates and improvements for your product Please note that if your Vigor 2760 product has firmware version 1 x x or earlier then it can only update to later 1 x x firmware If your Vigor 2760 has firmware version 3 7 5 or later Delight DrayOS hardware then you can upgrade to any compat...

Page 17: ...1 Connect the XDSL interface to the external XDSL splitter with an XDSL line cable for all models For Vigor2760Vn also connect Line interface to external XDSL splitter 2 Connect one port of 4 port switch to your computer with a RJ 45 cable This device allows you to connect 4 PCs directly 3 Connect Phone port to a conventional analog telephone for V model only 4 Connect detachable antennas to the r...

Page 18: ...Vigor2760 Series Quick Start Guide 10 For the detailed information of LED status please refer to section 1 1 ...

Page 19: ...this router can print documents via the router The example provided here is made based on Windows XP 2000 For Windows 98 SE Vista please visit www draytek com Before using it please follow the steps below to configure settings for connected computers or wireless clients 1 Connect the printer with the router through USB parallel port 2 Open All Programs Getting Started Devices and Printers ...

Page 20: ...ide 12 3 Click Add a printer 4 A dialog will appear Click Add a local printer and click Next 5 In this dialog choose Create a new port In the field of Type of port use the drop down list to select Standard TCP IP Port Then click Next ...

Page 21: ...uick Start Guide 13 6 In the following dialog type 192 168 1 1 router s LAN IP in the field of Hostname or IP Address and type 192 168 1 1 as the Port name Then click Next 7 Click Standard and choose Generic Network Card ...

Page 22: ...Now your system will ask you to choose right name of the printer that you installed onto the router Such step can make correct driver loaded onto your PC When you finish the selection click Next 9 Type a name for the chosen printer Click Next ...

Page 23: ...Vigor2760 Series Quick Start Guide 15 10 Choose Do not share this printer and click Next 11 Then in the following dialog click Finish ...

Page 24: ...t Guide 16 12 The new printer has been added and displayed under Printers and Faxes Click the new printer icon and click Printer server properties 13 Edit the property of the new printer you have added by clicking Configure Port ...

Page 25: ...tocol type p1 number 1 as Queue Name Then click OK Next please refer to the red rectangle for choosing the correct protocol and LPR name The printer can be used for printing now Most of the printers with different manufacturers are compatible with vigor router ...

Page 26: ...re not supported If you do not know whether your printer is supported or not please visit www draytek com to find out the printer list Open Support FAQ Application Notes find out the link of USB Printer Server and click it Note 2 Vigor router supports printing request from computers via LAN ports but not DSL port ...

Page 27: ...cally from the router or set up the IP address of the computer to be the same subnet as the default IP address of Vigor router 192 168 1 1 For the detailed information please refer to the later section Trouble Shooting of the guide 2 Open a web browser on your PC and type http 192 168 1 1 3 The following window will be open to ask for username and password Please type admin admin on Username Passw...

Page 28: ...ge slightly in accordance with the router model you have 3 3 2 2 B Ba as si ic c C Co on nf fi ig gu ur ra at ti io on n Q Qu ui ic ck k S St ta ar rt t W Wi iz za ar rd d The Quick Start Wizard is designed for you to easily set up your router for Internet access ...

Page 29: ...ow please select the WAN interface that you use If DSL interface is used please choose WAN1 if Ethernet interface is used please choose WAN2 if 3G 4G USB modem is used please choose WAN3 Then click Next for next step WAN1 WAN2 and WAN3 will bring up different configuration page Refer to the following for detailed information ...

Page 30: ...nnection Click Next to go to the following page You have to select the appropriate Internet access type according to the information from your ISP For example you should select PPPoE mode if the ISP provides you PPPoE interface In addition the field of For ADSL Only will be available only when ADSL is detected Then click Next for next step ...

Page 31: ...2760 Series Quick Start Guide 23 P PP PP Po oE E P PP PP Po oA A 1 Choose WAN1 as WAN Interface and click the Next button you will get the following page 2 After finished the above settings simply click Next ...

Page 32: ...y of such connection 4 Click Finish A page of Quick Start Wizard Setup OK will appear Then the system status of this protocol will be shown 5 Now you can enjoy surfing on the Internet M MP Po oA A S St ta at ti ic c o or r D Dy yn na am mi ic c I IP P 1 Choose WAN1 as WAN Interface and click the Next button you will get the following page ...

Page 33: ...ask gateway information originally provided by your ISP Then click Next for viewing summary of such connection 3 Click Finish A page of Quick Start Wizard Setup OK will appear Then the system status of this protocol will be shown 4 Now you can enjoy surfing on the Internet ...

Page 34: ...n click Next On the next page as shown below please select the appropriate Internet access type according to the information from your ISP For example you should select PPPoE mode if the ISP provides you PPPoE interface Then click Next for next step P PP PP Po oE E 1 Choose WAN2 as the WAN Interface and click the Next button The following page will be open for you to specify Internet Access Type ...

Page 35: ...xt to continue 3 Please manually enter the Username Password provided by your ISP Click Next for viewing summary of such connection 4 Click Finish A page of Quick Start Wizard Setup OK will appear Then the system status of this protocol will be shown 5 Now you can enjoy surfing on the Internet ...

Page 36: ...art Guide 28 P PP PT TP P 1 Choose WAN2 as the WAN Interface and click the Next button The following page will be open for you to specify Internet Access Type 2 Click PPTP as the Internet Access Type Then click Next to continue ...

Page 37: ...ask gateway information originally provided by your ISP Then click Next for viewing summary of such connection 4 Click Finish A page of Quick Start Wizard Setup OK will appear Then the system status of this protocol will be shown 5 Now you can enjoy surfing on the Internet ...

Page 38: ...30 S St ta at ti ic c I IP P 1 Choose WAN2 as the WAN Interface and click the Next button The following page will be open for you to specify Internet Access Type 2 Click Static IP as the Internet Access type Simply click Next to continue ...

Page 39: ...in the IP address information originally provided by your ISP Then click Next for next step 4 Click Finish A page of Quick Start Wizard Setup OK will appear Then the system status of this protocol will be shown 5 Now you can enjoy surfing on the Internet ...

Page 40: ...tart Guide 32 D DH HC CP P 1 Choose WAN2 as WAN Interface and click the Next button The following page will be open for you to specify Internet Access Type 2 Click DHCP as the Internet Access type Simply click Next to continue ...

Page 41: ...ter finished the settings above click Next for viewing summary of such connection 4 Click Finish A page of Quick Start Wizard Setup OK will appear Then the system status of this protocol will be shown 5 Now you can enjoy surfing on the Internet ...

Page 42: ...edicated to physical mode in USB If WAN3 is selected it is not necessary for you to type any information for such connection 1 Choose WAN3 as WAN Interface 2 Then click Next for getting the following page Choose 3G 4G USB Modem PPP mode or 4G USB Modem DHCP mode according to the modem you use ...

Page 43: ... Guide 35 3 Then click Next for viewing summary of such connection 4 Click Finish A page of Quick Start Wizard Setup OK will appear Then the system status of this protocol will be shown 5 Now you can enjoy surfing on the Internet ...

Page 44: ...owing section carefully for configuring the settings for this router The default value of Frequency Domain was set by factory depends on the reselling region 3 3 3 3 1 1 B Ba as si ic c W Wi ir re el le es ss s L LA AN N C Co on nc ce ep pt t In an Infrastructure Mode of wireless network Vigor wireless router plays a role as an Access Point AP connecting to lots of wireless clients or Stations STA...

Page 45: ...ure settings specified for a host AP for home use or internal use for a company and specified for a guest AP for any wireless clients accessing into Internet Follow the steps listed below 1 Open Wireless Wizard 2 The screen of wireless wizard will be shown as follows This page will be used for internal users in a company or your home ...

Page 46: ... Next The settings in the page limit the wireless station guest accessing into Internet but not being allowed to share the LAN network and VPN connection 4 After typing the required information click Next 5 The following page will display the configuration summary for wireless setting ...

Page 47: ...Backing to factory default setting if necessary If all above stages are done and the router still cannot run normally it is the time for you to contact your dealer for advanced help 4 4 1 1 C Ch he ec ck ki in ng g I If f t th he e H Ha ar rd dw wa ar re e S St ta at tu us s I Is s O OK K o or r N No ot t Follow the steps below to verify the hardware status 1 Check the power line and LAN cable con...

Page 48: ...the link is stilled failed please do the steps listed below to make sure the network connection settings is OK F Fo or r W Wi in nd do ow ws s The example is based on Windows XP As to the examples for other operation systems please refer to the similar steps or find support notes in www draytek com 1 Open All Programs Getting Started Control Panel Click Network and Sharing Center 2 In the followin...

Page 49: ...2760 Series Quick Start Guide 41 4 Select Internet Protocol Version 4 TCP IP and then click Properties 5 Select Obtain an IP address automatically and Obtain DNS server address automatically Finally click OK ...

Page 50: ...t Guide 42 F Fo or r M Ma ac c O OS S 1 Double click on the current used Mac OS on the desktop 2 Open the Application folder and get into Network 3 On the Network screen select Using DHCP from the drop down list of Configure IPv4 ...

Page 51: ...outer correctly F Fo or r W Wi in nd do ow ws s 1 Open the Command Prompt window from Start menu Run 2 Type command for Windows 95 98 ME or cmd for Windows NT 2000 XP Vista 7 The DOS command dialog will appear 3 Type ping 192 168 1 1 and press Enter If the link is OK the line of Reply from 192 168 1 1 bytes 32 time 1ms TTL 255 will appear 4 If the line does not appear please check the IP address s...

Page 52: ...erting 3G USB Modem into your Vigor2760 Later the USB LED will light on which means the installation of USB Modem is successful If the USB LED does not light on please remove and reinsert the modem again If it still fails restart Vigor2760 U US SB B L LE ED D l li ig gh ht ts s o on n b bu ut t t th he e n ne et tw wo or rk k c co on nn ne ec ct ti io on n d do oe es s n no ot t w wo or rk k Check...

Page 53: ...e modem indoors please put it on the place near the window to obtain better signal receiving 4 4 6 6 B Ba ac ck ki in ng g t to o F Fa ac ct to or ry y D De ef fa au ul lt t S Se et tt ti in ng g I If f N Ne ec ce es ss sa ar ry y Sometimes a wrong connection can be improved by returning to the default settings Try to reset the router by software or hardware Warning After pressing factory default ...

Page 54: ...ry Reset button and hold for more than 5 seconds When you see the ACT LED blinks rapidly please release the button Then the router will restart with the default configuration After restore the factory default setting you can configure the settings for the router again to fit your personal request 4 4 7 7 C Co on nt ta ac ct ti in ng g D Dr ra ay yT Te ek k If the router still cannot work correctly...

Reviews: