background image

7-14

System Management

7.4 Reboot System

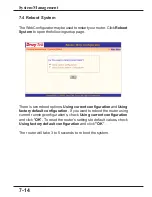
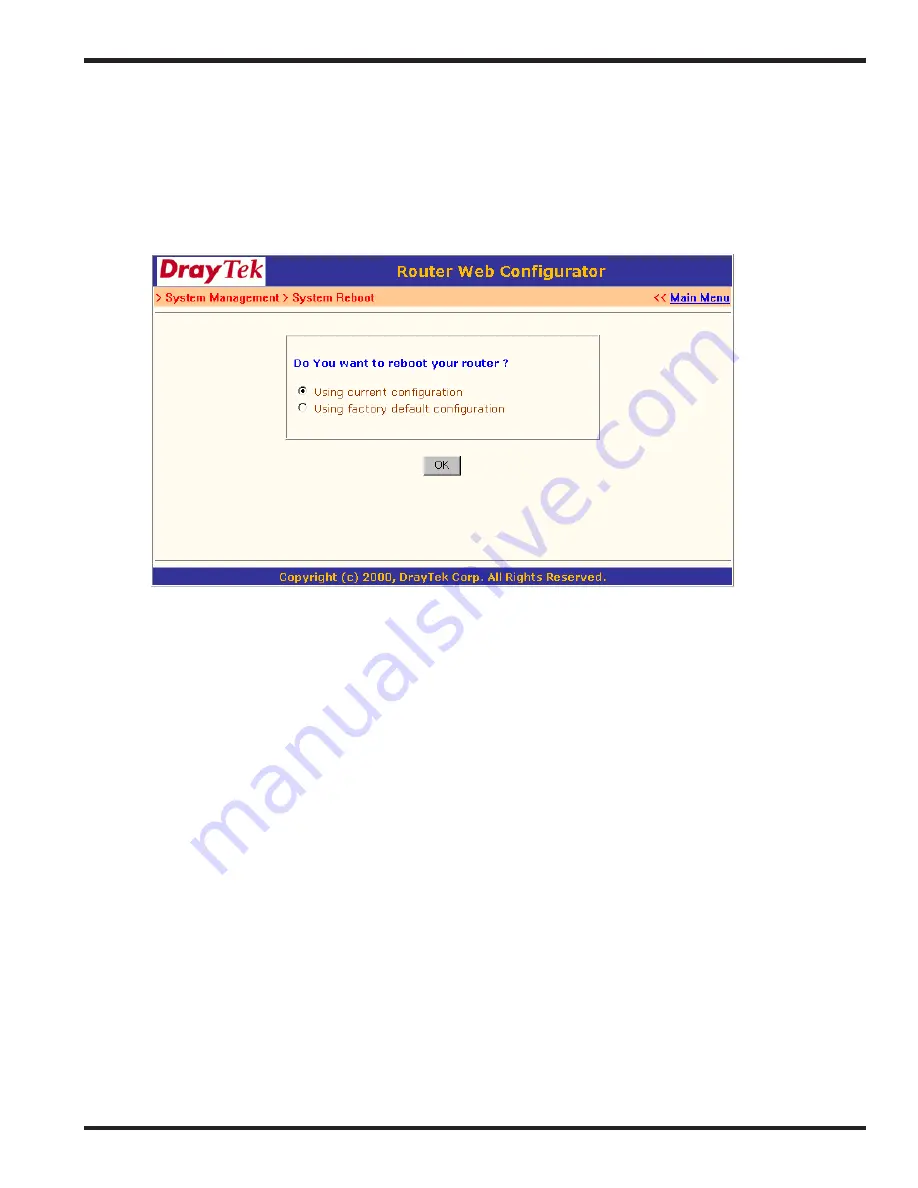
The Web Configurator may be used to restart your router.  Click 

Reboot

System

 to open the following setup page.

There is two reboot options: 

Using current configuration

 and 

Using

factory default configuration

.  If you want to reboot the router using

current running configurations, check 

Using current configuration

and click "

OK

"

.

  To reset the router's settings to default values, check

Using factory default configuration

 and click 

"OK

".

The router will take 3 to 5 seconds to reboot the system.

Summary of Contents for Vigor2000

Page 1: ...European Community Declarations 0 4 1 Getting Started 1 1 1 1 Introduction 1 2 1 2 Unpacking your Vigor2000 Router 1 3 1 3 LED Indicators Rear Panels 1 4 1 4 Key Features 1 7 2 Installation Setup 2 1 2 1 Before you Begin 2 2 2 2 Hardware Installation 2 4 2 3 Setting up a Management PC 2 7 2 4 Using the Smart Start Wizard 2 13 2 5 Using the Web Configurator 2 18 Table of Contents ...

Page 2: ...4 RemoteAccess 4 1 4 1 Introduction to RemoteAccess 4 3 4 2 RemoteDial inAccess 4 3 4 3 LAN to LANAccess 4 7 5 Advanced Setup 5 1 5 1 Enabling the Remote Activation Function 5 3 5 2 Call Control Setup 5 4 5 3 Configuring the BOD Parameters 5 5 5 4 NAT Setup 5 7 5 5 IP Filter Firewall Setup 5 10 6 Virtual TAApplication 6 1 6 1 Virtual TAConcepts 6 2 6 2 Installing a Virtual TAClient 6 4 ...

Page 3: ...us 7 3 7 2 Management Setup 7 5 7 3Diagnostic Tools 7 7 7 4 Reboot System 7 14 7 5 Firmware Upgrade 7 15 8 Troubleshooting FAQ 8 1 8 1 Using the Telnet Terminal Commands 8 2 8 2 Viewing Call Logs 8 4 8 3 Viewing ISDN Logs 8 6 8 4 Viewing PPP Logs 8 7 8 5 Viewing WAN Logs 8 8 8 6 FAQs 8 9 ...

Page 4: ...0 1 0 Preface 0 1 About This Manual 0 2 Copyright Declarations 0 3 Trademarks 0 4 How To Become A Registered Owner 0 5 Safety Instructions 0 6 Warranty 0 7 European Community Declarations ...

Page 5: ...information that is protected by copyright No part may be reproduced transmitted transcribed stored in a retrieval system or translated into any language without writ ten permission from the copyright holders 0 3 Trademarks Microsoft is a registered trademark of Microsoft Corp Windows Windows 95 98 Me NT and 2000 are trademarks of Microsoft Corp Other trademarks and registered trademarks of produc...

Page 6: ...g out of reach of children When you want to dispose the router please follow local regulations on conservation of the environment We warrant to the original end user purchaser thattheVigor2000 Routers will be free from any defects in workmanship or materials for a period of two 2 years from the date of purchase from the dealer Please keep your purchase receipt in a safe place as it serves as proof...

Page 7: ...the usability of the product will not be covered by the warranty We reserve the right to revise the manual and online documen tation and to make changes from time to time in the contents hereby without obligation to notify any person of such revision or changes 0 7 European Community Declarations The Vigor2000 Routers have been approved for connection to the Public Switched Telecommunication Netwo...

Page 8: ...1 1 1 Getting Started 1 1 Introduction 1 2 Unpacking Your Vigor2000 Router 1 3 Front Panel Rear Panel Descriptions 1 4 Key Features ...

Page 9: ... security for network management The broadband access protocol supports PPPoE PPTP and Static IP These protocols comply with worldwide Ethernet basedDSL Cable Modem standards For traditional ISDN users the Vigor2000 Router features a built in Virtual TA Remote CAPI server which operates as a CAPI based ISDNTAfor LANusers To run FAX transmission or data transfer serv ices users need to install a Vi...

Page 10: ... including User Manual in electronic form latest released firmware and utilities One RJ 45 ISDNtelephone cable black OneAC AC power adapter black One Console cable gray One RJ45 to RS232 9 pin converter for console cable One Ethernet LAN cable blue for connection to a computer or hub Dimensions cm of Vigor2000 Router 21 8 L x 15 8 W x 3 6 H Weight 399 grams Maximum Power 10W PowerAdapter AC adapte...

Page 11: ...Panel Descriptions Vigor2000 Router Front Panel Description LED Indicators There are eleven LEDs on the front panel includingACT LNK B1 B2 COL and P1 P6 ACT Activity BLINK when power is supplied to the router and the router is running normally ...

Page 12: ...1 ON when there is successful remote connection on the ISDN BRI B1 channel B2 ON when there is successful remote connection on the ISDN BRI B2 channel LAN Group Col Collision BLINK when there is collision of packets within the Ethernet P1 P6 ONwhen the computer is connected and has no packet transmission going BLINK when packets are sending receiving through hub or connected computer Rear Panel De...

Page 13: ... another hub LAN P1 P2 P3 P4 P5 P6 These switch ports should be connected to your local PCs CONSOLE Connects to the computer you want to use to configure Vigor2000 Router ISDN Varied by Router Model For S T Interface Router Model Connects to a NT1 box provided by your ISDNservice provider For U Interface Router Model If your ISDNservice provider does not provide the NT1 box or your ISP provides ID...

Page 14: ...Virtual TA Server VTA The terminology Virtual TA means the Vigor2000 can operate as traditional ISDN TA to transmit and receivedata FAX andvoicetransmissionsviathird partysoftwarerunning on a desktop computer In fact a virtual TAserver works as a network TA to exchange packets between an ISDN BRI and an Ethernet LAN Therefore desktop computers can use the ISDN line resource via an Ethernet LAN In ...

Page 15: ...n management and troubleshooting 9 Dynamic Host Configuration Protocol DHCP Server The server provides an easy to configure function for your local IP network It can automatically assign IP network configurations for local PCs such as IP address IP netmask gateway IP address andDomainName server etc 10 Built in Flash ROM The Flash ROM memory saves the router firmware and configurations even after ...

Page 16: ...nother powerful firewall to protect your local network or to deny specified local users access to unauthorized network services 15 Bandwidth on Demand BOD for ISDN Interface As the ISDN BRI interface has two independent B channels the BOD mechanism allows you to automatically add drop a B channel according to data traffic throughput 16 Remote Management The system manager can remotely manage the r...

Page 17: ...2 1 2 Installation Setup 2 1 Before you Begin 2 2 Hardware Installation 2 3 Setting up a Management PC 2 4 Using the Smart Start Wizard 2 5 Using the Web Configurator ...

Page 18: ...ency unplug the power adapter first 4 Locate the device in a clean location Do not block the ventilating slots on the rear panel 5 Cables must be attached to the correct ports to do otherwise may result in damage to the router Keep cables away from walkways 6 If you use S T interface do not extend the ISDN line greater than 100 meters from the NT 1 NT 1 plus box and the router 7 If you use DSL Cab...

Page 19: ... IP Address empty Secondary IP Address empty Web Configurator Username admin Password blank Note Blank means no password required Telnet Console Password blank Note Blank means no password required Management from the Internet Not allowed Virtual TA Server Enabled Remote Dial In Server Disable IP Address Assignment for Dial In User 192 168 1 200 ...

Page 20: ...he Ethernet cable to your PCs installed network interface card NIC 3 The LED indicators at both the Ethernet port and the NIC should be ON 4 Attach the Console cable to Console port 5 Connect the other end of the Console cable to the Management PC p6 p23 you want to use to configure the Vigor2000 Router Note If the Ethernet cable is not long enough to reach your PCs purchase a longer straight thro...

Page 21: ...nectors on the cable into the ISDN port on the rear panel of the router 3 Plug the other end of the cable into any of theNT 1 orNT1 plus S T interface ports B U Interface Model 1 Locate the ISDN cable black color cable 2 Plug one of the RJ 45 connectors on the cable into the ISDN port on the rear panel of the router 3 Plug the other end of the cable into the ISDN wall outlet 2 2 4 Connecting to a ...

Page 22: ... hardware installation is now complete The following sections will guide you through setting up your management PC and connecting to the Web Configurator The Web Configurator is a management utility that han dles all configuration and provides web based management Note modem 2 Plug the other end of the cable into the P1 P6 port ...

Page 23: ...etwork settings The DHCP server implanted in the router is enabled by default so the PC will then be assigned an IP address and related settings by the router The following examples are for a MicrosoftTM Windows 95 98 machine set to use a dynamic IP address For other operating systems please refer to the OS user manuals 2 3 1 Checking the Network IP Configuration The following explains how to setu...

Page 24: ...nd install the card and drivers If your have installed the NIC card 1 Click the Add button The Select Network Component Type dialog box will open This box has four options Client Adapter Protocol Service 2 Select Protocol and click the Add button The Select Net work Protocol dialog box will open 3 Select Microsoft in the left scrolling window then select TCP IP on the right and click OK It will re...

Page 25: ...CP IP Properties dialog box will open 2 On the IP Address tab click Obtain an IP address automatically As the DHCP Dynamic Host Configuration Proto col server built into the router is enabled by default your computer will get an IP address subnet mask and other related IP network settings from the router 3 On the DNS Configuration tab click Disable DNS ...

Page 26: ...2 10 Installation Setup 4 Click the Gateway tab ...

Page 27: ... 192 168 1 2 to 192 168 1 254 range click the Release button to release the current configuration Wait a few seconds and click Renew to get a new IP configuration from the router 2 If the IP configuration is correct you will be able to use the PING diagnostic utility built in Microsoft Windows to ping the router Click Start Programs MS DOS Prompt A command mode window will open Type ping 192 168 1...

Page 28: ...2 12 Installation Setup on the next page If not verify that the Ethernet cable is connected to the router properly and the Ethernet port LED on the front panel is lit ...

Page 29: ...Netscape Communicator etc or telnet client software you may jump directly to the next section We suggest you use the most up to date version of your web browser Installing the Router Tools 1 Insert the CD supplied with the router into the CD ROM drive The auto run CD will display the main menu Note If auto run fails to start the installation program click autostart exe on the root directory of the...

Page 30: ...ollowing screen will open 2 Click Search to find the router on your network 3 Click OK to go to the login password screen 4 If this is the first time you setup the router do not enter any password Click OK to go to the next screen ...

Page 31: ...nd also the IP Address and IP Mask settings for the router Here you may change the settings of the router to match your current network environment or keep the default settings 5 Click Next to update the settings of the router 6 Wait for a few seconds The Telnet and the Browser will be clear see below ...

Page 32: ...s IP address using winipcfg exe on Windows95 98 ME or ipconfig exe on Windows NT 2000 As the browser has been launched the following pop up window will ask for User Name and Password Enter admin as the User Name and leave the Password field blank The Web Configurator will open In the following examples we use the NetscapeTM web browser ...

Page 33: ...2 17 Installation Setup ...

Page 34: ...browser Address window and press the Enter key 2 An authentication dialog box will open 3 If this is the first time you setup the router type admin as the User Name and leave the Password field blank Click OK 4 The Web Configurator Setup Main Menu will open On the main page Model Firmware Version Build Date Time and LAN MAC Hardware Address information will be displayed ...

Page 35: ...a sic Setup Setup First Quick Setup Advanced Setup and Sys tem Management The following will describe the outline for each configuration menu Basic Setup Setup First 1 Administrator Password Setup Sets changes the administrator password 2 Ethernet TCP IP and DHCP Setup Modifies the router s IP address and DHCP server settings ...

Page 36: ...emote access or LAN to LANremote access settings are made here 3 Virtual TA Remote CAPI Setup Use this menu to create a Virtual TA user account and enable disable the built in Virtual TA server Advanced Setup The following settings are for advanced configurations only These items do not need to be configured for standard Internet access 1 Call Control and PPP MP Setup Sets bandwidth on demand BOD ...

Page 37: ...nt from last setup menu Here up to 16 LANto LAN profiles can be set for access to up to 16 remote networks via an ISDN line These profiles have dial out dial in static route functions 6 IP Filter Firewall Setup The router has a powerful built in firewall Up to 84 Call Filter and Data Filter rules may be set System Management 1 Online Status Click this item to view the current online status and sta...

Page 38: ...d packet etc 4 Reboot System You can restart the router with the default configuration or with the current running configuration 5 Firmware Upgrade TFTP Server Enables the TFTP server for firmware upgrades Note You should now have some basic concepts on how to setup and configure the router The following chapters will explain each setup menu and related settings in more detail ...

Page 39: ...3 1 3 Basic Setup Internet Access 3 1 Basic Setup 3 2 Internet Access Setup 3 3 ISDN Dial up Internet Access 3 4 IDSL Leased Line 3 5 DSL Cable Modem Internet Access ...

Page 40: ...group includes Administrator Password Setup Ethernet TCP IP and DHCP Setup and ISDN Setup 3 1 1 Changing the Administrator Password On first setup the router requires no password However for security reasons we strongly recommend that you set an administrator pass word for the router If you do not set a password for the router any user can access the setting of the router and make changes randomly...

Page 41: ...dress netmask is for public users or pure router not NAT user To allow access of public users you need to subscribe a globally reachable subnet from your ISP For example for some ISDN dial up access the ISP will assign a few public IP addresses for your local network usage You could use one IP address for your router the 2nd IP address netmask should be configured using the public IP address Other...

Page 42: ... For IP Routing Usage Default Disable Enable Enable the 2nd IP address settings Disable Disable the 2nd IP address settings 2nd IP Address Set a public IP address 2nd Subnet Mask Set a netmask for the public IP address DHCP Server Configuration DHCP stands for Dynamic Host Configuration Protocol It can auto matically dispatch related IP settings to any local user configured as a DHCP client The DH...

Page 43: ...as www yahoo com TheDNS server converts this name into its equivalent IP address Primary IP Address Set the IP address of the primary DNS server Secondary IP Address Set the IP address of the secondary DNS server Note If you leave both Primary IP and Secondary IP Address fields blank the router will assign its own IP address to local users as a DNS proxy server and maintain a DNS cache If the IP a...

Page 44: ...you called MSN Numbers for the Router MSNNumbers means that the router is able to accept number matched incoming calls In addition local ISDN network provider shoud support MSN service The router provides three MSN number fields Note that MSN services must be subscribed from your local telecom By default MSN function is disabled i e leave the MSN number fields blank under which all incoming calls ...

Page 45: ...ng setup page will be shown Six methods are available for Internet Access Dialing to Single ISP If you want to access the Internet via a single ISP click here Dialing to Dual ISP If you have more than one ISP click here to set up two ISP dialup profiles You will be able to dial to both ISPs at the same time This is mainly for those ISPs who do not support Multiple link PPP ML PPP In such cases dia...

Page 46: ... special DSL modem e g Alcatel s DSL modem This kind of modem only supports the PPTP tunnel method to access the Internet In these cases you create a PPTP tunnel that carries a PPP session and terminates on the DSL modem Once the tunnel has been established this kind of DSL modem will forward the PPP session to the ISP As long as the PPP session is connected all the local users will be able to sha...

Page 47: ...er provided by your ISP Username Enter the username provided by your ISP Password Enter the password provided by your ISP Require ISP Callback CBCP If your ISP supports the callback function check Require ISP Callback CBCP to enable the Callback Control Protocol during PPP negotiations PPP MP Setup Link type There are four link types Link Disable Disable the ISDN dial out function ...

Page 48: ...on to use the PAP protocol to negotiate the username and password with the ISP PAP or CHAP Set the PPP session to use the PAP or CHAP protocols to negotiate the username and password with the ISP Idle Timeout Idle timeout means the router will disconnect after being idle for a preset amount of time The default is 180 seconds If you set the time to 0 the ISDN connection will remain always connected...

Page 49: ... 3 2 Connecting to Dual ISPs Most configuration parameters are the same as last section This page provides an Enable Dual ISPs Function check box and adds a secondary ISP Setup section Check the box and enter the second ISP information ...

Page 50: ... Internet Service Provider Name Username Enter the username obtained from your ISP provider Password Enter the password obtained from your ISP provider PPP MP Setup Link Type you have three selections Link Disable Disable the IDSL link Leased 64Kbps Use one B channel for Internet access Leased 128Kbps ...

Page 51: ...AP Sets the PPP session to use the PAP or CHAP protocols to negotiate the username and password with the ISP IP Address Assignment Method ICPC Fixed IP and Fixed IP Address In most environments you should not change the default set tings as most ISPs provide a dynamic IP address for the router when it connects to the ISP If your ISP provides a fixed IP address check Yes and enter the assigned IP a...

Page 52: ... will get a DSL Cable modem from the broadband access service provider The router is connected behind the broadband device and works as a NAT or IP router for broadband and ISDNconnections In addition to broadband access capabilities the ISDN port can do dial backup or provide remote access and remote management functions to support more flexible network connectivity The following ap plication sce...

Page 53: ...3 15 Basic Setup Internet Access 3 5 1 Using PPPoE with a DSL Modem Click Internet Access Setup PPPoE to enter the setup page ...

Page 54: ... Setup PPP Authentication Select PAP or CHAP for widest compatibility Idle Timeout Idle timeout means the router will disconnect after being idle for a preset amount of time The default is 180 seconds If you set the time to 0 the PPP session will not terminate itself Fixed IP Check No Dynamic IP unless your ISP has pro vided you with a static IP address Fixed IPAddress If your ISP has provided you...

Page 55: ...he IP address of the PPTP enabledDSL Cable modem Refer to the user manual of the PPTP enabledDSL Cable modem Click Internet Access Setup PPTP to enter the setup page The following setup page is just for example Your DSL Cable service provide should provide the exact settings ISP Access Setup ISP Name Enter the ISP name Username Enter the ISP supplied username Password Enter the ISP supplied passwo...

Page 56: ...ssion will not terminate itself Fixed IP Check No Dynamic IP unless your ISP has pro vided you with a static IP address Fixed IP Address If your ISP has provided you with a static IP address enter it here 3 5 3 Using a Static IP with a DSL Cable Modem Select this access mode if you receive a fixed public IP address or a public subnet from yourDSL or Cable ISP In most cases a Cable ISP will provide...

Page 57: ...3 19 Basic Setup Internet Access Click Internet Access Setup Static IP to enter the setup page Access Control Broadband Access Select Enable to turn on the broadband access capability ...

Page 58: ...address or the fixed IP gateway IPaddress ISDN Dial Backup Setup Dial Backup Mode Select None to disable this feature or select Packet Trigger to activate this feature refer to 3 5 4 Note The router should be restarted to allow the settings to take effect 3 5 4 Configuring ISDN Dial Backup ISDN Dial Backup Setup ...

Page 59: ...er to establish a connection Always On If the broadband connection is no longer available the backup line will automatically connect and stayAlways On until the broadband connection is recovered To start ISDN Dial Backup function you must create a dial backup profile Click Internet Access Setup Dialing to a Single ISP to setup the backup profile Refer to section 3 3 1 for details ...

Page 60: ...4 1 4 Remote Access 4 1 Introduction to Remote Access 4 2 Remote Dial in Access 4 3 LAN to LAN Access ...

Page 61: ...abilities of remote access of the Vigor2000 Router Use the following setup links on the Setup Main Menu to setup remote access functions Quick Setup Remote Dial In Access Setup Advanced Setup Remote Dial In User Setup LAN to LAN Dialer Profile Setup ...

Page 62: ... resources of the local network or to surf the Internet via a broadband device The other remote access function LAN to LAN Access provides a solution to connect two independent LANs for mutual sharing of network resources For ex ample the head office network can access the branch office network and vice versa 4 2 Remote Dial In Access 4 2 1 Activating Remote Dial In In the Quick Setup group of the...

Page 63: ...is only if the connecting router requires mutual authentication By default the option is set to No IP Address Assignment for Dial In Users Start IP Address Enter a start IP address to be assigned to the dial in PPP connection You should choose an IP address from the local private network For example if the local private network is 192 168 1 0 255 255 255 0 you can choose 192 168 1 200 to be the St...

Page 64: ...clear all dial in user ac counts Index Click one of the index numbers to open an individual setup page and enter the detail setting for each account Dial In Username The means the access account has not set up yet If an access account has been configured the username will be shown Status The symbol v means the account is active x means inac tive Click the index number of an account to open an indi...

Page 65: ...connection has been idled longer than the time limit the router will drop the connection Click to enable CLID authentication For extra security enables the option to allow the dial in user to call only from a specific number CLID stands for Calling Line Identification Peer ISDN Number If CLIDauthentication has been enabled enter the dial in user s ISDNnumber Callback Function The callback function...

Page 66: ...ber Callback Number If the previous option has been enabled enter the dial in user s ISDN line number here Click to enable Callback Budget Control Enable the callback budget control Callback Budget Unit minutes By default the callback function has a 30 minutes time restriction The budget will be decreased automatically per callback connection Once the callback budget has been exhausted the callbac...

Page 67: ... n a r B D I k r o w t e N 4 2 0 1 8 6 1 2 9 1 4 2 0 2 8 6 1 2 9 1 k s a m t e n s s e r d d a P I r e t u o R 4 2 1 1 8 6 1 2 9 1 4 2 1 2 8 6 1 2 9 1 n o i t c e n n o c n i l a i d r o f P I d e n g i s s A 0 0 2 1 8 6 1 2 9 1 0 0 2 2 8 6 1 2 9 1 t n u o c c A s s e c c A d a e h N U d a e h W P h c n a r b N U h c n a r b W P r e b m u n e n i l N D S I 0 0 0 1 0 0 0 2 n o i t c n u F k c a b l...

Page 68: ...4 9 Remote Access Head Office The IP range of the Head Office network is 192 168 1 0 24 the settings should be as below Dial In Service Enable Start IP Address 192 168 1 200 ...

Page 69: ...ngs should be as below Dial In Service Enable Start IP Address 192 168 2 200 4 3 2 Creating a LAN to LAN Dialer Profile After enabling the Dial in service you must create a LAN to LAN pro file for each network From the Advance Setup menu click LAN to LAN Dialer Profile to enter the setup page as below ...

Page 70: ... profiles Index Click a number in the Index to open a detailed settings page for each profile Name Indicate the name of the LAN to LAN profile The symbol means the profile is available Status Indicate the status of the individual profiles The symbol v means the profile is active and x means it is inactive Click an index number to open an individual LAN to LAN profile settings page ...

Page 71: ...ttings Dial In Settings and TCP IPNetwork Settings The following will explain every subgroup in detail Common Settings Profile Name Specify a name for the remote network Enable this profile Check here to activate this profile Call Direction Specify the allowed call direction for this profile ...

Page 72: ...stination ISDN number for dialup Link Type Indicate the dial out link type Disable Deactivate the dial out action 64kbps Specify the outgoing connection speed is restricted to 64kbps one B channel 128k bps Specify the outgoing connection speed is 128kbps two B channels BOD Specify the link type to be dynamic bandwidth control Bandwidth on Demand PPP Authentication Specify the authentication method...

Page 73: ...nable CLID Authentication Limit the dial in router to be called from a specific ISDN number Peer ISDN Number If CLIDAuthentication is enabled enter the remote router s ISDN number in this field Link Type Refer to Dial Out Settings PPP Authentication Refer to Dial Out Settings CVJ Compression Refer to Dial Out Settings Callback Function CBCP Checking here allows this router to accept requests from ...

Page 74: ... 168 1 0 is a network identification of a class C subnet with netmask 255 255 255 0 24 Remote Network Mask Specify the netmask of the remote network RIP Direction The option specify the direction of RIP Rout ing Information Protocol packets through the ISDNWAN con nection RIP Version Select the RIP protocol version Specify Ver 2 for greatest compatibility Exchange RIP Packets The router has two lo...

Page 75: ...4 16 Remote Access Head Office ...

Page 76: ...4 17 Remote Access Branch Office ...

Page 77: ...5 1 5 Advanced Setup 5 1 Enabling the Remote Activation Function 5 2 Call Control Setup 5 3 Configuring the BOD Parameters 5 4 NAT Setup 5 5 IP Filter Firewall Setup ...

Page 78: ...available in Advanced Setup Advanced Setup Call Control and PPP MP Setup NAT Setup IP Filter Firewall Setup As you click Call Control and PPP MP Setup will open the setup page as below The page will describe in the following three sections for specific application ...

Page 79: ...ection is idle when you are not at home You may want to get some files from home while you are working in the office This func tion allows you to make a phone call to the router and ask it to dial up to the ISP Then you can access your home network to retrieve the files Of course you have to have a fixed IP address and expose some internal network resources such as FTP WWW etc Click Call Control a...

Page 80: ...nterval These two parameters set global settings for ISDN dialup access Dial Retry Specify the dial retry counts per triggered packet A triggered packet is any packet whose destination is outside the local network The default setting is no dial retry If set to 5 for each triggered packet the router will dial 5 times until it is connected to the ISP or remote access router Dial Delay Interval Speci...

Page 81: ...er parameters according to the setup you entered for Remote Access Setup Chap 4 5 3 Configuring the BOD Parameters BODstands for bandwidth on demand for Multiple Link PPP ML PPP or MP Click Call Control and PPP MP Setup to see the follow ing settings These parameters are activated when you set the Link Type to Dialup ...

Page 82: ...l will be activated When the utilization of the first connected channel goes over the High Water Mark and past the High Water Time the additional channel will be activated The link speed will then be 128kbps two B channels Low Water Mark and Low Water Time These parameters specify the conditions under which the second channel will be dropped When the utilization of two B channels is under the Low ...

Page 83: ...t is then used to access the Internet The following explains NAT features for specific applications Click NAT Setup to open the setup page On the page you will see the private IP address definitions defined in RFC 1918 Usually we use the 192 168 1 0 24 subnet for the router 5 4 1 Exposing Internal Servers to the Public Domain The Port Redirection Table may be used to expose internal servers to the...

Page 84: ...ternal hosts Service Name Specify the name for the specific network serv ice Protocol Specify the transport layer protocol that supports TCP and UDP options Public Port Specify which port should be redirected to the internal host Private IP Specify the private IP address of the internal host offering the service Private Port Specify the private port number of the service offered by the internal ho...

Page 85: ...ost settings allow a defined internal user to be exposed to the Internet to use some special purpose applications such asNetmeeting or Internet Games etc DMZ Enable Check to enable the DMZ Host function DMZ Host IP Enter the IP address of DMZ host 5 4 3 Well known Port Number List This page provides some well known port numbers for your reference ...

Page 86: ...filter out specific packets to trigger the router to place an outgoing connection 5 5 1 An Overview of the Firewall The IP Filter Firewall includes two types of filter Call Filter and Data Filter The former is designed to block or allow IP packets that will trigger the router to establish an outgoing connection The later is designed to block or allow which kind of IP packets are allowed to pass th...

Page 87: ...ill pass through the Data Filter Packets match the block rule will be dropped and the contrary will be sent to the WAN interface Alternatively if an incoming packet enters from the WAN interface it will pass through the Data Filter directly If the packets match the block rule it will be dropped Otherwise it will be sent to the internal LAN The filter architecture is shown as below The Following se...

Page 88: ... Here there are 12 filter sets for IP Filter configu rations Set to Factory Default Click here to restore the filter rules to default values 5 5 2 General Setup On the General Setup page you can enable disable the Call Filter or Data Filter and assign a Start Filter Set for each configure the log settings and set the MAC address for duplicate packets ...

Page 89: ...ign a start filter set for Data Filter Log Flag For troubleshooting purpose you need to specify the filter log here None The log function is inactive Block All blocked packets will be logged Pass All passed packets will be logged No Match The log function will record all packets that are unmatched Note The filter log will be displayed on the Telnet terminal when you type the log f command ...

Page 90: ...0 to disable the feature also see Duplicate to LAN on page 5 22 The feature will be helpful under Ethernet switch environment 5 5 3 Editing the Filter Sets Comments Enter filter set comments description Its maximum length is 22 characters Filter Rule Click a button numbered 1 7 to edit the filter rule Active Enable or disable the filter rule Next Filter Set Specify the next filter set to link to a...

Page 91: ...Setup any possible loop among the filter sets The following setup pages show the default settings for Call Filter and Data Filter You will see the Call Filter set is assigned to Set 1 and the Data Filter set to Set 2 ...

Page 92: ...ents Enter filter set comment description Its maximum length is 14 characters Check to enable the Filter Rule Enable the filter rule Pass or Block Specify the action to be taken when packets match the rule Block Immediately Packets matching the rule will be dropped immediately Pass Immediately Packets matching the rule will be passed immediately Block If No Further Match A packet matching the rule...

Page 93: ...ter rule the next filter rule will branch to the specified filter set Duplicate to LAN If you want to log the matched packets to another network device check this box to enable it The MAC Address is defined in General Setup MAC Address for Packet Duplication Log Check this box to enable the log function Use the Telnet command log f to view the logs Direction Set the direction of packet flow For th...

Page 94: ...d The filter rule will filter out any port number If the End Port is empty the filter rule will set the port number to be the value of the Start Port Otherwise the port number ranges between the Start Port and the End Port including the Start Port and the End Port If the End Port is empty the port number is not equal to the value of the Start Port Otherwise this port number is not between the Star...

Page 95: ...t Apply the rule only to packets that are too short to contain a complete header 5 5 5 Restricting Unauthorized Internet Services This section will show a simple example to restrict access of WWW from certain locations In this example we assume the IP address of the access restricted user is 192 168 1 10 The filter rule is created in the Data Filter set and is shown as below Port 80 is the HTTP pr...

Page 96: ...6 1 6 Virtual TA Application 6 1 Virtual TA Concepts 6 2 Installing a Virtual TA Client 6 3 Configuring a Virtual TA Client Server ...

Page 97: ... the ISDN line Basically it is a client server network model The Virtual TA server built into the router handles the connection establishment and release The Virtual TA client installed in the Ethernet connected host creates a CAPI based driver to relay all CAPI messages between applications and the router s CAPI module Note 1 The Virtual TA client is only supported on MicrosoftTM Windows 95 OSR2 ...

Page 98: ... 4 Before you set up the Virtual TA you must set the correct country code Click ISDN Setup in the Basic Setup group As the following application chart shows the Virtual TA client can make an outgoing call or accept an incoming call to from a peer FAX machine or ISDNTAetc ...

Page 99: ... requires you to restart your computer Click OK to restart 3 After the computer restarted you will see a VT icon on the taskbar usually in the bottom right of the screen near the clock as shown below When the icon text is GREEN the Virtual TA client is connected to the Virtual TAserver and you can launch your CAPI based software to use the client to access the router Read your software user guide ...

Page 100: ...e Virtual TA server is enabled and the username and password fields are blank Any Virtual TA client may login to the server Once a single Username and Password field has been filled the Virtual TA server will only allow clients with a valid username and password to login Virtual TA Server Enable Check to activate the server Disable Check to deactivate the server All Virtual TAapplica tions will be...

Page 101: ... a specific client If you have no MSN services leave this field blank Active Check to enable the client to access the server Creating a User Profile Note that creating a single user access account limits access to the Virtual TA server to only the specified account holders In the following we assume you have no MSNservice from your ISDN network provider 1 On the server Click Virtual TA Remote CAPI...

Page 102: ... OK After a short period of time the VT icon text will turn green Configuring the MSN Number If you have subscribed to an MSNnumber service the Virtual TAserver can specify which client has the specified MSN number When an incoming call arrives the server will alert the Username Password matched and MSN matched client ...

Page 103: ...e client 2 Set the specified MSN number in the CAPI based software When the Virtual TAserver sends an alert signal to the specified Virtual TA client the CAPI based software will also receive the alert signal If the MSN number is incorrect the software will not accept the incoming call ...

Page 104: ...7 1 7 System Management 7 1 Online Status 7 2 Management Setup 7 3 Diagnostic Tools 7 4 Reboot System 7 5 Firmware Upgrade ...

Page 105: ...agement This chapter will show you how to manage your router using the Sys tem Management tools shown below System Management Online Status Management Setup Diagnostic Tools Reboot System Firmware Upgrade TFTP Server ...

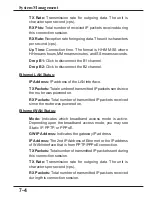
Page 106: ...ntains three subgroups ISDN Status Ethernet LAN Status and Ethernet WAN Status ISDN Status Shows the connection status of B1 B2 and Dchannel including ISP dialup active remote dial in user or LAN to LANconnection Active Connection Shows the ISP active remote dial in user or LAN to LANprofile name and also the IP address for each B channel TX Pkts Total numbers of transmitted IP packets sent during...

Page 107: ... Total number of transmitted IP packets send since the router was powered on RX Packets Total number of transmitted IP packets received since the router was powered on Ethernet WAN Status Mode Indicates which broadband access mode is active Depending upon the broadband access mode you may see Static IP PPTP or PPPoE GW IP Address Indicates the gateway IP address IP Address The 2nd IPAddress of Eth...

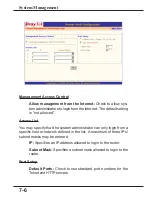
Page 108: ...agement Setup By default the router may be configured and managed with any Telnet client or Web browser running on any operating system There is no requirement for additional software or utilities However for some spe cific environments you may want to change the server port numbers for the built in Telnet or HTTP server create access lists to protect the router or reject system administrator logi...

Page 109: ...ss List You may specify that the system administrator can only login from a specific host or network defined in the list A maximum of three IPs subnet masks may be entered IP Specifies an IP address allowed to login to the router Subnet Mask Specifies a subnet mask allowed to login to the router Port Setup Default Ports Check to use standard port numbers for the Telnet and HTTP servers ...

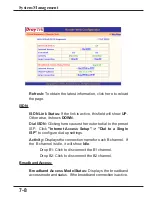
Page 110: ...ls for viewing or diagnosing the router Click Diagnostic Tools to enter the following page ISDN PPPoE PPTP Diagnostics Click to open the following page The page shown here is for reference only different networks will show different results This page has been grouped into two subgroups the upper one is for ISDN link status and the lower one is for broadband access status ...

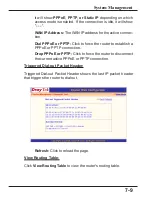
Page 111: ...ter to dial to the preset ISP Click Internet Access Setup Dial to a Single ISP to configure dial up settings Activity Displays the connection name for each B channel If the B channel is idle it will show Idle Drop B1 Click to disconnect the B1 channel Drop B2 Click to disconnect the B2 channel Broadband Access Broadband Access Mode Status Displays the broadband access mode and status If the broadb...

Page 112: ...TP Click to force the router to establish a PPPoE or PPTP connection Drop PPPoE or PPTP Click to force the router to disconnect the current active PPPoE or PPTP connection Triggered Dial out Packet Header Triggered Dial out Packet Header shows the last IP packet header that triggers the router to dial out Refresh Click to reload the page View Routing Table Click View Routing Table to view the rout...

Page 113: ...nected S Static route R RIP Default route To the right of each routing rule you will see an interface identifier IF0 Local LAN interface IF1 ISDN B1 channel IF2 ISDN B2 channel View ARP Cache Table Click View ARP Cache Table to view the ARP Address Resolution Protocol cache held in the router The table shows a mapping between an Ethernet hardware address MACAddress and an IP address ...

Page 114: ...Management View DHCP Assigned IP Addresses View DHCP Assigned IP Addresses provides information on IP ad dress assignments This information is helpful in diagnosing network problems such as IP address conflicts etc ...

Page 115: ...AT Setup click to verify that your settings are correct for redirecting specific port numbers to specified internal users View NAT Active Sessions Table As the router is getting on the Internet through the built in NAT engine click View NAT Active Sessions Table to see which active outgoing sessions are online ...

Page 116: ...nformation is displayed Private IP Port The internal user s PC s IP address and port number Pseudo Port The public port number Peer IP Port The peer user s PC s IPaddress and port number Ifno Stands for interface number The definition is listed below 0 LAN interface 1 B1 interface 2 B2 interface ...

Page 117: ...o reboot options Using current configuration and Using factory default configuration If you want to reboot the router using current running configurations check Using current configuration and click OK To reset the router s settings to default values check Using factory default configuration and click OK The router will take 3 to 5 seconds to reboot the system ...

Page 118: ...ols The following steps will guide you through the process of upgrade Note that the examples below use Windows OS 1 Download the latest firmware from DrayTek s website or FTP site ftp ftp draytek com vigor2000 2 Use Web Configurator to enable the Firmware Upgrade function Click Firmware Upgrade TFTP Server to open the following screen Click OK to enable the function ...

Page 119: ...Click Upgrade The upgrade status will be shown on the progress bar Note The definition of firmware filename v2kxxxxx bin Binary code file of the firmware v2kxxxxx web WebPages file of the firmware v2kxxxxx cfg Default settings file of the firmware v2kxxxxx all v2kxxxxx bin v2kxxxxx web v2kxxxxx rst v2kxxxxx cfg v2kxxxxx bin v2kxxxxx web Note When you upgrade firmware the bin file should be the fir...

Page 120: ...8 1 8 Troubleshooting FAQ 8 1 Using the Telnet Terminal Commands 8 2 Viewing Call Logs 8 3 Viewing ISDN Logs 8 4 Viewing PPP Logs 8 5 Viewing WAN Logs 8 6 FAQs ...

Page 121: ...e on your computer By default the Linux has a built in Telnet client 8 1 Using the Telnet Terminal Commands Click Start Run and type Telnet 192 168 1 1 in the Open box as below Note that the IP address in the example is the default address of the Vigor2000 router If you have changed the default enter the current IP address of the router Click OK The Telnet terminal will open If an administrator pa...

Page 122: ... type You will see all possible Telnet commands Command Help If you are not familiar with these commands type the command fol lowed by a question mark For example the ip command is a first level command Type ip to get next level commands as shown below ...

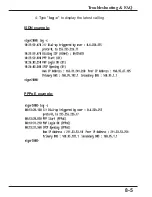
Page 123: ... Logs The Call log provides a simple method for troubleshooting the call setup or WAN connection problems By default the router records WAN connection messages This information can be helpful in diagnosing WANconnection problems If you do not understand the content you can easily save the log and send it to a support technician The steps are 1 Login to the Telnet terminal 2 Type log F c to clear a...

Page 124: ...8 5 Troubleshooting FAQ 4 Type log c to display the latest call log ISDN example PPPoE example ...

Page 125: ...fore you start capturing the new log The steps are 1 Login to the Telnet terminal 2 Type log F w to clear all ISDN logs 3 Ping to any outside host to trigger the router to dial from your PC 4 Type log i to display the latest ISDN log To display all ISDN logs saved in the log buffer type log i t Detailed ISDN log example ...

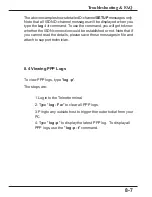
Page 126: ...nnection could be established or not Note that if you cannot read the details please save these messages in file and attach to support technician 8 4 Viewing PPP Logs To view PPP logs type log p The steps are 1 Login to the Telnet terminal 2 Type log F w to clear all PPP logs 3 Ping to any outside host to trigger the router to dial from your PC 4 Type log p to display the latest PPP log To display...

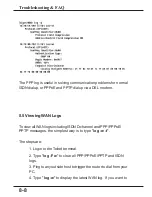
Page 127: ...wing WAN Logs To view all WAN logs including ISDND channel and PPP PPPoE PPTP messages the simplest way is to type log w t The steps are 1 Login to the Telnet terminal 2 Type log F w to clear all PPP PPPoE PPTP and ISDN logs 3 Ping to any outside host to trigger the router to dial from your PC 4 Type log w to display the latest WAN log If you want to ...

Page 128: ...son you should assign a password to protect your router against misusage and hacker attack 2 What is the default IP address of the router A The default IP address is 192 168 1 1 with subnet mask 255 255 255 0 3 Why does the router dial out very often A Examine the packets that trigger the router to dial out Login to the Web Configurator and click Diagnostic Tools Triggered Dial out Packet Header Y...

Page 129: ... your PC Your should have received theDNS server settings from your ISP If your PC is running a DHCP client remove any DNS IP address settings Because the router will assign theDNS settings to the DHCP client enabled PC 6 How many IP addresses the DHCP server of the router can assign to local PCs A The built in DHCP server can support 253 IP addresses for local network usage ...

Reviews: