background image


28 

II-1 Operation Mode 


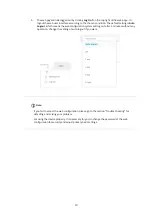
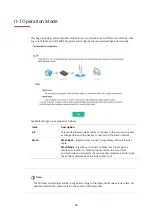
This page provides several available modes for you to choose from for different conditions. Click 
any one of them and click 

OK

. The system will configure the required settings automatically. 


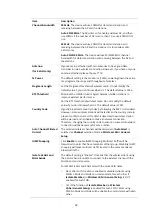
Available settings are explained as follows: 

Item Description 

AP


This mode allows wireless clients to connect to the access point and 
exchange data with the devices connected to the wired network.


Mesh 

Mesh Root –

 VigorAP must connect to a gateway with an Ethernet 

cable.  

Mesh Node – 

VigorAP can connect to other mesh roots via the 

wireless connection. A mesh network creates one set of links 
automatically and calculates the most optimal wireless path through 
the wireless network back to a wired mesh root. 


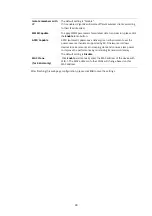
 Note:   

The Wireless LAN settings will be changed according to the Operation Mode selected here. For 
detailed information, please refer to the section of Wireless LAN. 


Summary of Contents for VigorAP 906

Page 1: ...I ...

Page 2: ...II VigorAP 906 802 11ax Access Point User s Guide Version 1 0 Firmware Version V1 4 5 Date Nov 9 2022 ...

Page 3: ... environment Warranty We warrant to the original end user purchaser that the modem will be free from any defects in workmanship or materials for a period of two 2 years from the date of purchase from the dealer Please keep your purchase receipt in a safe place as it serves as proof of date of purchase During the warranty period and upon proof of purchase should the product have indications of fail...

Page 4: ... II 1 Operation Mode 28 II 2 General Concepts for Wireless LAN 2 4GHz 5GHz 29 II 3 Wireless LAN 2 4GHz 5GHz Settings for AP Mode 32 II 3 1 General Setup 33 II 3 2 Security 36 II 3 3 Access Control 39 II 3 4 WPS 40 II 3 5 Advanced Setting 41 II 3 6 AP Discovery 44 II 3 7 WDS AP Status 45 II 3 8 Bandwidth Management 45 II 3 9 Airtime Fairness 46 II 3 10 Station Control 48 II 3 11 Roaming 50 II 3 12 ...

Page 5: ... Station Nearby 116 III 3 4 Policies 117 III 3 5 Station Control List 118 Chapter IV Others 119 IV 1 RADIUS Setting 120 IV 1 1 RADIUS Server 120 IV 1 2 Certificate Management 121 IV 2 Applications 124 IV 2 1 Schedule 124 IV 2 2 Wi Fi Auto On Off 127 IV 3 Objects Setting 128 IV 3 1 Device Object 128 IV 3 2 Device Group 130 Chapter V Mobile APP DrayTek Wireless 133 V 1 Introduction of DrayTek Wirele...

Page 6: ...are Status 156 VI 3 Checking the Network Connection Settings 157 VI 3 1 For Windows 157 VI 3 2 For Mac Os 159 VI 4 Pinging the Device 160 VI 4 1 For Windows 160 VI 4 2 For Mac Os Terminal 160 VI 5 Backing to Factory Default Setting 162 VI 5 1 Software Reset 162 VI 5 2 Hardware Reset 162 VI 6 Contacting DrayTek 163 ...

Page 7: ...VII Chapter I Installation ...

Page 8: ......

Page 9: ...AP Management lets control efficiency monitoring and security of your company wide wireless access easier be managed Inside the web user interface we name the central wireless management as Central AP Management which supports mobility client monitoring reporting and load balancing to multiple APs For central wireless management you will need a Vigor2865 or Vigor2927 series router there is no per ...

Page 10: ...he Vigor modem please get acquainted with the LED indicators and connectors first LED Status Explanation Off The system is not ready or is failed Blinking The system is ready and can work normally ACT Blinking with WLAN WPS is enabled and waiting for the response from the wireless client Off Wireless function is not ready On Wireless function is ready Blinking Data is transmitting sending receivin...

Page 11: ...client connecting to it through WPS Power switch PWR Connecter for a power adapter LAN A4 A1 A4 PoE LAN B Connectors for local networked devices Left LED on The port is connected Left LED off The port is disconnected Left LED Blinking The data is transmitting Right LED on The port is connected with 1000Mbps Right LED off The port is connected with 10 100 Mbps In which LAN A4 is used for PoE connec...

Page 12: ...a Vigor router via wireless connection For detailed information refer to VigorAP 906 User s Guide 2 Connect a computer to other available LAN A port Make sure the subnet IP address of the PC is the same as VigorAP 906 management IP e g 192 168 1 X 3 Connect the A C power adapter to the wall socket and then connect it to the PWR connector of the access point 4 Power on VigorAP 906 5 Check all LEDs ...

Page 13: ...cable 2 Connect the A C power adapter to the wall socket and then connect it to the PWR connector of the access point 3 Power on VigorAP 906 4 Check all LEDs on the front panel ACT LED should be steadily on LAN LEDs should be on if the access point is correctly connected to the ADSL modem or router For detailed information on LED status please refer to section I 1 1 ...

Page 14: ...ion 1 Connect the A C power adapter to the wall socket and then connect it to the PWR connector of the access point 2 Power on VigorAP 906 3 Check all LEDs on the front panel ACT LED should be steadily on 4 Connect VigorAP 906 to the ADSL modem or router via a wireless network For detailed information on LED status please refer to section I 1 1 ...

Page 15: ...a switch in your network through the LAN A4 PoE port of the access point by Ethernet cable 2 Connect a computer to VigorSwitch Make sure the subnet IP address of the PC is the same as VigorAP 906 management IP e g 192 168 1 X 3 Power on VigorAP 906 4 Check all LEDs on the front panel ACT LED should be steadily on LAN LEDs should be on if the access point is correctly connected to the ADSL modem ro...

Page 16: ...ill two holes on the wall The distance between the holes shall be 100 75mm The recommended drill diameter shall be 6 5mm 1 4 2 Fit screws into the wall using the appropriate type of wall plug 3 Hang the VigorAP directly onto the screws ...

Page 17: ...ith the AP or you re unsure please follow the following instructions to configure your computer to use the static IP address in the same subnet as the default IP address of this AP For the default IP address of this AP is set to 192 168 1 2 we recommend you to use 192 168 1 X except 2 in the field of IP address on this section for your computer If the operating system of your computer is Windows 1...

Page 18: ...10 Next click Change adapter options Click the local area connection ...

Page 19: ...l Version 4 TCP IPv4 and click Properties Under the General tab click Use the following IP address Then input the following settings in the respective field and click OK when finished IP address 192 168 1 9 Subnet Mask 255 255 255 0 ...

Page 20: ...se type admin admin on Username Password and click OK Note You may either simply set up your computer to get IP dynamically from the router or set up the IP address of the computer to be in the same subnet as the IP address of VigorAP 906 If there is no DHCP server on the network then VigorAP 906 will have an IP address of 192 168 1 2 If there is DHCP available on the network then VigorAP 906 will...

Page 21: ...rAP the Quick Start Wizard for configuring wireless settings will appear as follows Refer to Section I 7 Quick Start Wizard for detailed information 4 If VigorAP has been configured previously the Dashboard of VigorAP will appear as follows ...

Page 22: ...the web configuration system will log out after 5 minutes without any operation Change the setting of auto logout if you want Note If you fail to access the web configuration please go to the section Trouble Shooting for detecting and solving your problem For using the device properly it is necessary for you to change the password of the web configuration for security and adjust primary basic sett...

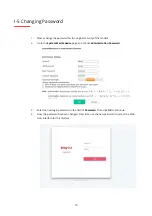
Page 23: ... of the modem 2 Go to the System Maintenance page and choose Administration Password 3 Enter the new login password on the field of Password Then click OK to continue 4 Now the password has been changed Next time use the new password to access the Web User Interface for this modem ...

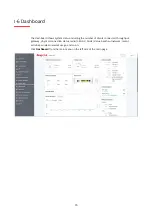
Page 24: ...s including the number of clients connected throughput gateway physical connection status radio 2 4GHz 5GHz status backhaul network recent activities wireless network usage and so on Click Dashboard from the main menu on the left side of the main page ...

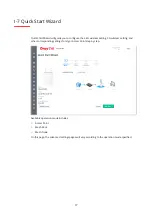
Page 25: ...the 2 4G wireless setting 5G wireless setting and other corresponding settings for Vigor Access Point step by step Available operation mode includes Access Point Mesh Root Mesh Node On this page the advanced settings pages will vary according to the operation mode specified ...

Page 26: ...are explained as follows Item Description WiFi Name Set a name for VigorAP 906 to be identified WiFi Password Enter 8 63 ASCII characters such as 012345678 or 64 Hexadecimal digits leading by 0x such as 0x321253abcde Enable 2nd WiFi Check the box to enable the second wireless setting Such a feature is especially useful for free Wi Fi service For example a coffee shop offers free Wi Fi service for ...

Page 27: ...ll the radio button to choose the value you want Download Limit Scroll the radio button to choose the value you want Enable Station Control Check the box to set the duration for the guest connecting reconnecting to the Vigor device Connection Time Scroll the radio button to choose the value you want Reconnection Time Scroll the radio button to choose the value you want 3 Change the default passwor...

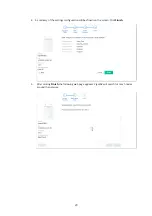
Page 28: ...20 4 A summary of the settings configuration will be shown on the screen Click Finish ...

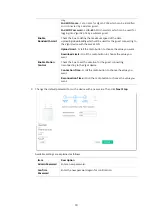
Page 29: ... follows Item Description WiFi Name Set a name for VigorAP 906 to be identified WiFi Password Enter 8 63 ASCII characters such as 012345678 or 64 Hexadecimal digits leading by 0x such as 0x321253abcde Enable 2nd WiFi Check the box to enable the second wireless setting Such a feature is especially useful for free Wi Fi service For example a coffee shop offers free Wi Fi service for its guests for o...

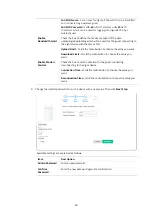
Page 30: ... Limit Scroll the radio button to choose the value you want Download Limit Scroll the radio button to choose the value you want Enable Station Control Check the box to set the duration for the guest connecting reconnecting to the Vigor device Connection Time Scroll the radio button to choose the value you want Reconnection Time Scroll the radio button to choose the value you want 3 Change the defa...

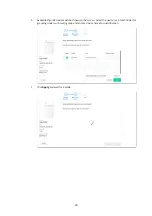
Page 31: ...23 4 A summary of the settings configuration will be shown on the screen Click Finish 5 After clicking Finish the following web page appears VigorAP will search for mesh nodes around the network ...

Page 32: ...4 6 Available VigorAP devices will be shown on the screen Select the device as a mesh node for grouping under such mesh group and enter a device name for identification 7 Click Apply and wait for a while ...

Page 33: ...25 8 Later a summary page of mesh root with mesh node will be shown on the screen ...

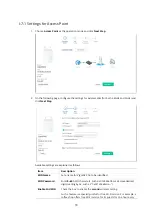
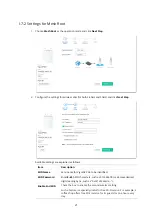
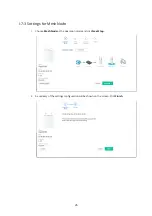
Page 34: ...26 I 7 3 Settings for Mesh Node 1 Choose Mesh Node as the operation mode and click Next Step 2 A summary of the settings configuration will be shown on the screen Click Finish ...

Page 35: ...27 Chapter II Connectivity ...

Page 36: ...oint and exchange data with the devices connected to the wired network Mesh Mesh Root VigorAP must connect to a gateway with an Ethernet cable Mesh Node VigorAP can connect to other mesh roots via the wireless connection A mesh network creates one set of links automatically and calculates the most optimal wireless path through the wireless network back to a wired mesh root Note The Wireless LAN se...

Page 37: ...ill previously set a set of four keys and it will communicate with each station using only one out of the four keys WPA Wi Fi Protected Access the most dominating security mechanism in the industry is separated into two categories WPA personal or called WPA Pre Share Key WPA PSK and WPA Enterprise or called WPA 802 1x In WPA Personal a pre defined key is used for encryption during data transmissio...

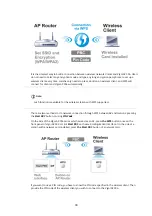
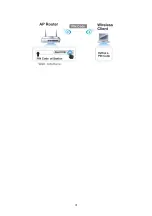
Page 38: ...th WPS supported There are two methods to do network connection through WPS between AP and Stations pressing the Start PBC button or using PIN Code On the side of the VigorAP 906 series which served as an AP press the WPS button once on the front panel of VigorAP 906 or click Start PBC on the web configuration interface On the side of a station with a network card installed press the Start PBC but...

Page 39: ...31 ...

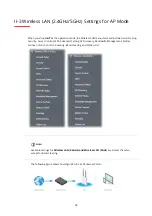
Page 40: ...neral Setup Security Access Control WPS Advanced Setting AP Discovery Bandwidth Management Airtime Fairness Station Control Roaming Band Steering and Station List Note Available settings for Wireless LAN 2 4GHz and Wireless LAN 5GHz are almost the same except for Band Steering The following figure shows how VigorAP runs as AP Access Point ...

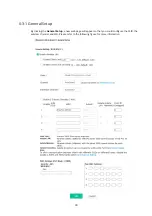
Page 41: ...3 II 3 1 General Setup By clicking the General Setup a new web page will appear so that you could configure the SSID the wireless channel and WD Please refer to the following figure for more information ...

Page 42: ...ce If you have no idea of choosing the frequency please select AutoSelect to let the system determine for you Extension Channel With 802 11n there is one option to double the bandwidth per channel The available extension channel options will be varied according to the Channel selected above Configure the extension channel you want Enable 2 Subnet Simulate 2 APs Check the box to enable the function...

Page 43: ...late Member Check this box to make the wireless clients stations with the same SSID not access each other VLAN ID Enter the value for such SSID Packets transferred from such SSID to LAN will be tagged with the number If your network uses VLANs you can assign the SSID to a VLAN on your network Client devices that associate using the SSID are grouped into this VLAN The VLAN ID range is from 3 to 409...

Page 44: ... WPA encrypts each frame transmitted from the radio using the key which either PSK Pre Shared Key entered manually in this field below or automatically negotiated via 802 1x authentication The WPA encrypts each frame transmitted from the radio using the key which either PSK Pre Shared Key entered manually in this field below or automatically negotiated via 802 1x authentication Select WPA WPA2 or ...

Page 45: ...Vigor router support WPA3 mode However if the Vigor router supports WPA3 Personal Enterprise security mode the WPA algorithms will be set as AES Pass Phrase Enter 8 63 ASCII characters such as 012345678 or 64 Hexadecimal digits leading by 0x such as 0x321253abcde This feature is available for WPA Personal or WPA2 Personal or WPA2 WPA Personal mode WPA3 Personal or WPA3 WPA2 Personal Key Renewal In...

Page 46: ...Server to configure settings for internal server of VigorAP 906 IP Address Enter the IP address of the external RADIUS server Port The UDP port number that the external RADIUS server is using The default value is 1812 based on RFC 2138 Shared Secret The external RADIUS server and client share a secret that is used to authenticate the messages sent between them Both sides must be configured to use ...

Page 47: ...ll appear as depicted below so that you could edit the clients MAC addresses to control their access rights deny or allow Available settings are explained as follows Item Description Policy Select to enable any one of the following policies or disable the policy Choose Activate MAC address filter to type in the MAC addresses for other clients in the network manually Choose Blocked MAC address filt...

Page 48: ...ject Select one of the existed device objects and click Add The MAC address of the device will be shown on the MAC Address Filter table Cancel Give up the access control set up Backup Click it to store the settings MAC addresses on MAC Address Filter table on this page as a file Restore Click it to restore the settings MAC addresses on MAC Address Filter table from an existed file After finishing ...

Page 49: ...ts for about two minutes Both ACT and 2 4G WLAN LEDs on VigorAP 906 will blink quickly when WPS is in progress It will return to normal condition after two minutes You need to set up WPS within two minutes Configure via Client PinCode Enter the PIN code specified in the wireless client you wish to connect with and click the Start PIN button Both ACT and 2 4G WLAN LEDs on VigorAP 906 will blink qui...

Page 50: ...he default value is 2347 Country Code VigorAP broadcasts country codes by following the 802 11d standard However some wireless stations will detect scan the country code to prevent conflict occurred If conflict is detected the wireless station will be warned and is unable to make a network connection Therefore changing the country code to ensure a successful network connection will be necessary fo...

Page 51: ...livery is an enhancement over the power save mechanisms supported by Wi Fi networks It allows devices to take more time in sleeping state and consume less power to improve the performance by minimizing transmission latency The default setting is Disable MAC Clone for 2 4GHz only Click Enable and manually enter the MAC address of the device with SSID 1 The MAC address of other SSIDs will change bas...

Page 52: ... of the AP scanned by VigorAP 906 BSSID Display the MAC address of the AP scanned by VigorAP 906 RSSI Display the signal strength of the access point RSSI is the abbreviation of Received Signal Strength Indication Channel Display the wireless channel used for the AP that is scanned by VigorAP 906 Encryption Display the encryption mode for the scanned AP Authentication Display the authentication ty...

Page 53: ... save and bandwidth for the working AP connected with WDS Click Refresh to get the newest information II 3 8 Bandwidth Management The downstream or upstream from FTP HTTP or some P2P applications will occupy large of bandwidth and affect the applications for other programs Please use Bandwidth Management to make the bandwidth usage more efficient Available settings are explained as follows Item De...

Page 54: ... and email send the same amount of data in each direction while video streaming and web surfing involve more traffic sent from access points to clients than the other way around This is essential for ensuring predictable performance and quality of service as well as allowing 802 11n and legacy clients to coexist on the same network Without airtime fairness offices using mixed mode networks risk ha...

Page 55: ...time assignment Please note that Airtime Fairness of 2 4GHz and 5GHz are independent But stations of different SSIDs function together because they all use the same wireless channel IN SPECIFIC ENVIRONMENTS this function can reduce the bad influence of slow wireless devices and improve the overall wireless performance Suitable environment 1 Many wireless stations 2 All stations mainly use download...

Page 56: ...ireless client to connect and reconnect VigorAP If such a function is not enabled the wireless client can connect VigorAP until it shuts down Such a feature is especially useful for free Wi Fi service For example a coffee shop offers free Wi Fi service for its guests for one hour every day Then the connection time can be set as 1 hour and reconnection time can be set as 1 day Thus the guest can fi...

Page 57: ...n Time Reconnection Time Use the drop down list to choose the duration for the wireless client connecting reconnecting to the Vigor device Or type the duration manually when you choose User defined Display All Station Control List All the wireless stations connecting to the Vigor router by using such SSID will be listed on Station Control List After finishing all the settings here please click OK ...

Page 58: ... station is too worse VigorAP 906 will automatically detect based on the link rate and RSSI requirement and cut off the network connection for that wireless station to assist it to connect another Wireless AP to get better signal Minimum Basic Rate Check the box to use the drop down list to specify a basic rate Mbps When the link rate of the wireless station is below such a value VigorAP 906 will ...

Page 59: ...ing Set the expiration time of the WPA2 PMK Pairwise master key cache PMK Cache manages the list from the BSSIDs in the associated SSID with which it has pre authenticated Such a feature is available for WPA2 Enterprise mode Pre Authentication Enables a station to authenticate to multiple APs for roaming securer and faster With the pre authentication procedure defined in IEEE 802 11i specification...

Page 60: ...elps to leave 2 4GHz band available for legacy clients and improves users experience by reducing channel utilization If dual band is detected the AP will let the wireless client connect to less congested wireless LAN such as 5GHz to prevent network congestion Note To make Band Steering work successfully SSID and security on 2 4GHz also MUST be broadcasted on 5GHz ...

Page 61: ...stem shall wait and check for several seconds 15 seconds in default to make the 2 4GHz network connection Specify the time limit for VigorAP to detect the wireless client 5GHz Minimum RSSI The wireless station has the capability of a 5GHz network connection yet the signal performance might not be satisfied Therefore when the signal strength is below the value set here while the wireless station co...

Page 62: ...54 Below shows how Band Steering works ...

Page 63: ...le Band Steering and use the default value 15 to check the time setting 3 Click OK to save the settings 4 Open Wireless LAN 2 4GHz General Setup and Wireless LAN 5GHz General Setup Configure SSID as ap906 BandSteering for both pages Click OK to save the settings Same value for 2 4GHz and 5GHz ...

Page 64: ...LAN 5GHz Security Configure Security as 12345678 for both pages Click OK to save the settings 6 Now VigorAP 906 will let the wireless clients connect to less congested wireless LAN such as 5GHz to prevent network congestion Same value for 2 4GHz and 5GHz ...

Page 65: ...control policies device objects and set black white lists II 3 13 1 Connected Number This page lists the graph for the number of wireless stations connected to this Access Point with different time phases II 3 13 2 Statistics The number of detected devices and the number of devices passed blocked according to the policy specified in Mobile Device Management Policy can be illustrated as a doughnut ...

Page 66: ...58 ...

Page 67: ...follows Item Description Access Control It is available after choosing one of the entries clients on the Clients List Wireless LAN Specify the bandwidth for the access control list SSID Policy Set the policy for each SSID as a blacklist or whitelist or disable From to list Display the clients available for applying this access ...

Page 68: ...hen click OK and exit the page Device Object list The existed device object profiles will be shown on the following page Clients List Display the stations connecting to this Vigor device Total Usage Display the total TX RX rates Total Clients Display the number of clients in the state of TX or RX Name MAC Display the host name MAC address of the connecting client Up Time Display the connection tim...

Page 69: ...ption Device Object list Click it to open the Device Object List dialog for reference Name MAC Display the host name MAC Address for the connecting client SSID Display the SSID that the wireless client connects to Reason Display the reference information Action Display the action that you can execute for the station Unblock Click to unblock the entry ...

Page 70: ...ned as follows Item Description Device Object list Click it to open the Device Object List dialog for reference Name MAC Display the host name MAC Address for the connecting client SSID Display the SSID that the wireless client connects to Action Display the action that you can execute for the station Block Click to block the entry ...

Page 71: ... Status Mesh Discovery Configuration Sync Support List and Mesh Syslog will be shown on the screen Please note that within the VigorMesh network the total number allowed for mesh nodes is 8 including the mesh root the maximum number of the hop is 3 Refer to the following figure For the mesh group set within the VigorMesh network ...

Page 72: ... of the same group Mesh Root and Mesh Node Mesh Root indicates that VigorAP would be another AP s uplink connection As a Mesh Root VigorAP must connect to a gateway with an Ethernet cable first to have an internet connection As a Mesh Node VigorAP can connect to the mesh root or mesh node within the same mesh group via a wireless network or physical connection with an Ethernet cable The following ...

Page 73: ...o a Vigor router with a physical Ethernet cable it can be set as a mesh root to deliver the wireless signals to a mesh node AP Mesh Node As a mesh node such VigorAP can pass the wireless connection signal to another mesh node or a remote device PC CPE mobile phone In addition VigorAP can be searched by mesh root AP and join the mesh group of the root AP The configuration set for mesh root can be a...

Page 74: ... root or an uplink downlink mesh node Mesh Group When the VigorAP is set as mesh root or is added to a mesh group the basic information including role MAC address and model name of the AP will be shown in this area Up to 8 entries one mesh root and seven mesh nodes will be shown on this field Reset Click it to clear the Mesh Group information Delete Click it to remove the selected entry Add Mesh N...

Page 75: ...et up a Mesh Group with mesh root and mesh node from Mesh Mesh Setup 1 Open Mesh Mesh Setup Click Mesh Root and click OK for the VigorAP connected to the PC with Ethernet cable At first a Mesh Group is with only Mesh Root 2 Click the Search button in the field of Add Mesh Node ...

Page 76: ...ait until the searching result appears 4 Choose the device s you want to add to the Mesh Group as mesh node s and define the Device Name for each node In this example five devices are specified as mesh nodes ...

Page 77: ...69 5 Click the Apply button and wait for it to finish the procedure 6 After finishing the mesh network configuration refer to Mesh Mesh Status for viewing the result ...

Page 78: ...ber of the device within a mesh group Status Display the role of the device within a mesh group Device Name Display the name of the device for identification IP Address Display the IP address of the device MAC Address Display the MAC address of the device Hop Display the level of the devices within a mesh group 0 means the access point is connected to a device by using an Ethernet cable wired 1 to...

Page 79: ... device status from Mesh Root This page can help to discover all Mesh devices around and offer the Link Status and Operation Mode of each Mesh device For obtaining the list of devices around this VigorAP click Scan Later the surrounding VigorAP device s will be displayed on this page ...

Page 80: ...t mode Tips for Mesh Network Setup Set up TWO mesh devices with uplink RSSI larger than 65dBm Upgrade the firmware version of Mesh devices through the Mesh link starting from the mesh device with less hop number For example upgrade the firmware from the root hop1 Mesh Node then hop2 Mesh Node and so on VigorMesh network supports up to 3 hops of mesh devices However it is suggested to connect the m...

Page 81: ...New Mesh network status also can be viewed and checked through the dashboard by clicking MESH NETWORK If Mesh Search Apply Discover is worked too fast or is done with the empty result your request may be rejected Please try again Troubleshooting Check the firmware version Please make sure all APs within the mesh group are in the newest firmware version Check the OP operation Mode Make sure the new...

Page 82: ...74 Collect some Mesh logs and send the result to DrayTek for analysis ...

Page 83: ... II 4 5 Advanced Config Sync If you add one Mesh Node in a mesh group the Mesh Root will synchronize the advanced configuration to the device based on the setting results on this page II 4 6 Support List ...

Page 84: ...76 II 4 7 Mesh Syslog ...

Page 85: ... regulated and ruled by modem II 5 1 General Setup Click LAN to open the LAN settings page and choose General Setup Note Such page will be changed according to the Operation Mode selected The following screen is obtained by choosing AP as the operation mode ...

Page 86: ...ting to a local private network Default 192 168 1 2 Subnet Mask Enter an address code that determines the size of the network Default 255 255 255 0 24 Default Gateway Enter an IP address Traffic will be sent to the default gateway address of the specified interface Enable Management VLAN VigorAP 906 supports tag based VLAN for wireless clients accessing Vigor devices Only the clients with the spec...

Page 87: ...hen issuing IP addresses Subnet Mask Type in an address code that determines the size of the network Default 255 255 255 0 24 Default Gateway Enter a value of the gateway IP address for the DHCP server Lease Time It allows you to set the leased time for the specified PC Primary DNS Server You must specify a DNS server IP address here because your ISP should provide you with usually more than one D...

Page 88: ...ere because your ISP should provide you with usually more than one DNS Server If your ISP does not provide it the modem will automatically apply default DNS Server IP address 194 109 6 66 to this field Secondary DNS Server You can specify a secondary DNS server IP address here because your ISP often provides you more than one DNS Server If your ISP does not provide it the modem will automatically ...

Page 89: ...to read and agree to terms and conditions or authenticate themselves before gaining access to the Internet Other potential uses include the serving of advertisements and promotional materials and the broadcast of public service announcements Click LAN to open the LAN settings page and choose Hotspot Web Portal Follow the on screen steps to configure settings Click the index number e g 1 in this ca...

Page 90: ... URL to which the client will be redirected Landing page Fixed URL Enter the URL as the landing page for wireless clients Applied Interfaces SSID1 to SSID4 The current Hotspot Web Portal profile will be in effect for the selected WLAN SSIDs Save and Next Click to access into next page After finishing this web page configuration please click Save and Next for the next setting page 2 RADIUS Settings...

Page 91: ...length of the shared secret you can set is 36 characters Authentication Port The UDP port number that the RADIUS server is using The default value is 1812 based on RFC 2138 Retry Set the number of attempts to perform reconnection with the RADIUS server Save and Next Click to access into next page After finishing this web page configuration please click Save and Next for the next setting page 3 Whi...

Page 92: ... IP address Destination IP Enable Check to enable the setting IP Whitelist LAN users with the IPs set on this page can access the Internet without entering other portals Finish Click to save the settings After finishing this web page configuration please click Finish to complete the configuration ...

Page 93: ...guration Available settings are explained as follows Item Description Enable Port Control Check it to enable the port control If it is enabled you are allowed to disable the function of the physical LAN port by checking the corresponding check box Disable Port Choose and check the LAN port After finishing this web page configuration please click OK to save the settings ...

Page 94: ...as follows Item Description Enable Hardware Acceleration Disable The default setting Enable Choose to enable the hardware acceleration function Exception List If you want to restrict some users clients from transmitting data through the router by using the hardware acceleration function check this box to create an exclusion list MAC Address Enter the MAC address of the client ARP Table Click to se...

Page 95: ...87 Chapter III Management ...

Page 96: ...l items that you have to know the way of configuration System Status TR 069 Administrator Password User Password Configuration Backup Syslog Mail Alert Time and Date SNMP Management Reboot System and Firmware Upgrade Below shows the menu items for System Maintenance ...

Page 97: ... the current firmware build System Uptime Display the period that such device connects to the Internet Operation Mode Display the operation mode that the device used System Memory total Display the total memory of your system Memory left Display the remaining memory of your system LAN MAC Address Display the MAC address of the LAN Interface IP Address Display the IP address of the LAN interface IP...

Page 98: ...90 III 1 2 TR 069 This device supports the TR 069 standard It is very convenient for an administrator to manage a TR 069 device Vigor router AP etc through VigorACS Auto Configuration Server ...

Page 99: ...e port number for CPE Username Password Type the username and password that VigorACS can use to access such CPE Periodic Inform Settings The default setting is Enable Please set interval time or schedule time for the AP to send a notification to the VigorACS server Interval Time Type the value for the interval time setting The unit is second STUN Settings The default is Disable If you click Enable...

Page 100: ... Old Password Enter the old password for accessing into the web user interface New Password Enter a new password in this field Confirm Password Enter the new password again for confirmation Password Strength The system will display the password strength represented with the word weak medium or strong of the password specified above When you click OK the login window will appear Please use the new ...

Page 101: ... web configuration The settings on a simple web user interface will be different from a full web user interface accessed by using the administrator password Account Enter a user name Password Enter a new password in this field The length of the password is limited to 31 characters Confirm Password Enter the new password again Click OK to save the settings Settings to be configured in User Mode wil...

Page 102: ...ect with password For the sake of security the configuration file for the access point can be encrypted Password Type several characters as the password for encrypting the configuration file Confirm Password Type the password again for confirmation Backup Click it to backup the configuration file Follow the steps below to backup your configuration 1 Go to System Maintenance Configuration Backup 2 ...

Page 103: ...n Backup does not include information on the Certificate Follow the steps below to restore your configuration 1 Go to System Maintenance Configuration Backup 2 Click Upload to choose the correct configuration file for uploading to the AP 3 Click Restore and wait for few seconds ...

Page 104: ...to activate the function of Syslog Server IP Address The IP address of the Syslog server Destination Port Assign a port for the Syslog protocol The default setting is 514 Log Level Specify which level of the severity of the event will be recorded by Syslog Mail Alert Setup Enable Check Enable to activate the function of mail alert SMTP Server The IP address of the SMTP server SMTP Server Port Set ...

Page 105: ...or telnet When Admin Login AP Enable disable the function When it is enabled VigorAP will send out an e mail to the recipient defined above when a user tries to access VigorAP by entering login username and password Click OK to save the settings III 1 7 Time and Date It allows you to specify where the time of VigorAP should be inquired from Available parameters are explained as follows Item Descri...

Page 106: ...ylight Saving Check the box to enable daylight saving This feature is available for a certain area NTP synchronization Select a time interval for updating from the NTP server Click OK to save these settings ...

Page 107: ...gent Check it to enable this function Enable SNMPV3 Agent Check it to enable this function USM User USM means user based security mode Type a username which that be used for authentication The maximum length of the text is limited to 23 characters Auth Algorithm Choose one of the encryption methods listed below as the authentication algorithm Auth Password Type a password for authentication The ma...

Page 108: ...LS encryption protocols For improved security the HTTPS servers that are built into the router have been upgraded to TLS 1 x protocol Panel Control Disable LED The LEDs blink always since VigorAP is powered on Some people might not like that Therefore the function of LED is allowed to be disabled to make people feeling comfortable and undisturbed After checking it all the LEDs on VigorAP will ligh...

Page 109: ...101 WLAN General Setup WLAN Bandwidth Management WLAN Station Control or System Maintenance Administration Password Click OK to save these settings ...

Page 110: ...ion check Using current configuration and click OK To reset the modem settings to default values check Using factory default configuration and click OK The modem will take 5 seconds to reboot the system Note When the system pops up Reboot System web page after configuring the web settings please click OK to reboot your device for ensuring normal operation and preventing unexpected errors of the mo...

Page 111: ...by using an example Note that this example is running over Windows OS Operating System Download the newest firmware from DrayTek s website or FTP site The DrayTek website is www draytek com or local DrayTek s web site and the FTP site is ftp draytek com Click System Maintenance Firmware Upgrade to launch the Firmware Upgrade Utility Click Download to locate the newest firmware from your hard disk ...

Page 112: ...heck the box to enable the function of AP Management APM Enable Auto Provision VigorAP 906 can be controlled under Central AP Management in the Vigor router When both the Vigor router series and VigorAP 906 have such feature enabled once VigorAP 906 is registered to the Vigor router series the WLAN profile pre configured on the Vigor router series will be applied to VigorAP 906 immediately Thus it...

Page 113: ... to save these settings III 2 2 APM Log This page will display log information related to wireless stations connected to VigorAP 906 and central AP management Such information also will be delivered to the Vigor router e g Vigor2865 or Vigor2927 series and be shown on Central AP Management Event Log of Vigor router ...

Page 114: ... of such web page will be disassociated to solve the problem of traffic overload The following web page is used to configure the white list and the Black List for wireless stations Available settings are explained as follows Item Description White List Black List Display the information such as index number MAC address and comment for all of the members in White List Black List Wireless stations l...

Page 115: ...ettings Load Balance can help to distribute the traffic for all of the access points e g VigorAP 906 registered to Vigor 2865 or Vigor2927 series This web page displays the settings related to Load Balance for VigorAP 906 In which By Station Number By Traffic and Force Overload Disassociation indicate settings configured in Vigor 2865 or Vigor2927 series X means the function is not enabled or Vigo...

Page 116: ...108 ...

Page 117: ... shows the menu items for Mobile Device Management MDM III 3 1 Station List Station List provides the information related to the number of clients connecting to VigorAP used bandwidth and the statistics of the AP device OS Besides users can create access control policies device objects and set black white lists III 3 1 1 Connected Number This page lists the graph for the number of wireless station...

Page 118: ...0 III 3 1 2 Statistics The number of detected devices and the number of devices passed blocked according to the policy specified in Mobile Device Management Policies can be illustrated as a doughnut chart ...

Page 119: ...follows Item Description Access Control It is available after choosing one of the entries clients on the Clients List Wireless LAN Specify the bandwidth for the access control list SSID Policy Set the policy for each SSID as a blacklist or whitelist or disable From to list Display the clients available for applying this access ...

Page 120: ... if required Then click OK and exit the page Device Object list The existed device object profiles will be shown on the following page Clients List Display the stations connecting to this Vigor device Total Usage Display Total Clients Display the number of the clients using 2 4GHz Name MAC Display the host name MAC address of the connecting client Up Time Display the connection time Link Speed Dis...

Page 121: ...tion Device Object list Click it to open the Device Object List dialog for reference Name MAC Display the host name MAC Address for the connecting client SSID Display the SSID that the wireless client connects to Reason Display the reference information Action Display the action that you can execute for the station Unblock Click to unblock the entry ...

Page 122: ...ined as follows Item Description Device Object list Click it to open the Device Object List dialog for reference Name MAC Display the host name MAC Address for the connecting client SSID Display the SSID that the wireless client connects to Action Display the action that you can execute for the station Block Click to block the entry ...

Page 123: ...e items to display the statistics chart for wireless stations Nearby Connected Number Choose it to have the statistics of the wireless stations which is nearby and connected to VigorAP 906 Visiting Passing Number Choose it to have the statistics of the wireless stations which is visiting and passing to VigorAP 906 Visiting Time Choose it to have the statistics of the wireless stations which is vis...

Page 124: ...the general information for the nearby stations You can select the station s and click Access Control to configure the nearby stations like the one s to pass through VigorAP or to be blocked by VigorAP Available parameters are explained as follows ...

Page 125: ...owed to make network connections via VigorAP or blocked by VigorAP Each item is explained as follows Item Description Block Mobile Connections All mobile devices will be blocked and not allowed to access the Internet via VigorAP Block PC Connections All network connections based on PC MAC or Linux platforms will be blocked and terminated Block Unknown Connections Only the unknown network connectio...

Page 126: ...118 III 3 5 Station Control List This page displays information related to the wireless stations connecting to the Vigor AP ...

Page 127: ...119 Chapter IV Others ...

Page 128: ...VigorAP 906 offers a built in RADIUS server to authenticate the wireless client that tries to connect to VigorAP 906 The AP can accept the wireless connection authentication requested by wireless clients Available settings are explained as follows ...

Page 129: ...rAP 906 as the external RADIUS server Secret Key Type the password for the user to be authenticated by VigorAP 906 while the user tries to use VigorAP 906 as the external RADIUS server Confirm Secret Key Type the password again for confirmation Configure Add Make a new client with IP and secret key specified on the left boxes Cancel Clear current settings for the client Delete Selected Delete the ...

Page 130: ...cking Create Root CA Click Create Root CA to open the following page Type or choose all the information that the window request such as subject name key type key size and so on Available settings are explained as follows Item Description Subject Name Enter the required information for creating a root CA Country C Enter the country code two characters in this box State S Location L Organization O O...

Page 131: ...e drop down list to specify the one you need Apply to Web HTTPS VigorAP needs a certificate to access the Internet via Web HTTPS Check this box to use the user defined root CA certificate which will substitute for the original certificate applied by web HTTPS Note Common Name must be configured with router s WAN IP or domain name After finishing this web page configuration please click OK to save ...

Page 132: ...of your PC The clock will reset once if you power down or reset the AP There is another way to set up a time You can inquiry about an NTP server a time server on the Internet to synchronize the AP s clock This method can only be applied when the WAN connection has been built up Available settings are explained as follows Item Description Current System Time Display current system time System time ...

Page 133: ...ck to enable such a schedule profile Start Date Specify the starting date of the schedule Start Time Specify the starting time of the schedule Duration Time Specify the duration or period for the schedule It is available only for the action set with WIFI UP WIFI Down or Internet Pause End Time Display the ending time sum of start time and duration time of the schedule Action Specify which action s...

Page 134: ...ted SSID2 SSID3 and SSID4 are not available for choosing vice versa Moreover SSID2 SSID3 and SSID4 are not available for choosing if they are not enabled Acts Specify how often the schedule will be applied Once The schedule will be applied just once Routine Specify which days in one week should perform the schedule Weekday Choose and check the day to perform the schedule It is available when the R...

Page 135: ...on is to avoid wireless station roaming to an AP which is unable to access the Internet Available settings are explained as follows Item Description Enable Auto Switch On Off Wi Fi Check the box to enable such a function Ping Host Enter an IP address e g 8 8 8 8 or a domain name e g google com for testing if the access point is stable or not Click OK to save the settings ...

Page 136: ... Objects Setting IV 3 1 Device Object VigorAP can specify a client as a device object to be used by other applications Available settings are explained as follows Item Description Create from Wireless Station Table Click the link to open the following page ...

Page 137: ...ant and click OK The selected entries will be listed on the Device Object Profiles Set to Factory Default Click it to return to the factory default setting and remove all the device object profiles Index Display the index number of the device object profile MAC Display the MAC address specified by the device object profile Name Display the name of the device object profile In addition to choosing ...

Page 138: ...dress of the client Attribute Check the box to ignore the function of Isolate LAN Member OK Save the settings Clear Remove the settings Cancel Discard the settings and return to the previous page IV 3 2 Device Group Clients can be integrated as a group and be used by other applications Available settings are explained as follows ...

Page 139: ...roup profile Available settings are explained as follows Item Description Name Enter the name of the new group profile Available Device Objects Display currently available device objects Choose the one s and click the button to move them under the Selected IP Objects Selected Device Objects Display the selected device objects Choose the one s and click the button to discard the selections OK Save ...

Page 140: ...132 This page is left blank ...

Page 141: ...133 Chapter V Mobile APP DrayTek Wireless ...

Page 142: ...oading the APP a mobile user is able to access and login the configuration page of VigorAP Note Before using the DrayTek Wireless APP please ENABLE your Wi Fi feature first Then select the Wi Fi network with Vigor access point s connected physically It is not necessary to connect to VigorAP physically The mobile user must connect to one network with the same subnet as the VigorAP ...

Page 143: ...ystem will open the NETWORK page to ask you create a new network first 3 There are two methods for creating a new network Click or press the search button A Click to enter the next page Enter the required information for the device that you want to create a network ...

Page 144: ...the search button Later the system will show the device searched Select the one you want and click the name to get the detailed information 4 After clicking Create Network a new network will be shown on the screen ...

Page 145: ...ard Mesh Root and Mesh Node The wizard can assist to configure mesh root and mesh node s 1 Click and hold the network item till available actions Wizard Edit and Delete shown on the screen Select and click Wizard ...

Page 146: ...ssword page enter the WiFi Name and the password should be the same as the security settings set on the device s WUI You can also enable 2nd SSID by enabling the function of 2nd WiFi Then click the Next button 3 On the Password Setting page enter the admin password and confirm the password Then click Next for the APP to verify the password If successful the Finish button will appear ...

Page 147: ...ch do not belong to any other mesh group by clicking Next 5 Later available VigorAP devices will be shown as the left figure below Choose the Mesh Node you want to add and give a device name e g VigorAP903 for it The selected mesh node s will be grouped under such mesh root Click Next After checking the quantity of mesh node and mesh information and click Apply ...

Page 148: ...he mesh root applies general configuration to the mesh nodes Later current status of the mesh node s will be shown on the following page Click Finish 7 A network with mesh root and mesh node has been set up successfully ...

Page 149: ... are explained as follows Item Description Network Create a new network Connect Connect to a device AP CPE Search Search available devices for connection Support Display a list of models supported by this APP About Display the version information of this APP ...

Page 150: ...h devices CPE AP for creating a network or editing an existing network refer to V 2 for detailed information For checking the general information of certain device click the existing item under the Network list to open the Dashboard of the selected device ...

Page 151: ...nnect icon to open the following left figure Enter the SSID password and select an encryption mode of the device Then click the Connect button for accessing into the dashboard of the device Or click Scan to scan the QR code printed on VigorAP packaging box to connect the designated VigorAP ...

Page 152: ...ode Information for AP Mode Available settings are explained as follows Item Description Dashboard The dashboard is designed with Responsive Web Design You can click Dashboard to connect to the selected VigorAP WUI Devices All of the devices mesh root and mesh nodes controlled by the mesh group will be shown on this page One mesh group contains up to eight devices ...

Page 153: ...ted VigorAP V 4 2 2 Devices Below shows the icon view and list view of the device One mesh group contains up to eight devices Icon view and List view for Mesh Root Mode Available settings are explained as follows Item Description Icon view List view Switch to display the network devices in icons or a list To add more mesh node click the link ...

Page 154: ...de Available settings are explained as follows Item Description INFORMATION Display general information of the device e g IP address Gateway MAC and etc SYSTEM SETTINGS Reboot Device Click to reboot the device immediately ...

Page 155: ... the page containing My Clients for adding new clients under My Clients My Clients Devices under this area can be classified under a group Clients Displays devices which have not been classified under any network group Groups Displays the group member and action Click it to display the items listed under My Clients Select the one you want to add it under current group Click the group to access the...

Page 156: ...148 V 4 2 4 Setup Setup page is used for configuring TR 069 Admin Password Wireless LAN and Wi Fi Blocklist settings of the Vigor device ...

Page 157: ...149 Chapter VI Troubleshooting ...

Page 158: ...g if the hardware status is OK or not Checking if the network connection settings on your computer are OK or not Pinging the router from your computer Checking if the ISP settings are OK or not Backing to the factory default setting if necessary If all the above stages are done and the router still cannot run normally it is time for you to contact your dealer or DrayTek technical support for advan...

Page 159: ... VI 1 1 System Log At present only System Log is offered VI 1 2 Speed Test Click the Start button on the page to test the speed Such a feature can help you to find the best installation place for Vigor AP ...

Page 160: ...to open the web page Choose one of the managed Access Points LAN A or LAN B daily or weekly for viewing the data transmission chart Click Refresh to renew the graph at any time The horizontal axis represents time the vertical axis represents the transmission rate in kbps ...

Page 161: ...153 VI 1 4 WLAN 2 4GHz Statistics This page is used for debugging by RD only ...

Page 162: ...VigorAP 903 User s Guide 154 VI 1 5 WLAN 5GHz Statistics This page is used for debugging by RD only ...

Page 163: ...hannel used or for all of the wireless channels All Channels This page displays the utilization and energy result for all channels based on 2 4G 5G Click Refresh to get the newest update interference situation VI 1 7 Support Area When you click Support Area you will be guided to visit www draytek com and open the corresponding pages directly ...

Page 164: ...ower line and cable connections Refer to I 2 Hardware Installation for details 2 Power on the modem Make sure the POWER LED ACT LED and LAN LED are bright 3 If not it means that there is something wrong with the hardware status Simply back to I 2 Hardware Installation to execute the hardware installation again And then try again ...

Page 165: ...eps listed below to make sure the network connection settings are OK VI 3 1 For Windows Note The example is based on Windows 7 Professional Edition As to the examples for other operating systems please refer to the similar steps or find support notes in www draytek com 1 Open All Programs Getting Started Control Panel Click Network and Sharing Center 2 In the following window click Change adapter ...

Page 166: ... will be shown on the window Right click on Local Area Connection and click on Properties 4 Select Internet Protocol Version 4 TCP IP and then click Properties 5 Select Obtain an IP address automatically and Obtain DNS server address automatically Finally click OK ...

Page 167: ... 3 2 For Mac Os 1 Double click on the current used Mac Os on the desktop 2 Open the Application folder and get into Network 3 On the Network screen select Using DHCP from the drop down list of Configure IPv4 ...

Page 168: ...ndows 1 Open the Command Prompt window from Start menu Run 2 Type command for Windows 95 98 ME or cmd for Windows NT 2000 XP Vista 7 The DOS command dialog will appear 3 Type ping 192 168 1 2 and press Enter If the link is OK the line Reply from 192 168 1 2 bytes 32 time 1ms TTL 255 will appear 4 If the line does not appear please check the IP address setting of your computer VI 4 2 For Mac Os Ter...

Page 169: ...161 ...
Page 170: ...et the modem to factory default via the Web page Go to System Maintenance and choose Reboot System on the web page The following screen will appear Choose Using factory default configuration and click OK After few seconds the modem will return all the settings to the factory settings VI 5 2 Hardware Reset While the modem is running press the Factory Reset button and hold for more than 5 seconds Wh...

Page 171: ...tacting DrayTek If the modem still cannot work correctly after trying many efforts please contact your dealer for further help right away For any questions please feel free to send an e mail to support draytek com ...

Reviews: