-PAGEQUICKSTART
ASSEMBLY
Note:
Make sure all parts are assembled appropriately and snugly fi t.
An air tight Collection Unit is necessary to function properly.
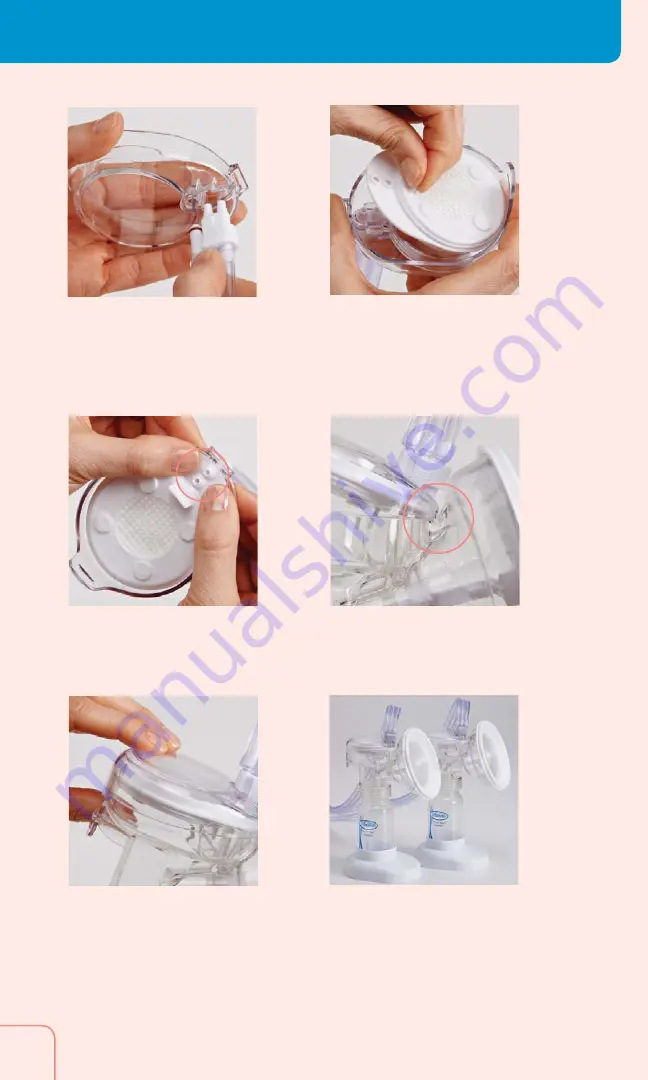
To prepare the Cap, fi rst connect the Air
Tubing to the top of the Cap using the end
with two long prongs and one short one. This
only fi ts one way. Make sure the Air Tubing is
pushed in fi rmly to ensure an airtight seal.
l
Then take the Sealing Insert and push it on
to the large ring on the underside of the Cap.
Note:
Make sure the tab of the Sealing Insert
is facing out.
l
Install the Cap assembly to the Connector
assembly by pivoting the front latch to
the Connector.
l
Pull down on the back portion to snap
the tab on the Connector.
l
Orient the two holes in the Sealing Insert
around the two long prongs.
l
Place the fi nished Collection Unit into
one of the stands. Repeat these steps to
assemble the second Collection Unit.
l
Quick Start
}
Summary of Contents for S1006
Page 1: ......


