background image


I

I

m

m

p

p

o

o

r

r

t

t

a

a

n

n

t

t


S

S

a

a

f

f

e

e

t

t

y

y


I

I

n

n

s

s

t

t

r

r

u

u

c

c

t

t

i

i

o

o

n

n

s

s


When installing and using this electrical equipment, basic safety precautions should always be followed, including the following:  


READ AND FOLLOW ALL INSTRUCTIONS  


1.


WARNING: To reduce the risk of injury, do not permit children to use this product unless they are closely supervised at all 
times.  

2.


WARNING: A wire connector is provided on this unit to connect a minimum 4.11 mm (No. 6 AWG) solid copper conductor 
between this unit and any metal equipment, metal enclosures of electrical equipment, metal water pipe, or conduit 
within 1.5m (5 feet) of the unit.  

3.


DANGER RISK OF INJURY:  (For cord and plug connected units): 

a.


Replace damaged cord immediately  

b.


Do not bury cord  

c.


Connect to a grounded, grounding type receptacle only.  

4.


WARNING:  All installations must be protected by a Residual Current Device (RCD).  

5.


DANGER RISK OF ACCIDENTAL DROWNING: Extreme caution must be exercised to prevent unauthorized access by 
children. To avoid accidents, ensure that children cannot use this spa unless they are supervised at all times. For 
additional protection, select a cover which is classified by the Underwriters Laboratories Meeting ASTM F1346-91 
requirements.  

6.


DANGER RISK OF INJURY:  If your spa is equipped with suction fittings, the suction fittings in this spa are sized to match 
the specific water flow created by the pump. Should the need arise to replace the suction fittings or the pump, be sure 
that the flow rates are compatible. Never operate spa if suction fittings are broken or missing. Never replace a suction 
fitting with one less than the flow rate marked on the original suction fitting. 

7.


DANGER RISK OF ELECTRIC SHOCK: Install at least 1.5m (5 feet) from all metal surfaces. As an alternative, a spa may be 
installed within 1.5m (5 feet) of metal surfaces if each metal surface is permanently connected by a minimum No. 4.11 
mm (No. 6 AWG) solid copper conductor to the wire connector on the terminal box that is provided for this purpose.  

8.


DANGER RISK OF ELECTRIC SHOCK: Do not permit any electric appliance, such as light, telephone, radio, or television, 
within 1.5m (5 feet) of a spa.  

9.


WARNING TO REDUCE THE RISK OF INJURY:  

a.


The water in a spa should never exceed 40°C (104°F). Water temperatures between 38°C (100°F) and 40°C 
(104°F) are considered safe for a healthy adult. Lower water temperatures are recommended for your children 
and when spa use exceeds 10 minutes.  

b.


Since excessive water temperatures have high potential for fetal damage during the early months of pregnancy, 
pregnant or possibly pregnant women should limit spa water temperatures to 38°C (100°F).  

c.


Before entering spa, the user should measure the water temperature with an accurate thermometer since the 
tolerances of water temperature-regulating devices vary.  

d.


The use of alcohol, drugs, or medication before or during spa use may lead to unconsciousness with the 
possibility of drowning.  

e.


Persons suffering from obesity or with a medical history of heart disease, low or high blood pressure, circulatory 
system problems, or diabetes should consult a physician before using a spa.  

f.


Persons using medication should consult a physician before using a spa since some medication may induce 
drowsiness while other medication may affect heart rate, blood pressure, and circulation.  

10.


WARNING:  

a.


People with infectious diseases should not use a spa or hot tub.  

b.


To avoid injury, exercise care when entering or exiting a spa or hot tub.  

c.


Do not use a spa or hot tub immediately following strenuous exercise.  

d.


Prolonged immersion in a spa or hot tub may be injurious to your health.  

11.


Caution:  Maintain water chemistry in accordance to manufacturer’s instructions.  


(Safety instructions continued on next page) 


Summary of Contents for Crossover Collection

Page 1: ...1 Crossover Collection Owner s Manual PN 378107Rev E Euro...

Page 2: ..._________________ Address ___________________________________________________________________ Phone ___________________________________________________________________ SPA Model see below ____________...

Page 3: ...KIMMER FILTER CLEANING OR REPLACEMENT OF THE FILTER CARTRIDGE 13 AIR INJECTOR VENTURI ADJUSTMENT 14 ADJUSTABLE WATER FLOW JETS 14 WATERFALL FLOW ADJUSTMENT 14 WATER CHEMISTRY 15 16 REPLACING THE LED L...

Page 4: ...native a spa may be installed within 1 5m 5 feet of metal surfaces if each metal surface is permanently connected by a minimum No 4 11 mm No 6 AWG solid copper conductor to the wire connector on the t...

Page 5: ...e heat stroke This can be fatal even to healthy adults If you have any questions about your own fitness or whether you should soak in the spa check with your physician 17 Prolonged immersion in hot wa...

Page 6: ...ter overflow The surface must be suitable for a wet location and allow for adequate drainage for overflow water Are there considerations for limiting access by children Childproof Your Spa Plan for li...

Page 7: ...as every three months To drain the spa follow these steps 1 Turn power off to the spa 1 Remove the access door Fig 1A and locate the drain valve Fig 2 2 Assure that the drain valve is in the off posi...

Page 8: ...ill not run while the jet pump high speed is running The low amp circuit may be needed where there is limited available power as seen in some older homes This means the water will begin to cool while...

Page 9: ...Z OPERATION 6 50HZ OPERATION STD ECON SLEEP ALLOWED 7 STANDARD MODE ONLY DEGREES FAHRENHEIT 8 DEGREES CELSIUS SEE PUMP TABLE 9 SEE PUMP TABLE HIGH AMP HEAT W P1 HI 24 AMP RATING 32 AMP CIRCUIT 10 LOW...

Page 10: ...se buttons are pressed the temperature setting will change by 1 After you have set the desired temperature stop pressing the buttons the display will stop flashing after five seconds and the current s...

Page 11: ...ng then With each pressing of then the display will cycle through the three different modes described below Standard Mode St Your spa is preset to this mode This mode operates the heater whenever need...

Page 12: ...ut down The sensor that is plugged into the B jack is not working If the problem persists contact your dealer or service organization May appear temporarily in an overheat situation and disappear when...

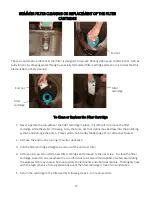
Page 13: ...lumbing system and damage the pump Place system on Standby Mode page 11 or disconnect power 2 Remove the end nut by turning it counter clockwise 3 Pull the filter cartridge straight up and out of the...

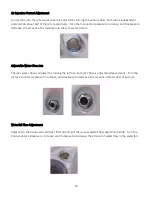
Page 14: ...e jets water stream Adjustable Water Flow Jets The jet s water flow is adjusted by turning the jet face Each jet s flow is adjusted independently Turn the jet face counter clockwise to increase and cl...

Page 15: ...This is done by A Test daily and maintain pH between 7 2 and 7 8 Adjust if necessary above 7 8 use pH decrease if below 7 2 use pH Increase Improper pH can damage spa finish equipment cause eye irrit...

Page 16: ...ding quantities and timing or chemical applications to your spa contact your spa dealer who can assist you in prescribing the correct program for your spa 5 Store all chemicals in a cool dry place and...

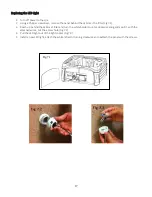
Page 17: ...Fig 7 1 3 Reach up behind the skimmer filter and turn the white holder counter clockwise and gently pull it with the attached wires out the access hole Fig 7 2 4 Pull the LED light out of the light s...

Page 18: ...rubbing or buffing compounds Use a soft liquid cleaner CARE OF VINYL HARD COVER Vinyl coated fabrics are perhaps the most maintenance free fabrics ever produced and certainly will provide exceptional...

Page 19: ...nd you plug it in Recommend unplugging and plugging back in between 7 and 8 This means the spa will come on every 12 hours at the designated time and filter the amount of time you have it set for 3 Wh...

Page 20: ...please follow these steps 1 Assure the spa is filled 15 to 20 cm 6 to 8 inches below the top of the spa 2 Remove the service panel to expose the water pump Fig 8 1 The pipes entering and leaving the...

Page 21: ...tch LOW WATER FLOW Dirty filter Replace or clean filter cartridge Pg 13 Low water level Make sure water level in spa is correct NO AIR BUBBLES IN JET Air control valve in the closed position Open vent...

Page 22: ...t RCD RCD is an abbreviation for a residual current device This device quickly disconnects current to prevent serious harm from an electric shock HEATER The thermostatically controlled heater raises t...

Reviews: