background image

Assembly Instruction

 1 of 20

 20 of 20

The Innovation Factory
St. Columb Major
Business Park,
Cornwall
TR9 6SX
United Kingdom

© 2011 Worlds Apart Limited, All Rights Reserved, 
Design Right Worlds Apart Limited

CUSTOMER CARE
FREEPHONE: 0800 389 8591 (UK only)
www.worldsapart.com
customercare@worldsapart.com

INS.458FPS - DR  15/07/11

WARNING!

 Do not use if any part is missing, damaged or broken. 

DO NOT substitute parts. Use only additional or replacement parts supplied by Worlds Apart Ltd. 
Please call 0800 389 8591 to obtain spare parts or assembly assistance.

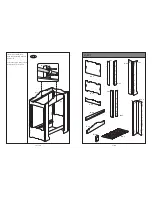
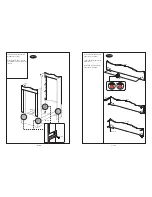
STEP 17

Attach the curtains x 4 to the
curtain rails using the hook &
loop fasteners.

Sticker over all uncovered
fixing points with the coloured
stickers provided.

x 4

EMILY 4 POSTER S B/S 223-00346

IMPORTANT! 

KEEP THIS INSTRUCTION FOR FUTURE REFERENCE.

Minimum No. of people
recommended to assemble
this product.

Approx assembly time.

Before you start, here is some helpful advice.

Do not use.

0.90’

0.90’

t8"3/*/(,FFQBXBZGSPNöSF
t8"3/*/(

Not suitable for children under 4 years. 

t8"3/*/(%POPUQMBDFUIJTDIJMETCFEOFBSIFBUTPVSDFTXJOEPXTBOEPUIFSGVSOJUVSF
t8"3/*/(%POPUVTFUIJTDIJMETCFEJGBOZQBSUJTCSPLFOUPSOPSNJTTJOH
t$IJMESFOBSFMJLFMZUPQMBZCPVODFBOEDMJNCPOCFETUIFSFGPSFUIFDIJMEhTCFETIPVMEOPUCFQMBDFEUPPDMPTFUPPUIFSGVSOJUVSF

blinds, curtain pulls or other strings or cords. The bed should be placed either tight to any wall or have a gap of 300mm between 
the wall and the side of the bed. 

t$IFDLBMMöYJOHTSFHVMBSMZBOEUJHIUFOJGOFDFTTBSZ
t%POPUTVCTUJUVUFQBSUT6TFPOMZBEEJUJPOBMPSSFQMBDFNFOUQBSUTTVQQMJFECZ8PSMET"QBSU-UE
t%POPUPWFSUJHIUFOöYJOHEVFUPQPTTJCMFSJTLPGEBNBHJOHZPVSQSPEVDU
t#FE8JQFDMFBOXJUIBEBNQDMPUI
t$VSUBJOT/PUXBUFSQSPPG8JQFDMFBOXJUIBEBNQDMPUI%POPUESZDMFBOPSJSPO
t4J[FPGNBUUSFTTUPCFVTFEDNYDN
t$IJMETCFEDPOGPSNTUP#4"
t.BEFJO$IJOB

Summary of Contents for 223-00346

Page 1: ...ons Attach panels D x 2 to each assembled section using bolts B7 x 8 B7 x 2 D x 1 D x 1 STEP 4 D6 x 2 C x 2 D1 x 4 C x 2 Insert camlock D6 x 4 into panel C x 2 by hand Screw cambolts D1 x 8 into panel...

Page 2: ...x 1 A x 1 Slot panels G F onto panel A and lock into place Slot panel C onto panel G F and lock into place STEP 10 B3 x 2 B3 x 2 D x 2 E34 x 1 D x 2 E34 x 1 Insert T nuts B3 x 8 into panel D x 2 by ha...

Page 3: ...1 Attach panels E x 2 onto panels H I L M using bolts B7 x 8 STEP 2 D6 x 2 F G x 1 F G x 1 3 D2 x 1 D1 x 4 Insert camlocks D6 x 4 into panels F G by hand Screw cambolts D1 x 8 into panels F G Lock dou...

Page 4: ...x 2 J K x 1 3 D2 x 1 D1 x 4 Insert camlocks D6 x 4 into panels J K by hand Screw cambolts D1 x 8 into panels J K Lock double ended cambolts D2 x 4 into panels J K STEP 12 Screw bolts B2 x 8 into pane...

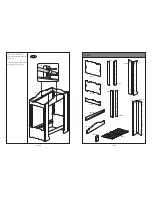
Page 5: ...N x 1 E x 1 E x 1 Insert spacer block N x 2 between the curtain rails and panels E Secure into place using curtain bracket and screws set x 2 A x 1 B x 1 C x 2 D x 2 E x 2 F x 1 G x 1 O x 1 N x 2 J x...

Page 6: ...B x 1 STEP 1 Screw cambolts D1 x 8 into panel A B Insert camlocks D6 x 4 into panel A B by hand Insert dowels E34 x 4 into panels A B by hand E34 x 1 STEP 14 B8 x 1 C x 1 C x 1 C x 1 Curtain rails x...

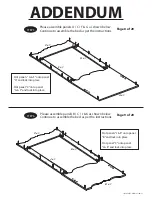
Page 7: ...1 B x 1 Page 8 of 20 Page 9 of 20 Please assemble panels B C J K as shown below Continue to assemble the bed as per the instructions INS 458FPS ADM 27 09 11 Slot panels G F onto panel A and lock into...

Page 8: ...assemble this product Approx assembly time Before you start here is some helpful advice Do not use 0 90 0 90 t 8 3 FFQ BXBZ GSPN SF t 8 3 Not suitable for children under 4 years t 8 3 P OPU QMBDF UIJ...

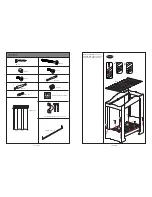
Page 9: ...x 48 B2 x 8 B3 x 8 B7 x 16 B8 x 4 Curtain rails x 2 Curtains x 4 Coloured Stickers x 88pcs Curtain bracket screws x 2 sets 2 of 20 STEP 16 A3 A3 A3 A3 A3 A3 A3 A3 O x 1 Place bed slats O x 1 onto the...

Page 10: ...N x 1 E x 1 E x 1 Insert spacer block N x 2 between the curtain rails and panels E Secure into place using curtain bracket and screws set x 2 A x 1 B x 1 C x 2 D x 2 E x 2 F x 1 G x 1 O x 1 N x 2 J x...

Page 11: ...B x 1 STEP 1 Screw cambolts D1 x 8 into panel A B Insert camlocks D6 x 4 into panel A B by hand Insert dowels E34 x 4 into panels A B by hand E34 x 1 STEP 14 B8 x 1 C x 1 C x 1 C x 1 Curtain rails x...

Page 12: ...1 Attach panels E x 2 onto panels H I L M using bolts B7 x 8 STEP 2 D6 x 2 F G x 1 F G x 1 3 D2 x 1 D1 x 4 Insert camlocks D6 x 4 into panels F G by hand Screw cambolts D1 x 8 into panels F G Lock dou...

Page 13: ...x 2 J K x 1 3 D2 x 1 D1 x 4 Insert camlocks D6 x 4 into panels J K by hand Screw cambolts D1 x 8 into panels J K Lock double ended cambolts D2 x 4 into panels J K STEP 12 Screw bolts B2 x 8 into pane...

Page 14: ...ons Attach panels D x 2 to each assembled section using bolts B7 x 8 B7 x 2 D x 1 D x 1 STEP 4 D6 x 2 C x 2 D1 x 4 C x 2 Insert camlock D6 x 4 into panel C x 2 by hand Screw cambolts D1 x 8 into panel...

Page 15: ...x 1 A x 1 Slot panels G F onto panel A and lock into place Slot panel C onto panel G F and lock into place STEP 10 B3 x 2 B3 x 2 D x 2 E34 x 1 D x 2 E34 x 1 Insert T nuts B3 x 8 into panel D x 2 by ha...

Page 16: ...M x 1 3 3 Slot panels L M onto the assembled footboard section and lock into place C x 1 B x 1 STEP 6 J x 1 K x 1 3 3 3 3 3 C x 1 B x 1 Slot panels J K onto panel B and lock into place Slot panel C o...

Page 17: ...I onto the assembled headboard section and lock into place 3 3 H x 1 I x 1 3 3 C x 1 A x 1 STEP 7 L M x 1 D6 x 8 E34 x 4 H I x 1 D6 x 8 E34 x 4 Insert camlocks D6 x 32 into panels H I L M by hand Inse...

Reviews: