background image

Fittings contained in the box

Fittings

 A                                              B

QTY 

˖

16 PCS-040-00767 


QTY 

˖

16PCS-040-00768

E                                              F 

    C                                           D 

QTY 

˖

4 PCS-040-00769

QTY 

˖

4 PCS

 -040-00770 

    G                                           H 

QTY 

˖

6 PCS-040-00771

QTY 

˖

4 PCS-040-00772

I


QTY 

˖

8 PCS-040-00773

QTY 

˖

4 PCS-040-00774

K                                            L 

QTY :12 PCS -040-00775


QTY 

˖

4 PCS-040-00776

M                                           N 

M5  QTY 

˖

1 PC-040-00777

QTY 

˖

2 PCS-040-00778

    O                                            P 

QTY 

˖

4 PCS-040-00779

QTY 

˖

4 PCS-040-00780

Q                                                    R                            

QTY 

˖

10 PCS

 -040-00781      

QTY 

˖

4 PCS-040-00782

    S                                            T 

QTY 

˖

1 PC-040-00783


QTY 

˖

1 PC-040-00784


U                                                     V

M4  QTY 

˖

1 PC

 -040-00785     

QTY 

˖

1 PC EACH-

QTY 

˖

8 PCS-040-00786

QTY 

˖

2 PCS-040-00148 


QTY 

˖

8 PCS-040-00787

Use on
wood dowels

glue

3 of 8

Please note: The assembly kit is contained in three packs: two kits are in box number 2, one kit is in box 4  

Summary of Contents for Amelia Bed

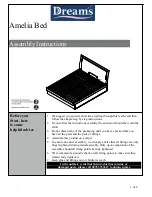
Page 1: ...t you have all the parts and the pack of fittings 4 Assemble this product on a carpet 5 To ensure an easier assembly we strongly advise that all fittings are only finger tightened during initial assem...

Page 2: ...Component parts contained in the box PARTS 2 of 8...

Page 3: ...0775 QTY 4 PCS 040 00776 M N M5 QTY 1 PC 040 00777 QTY 2 PCS 040 00778 O P QTY 4 PCS 040 00779 QTY 4 PCS 040 00780 Q R QTY 10 PCS 040 00781 QTY 4 PCS 040 00782 S T QTY 1 PC 040 00783 QTY 1 PC 040 0078...

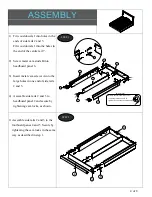
Page 4: ...to the large holes in one end of side rails 2 and 3 4 Assemble side rails 2 and 3 to headboard panel 2 and secure by tightening cam locks as shown 1 Assemble side rails 2 and 3 to the footboard panes...

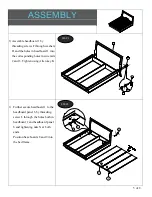
Page 5: ...into the corresponding holes in side rails 2 and 3 Tighten using Allen key K 1 Further secure headboard 1 to the headboard panel 6 by threading screw L through the holes both in headboard 1 and headbo...

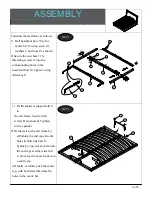
Page 6: ...en using Allen key S 1 Fit the mattress support rails V to the slat frame Secure with screws H and nuts O Tighten with a spanner 2 Fit the slats to the slat frame by a Pushing the end caps into the ho...

Page 7: ...nuts U 1 Two people carefully lower the slat frame onto the support arms T Secure by threading screws E through the holes in the slat frame and the corresponding holes in the support arms T Screw nut...

Page 8: ...in grain and colour We wish to reassure you that this is quite normal and is not the result of any manufacturing fault Where sheets of veneer are joined together a line may be detected Again this is n...

Reviews: