background image

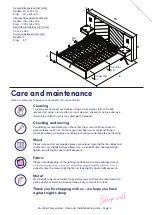
Care and maintenance

Here are some tips to keep your new bed in tip-top condition

Cleaning

To clean your new bed, we'd advise using a warm damp cloth or if fabric, 

remove dust using a low suction vacuum cleaner - please do not use abrasive 

chemicals or bleach as this may damage the product.

Checking and moving

Periodically we recommend you check that the screws or fixtures haven't


become loose, over time. To move your new bed, we recommend lifting it 

where possible, as dragging or pushing it could cause damage to your flooring.

Wood

Please note each of our wooden pieces are unique, meaning that markings and 

shade can vary slightly between beds. Over a period of time, the wood might 

lighten or fade slightly due to light exposure.

Fabric

Please note depending on the lighting, positioning and surroundings of your 

period of time the colour might lighten or fade slightly due to light exposure.

Metal

Metal tends to be more resilient to everyday wear and tear. We recommend to 

gently dust your metal furniture and keep it dry to maintain its loo

k.

Murphy Ottoman Bed - 

Care and maintenance guide

 - Page 14

L

10

33

34.5

Over Slat

Under Slat

W

H

6

3

37.5

2.3

Slat


5.3

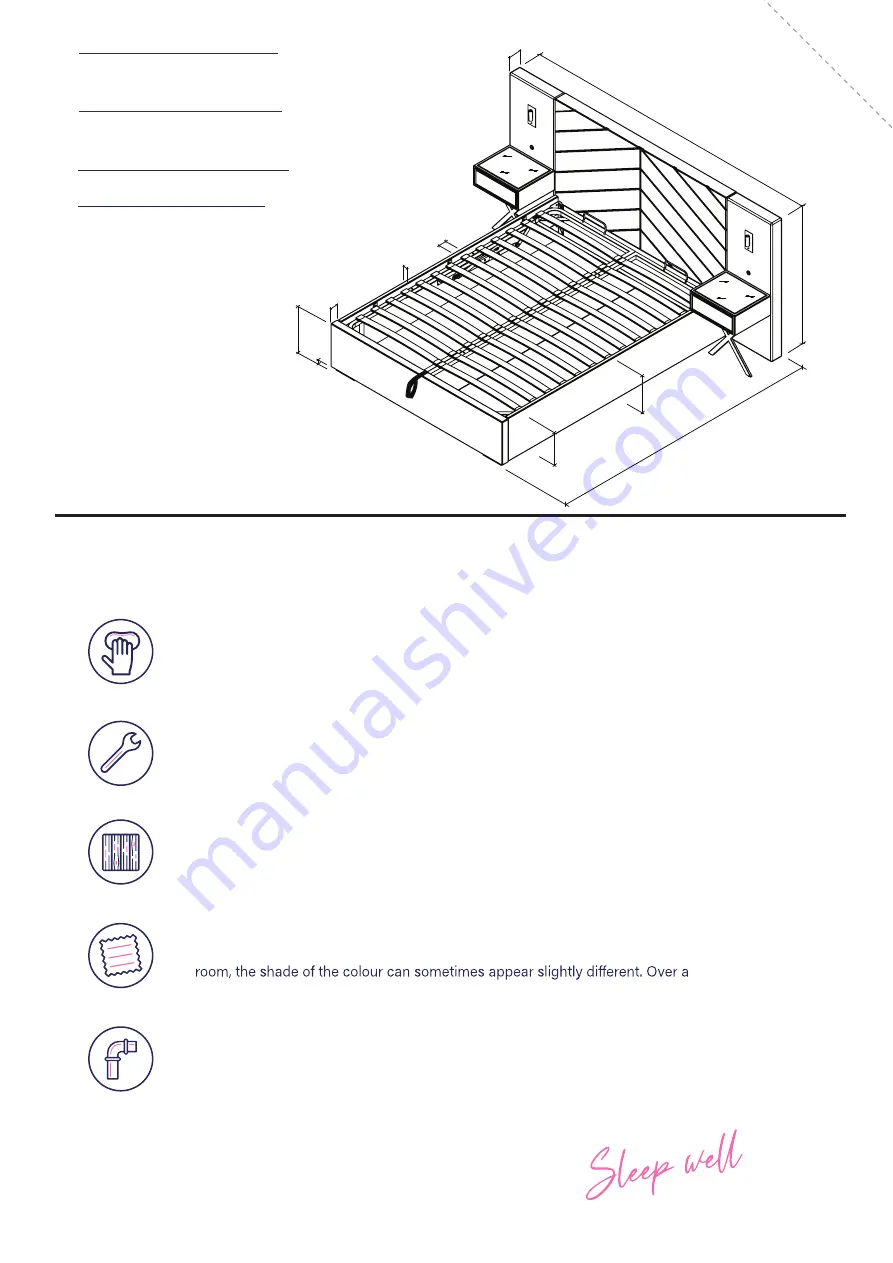
Overall Dimensions (LWH cm) 

Double: 211 x 230 x 112 

King:      221 x 245 x 112
Internal Dimensions (LWH cm) 

Double: 195 x 138 x 30.5

0


 :

g

n

i

K

5 x 153 x 30.5

Bedside Dimensions, (WDH cm) 

42 x 34 x 56.5

Distance between slats (cm) 

Double:  9

King: 

8.7

Thank you for shopping with us - we hope you have 

a great night's sleep

Summary of Contents for Murphy Ottoman Bed

Page 1: ...Two person assembly 1 5 hour approx assembly time Murphy Ottoman Bed MK2 201123...

Page 2: ...ur product or any missing parts please contact our Help Centre on 0800 652 6750 where a member of our team will be happy to help For customers based in Northern Ireland please call 028 9050 8300 Safet...

Page 3: ...rder If you have purchased a Sleepmotion base please follow the assembly instructions provided in the Sleepmotion side rail pack 3L Once the base is built please follow the AI provided in pack 3L to b...

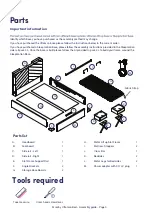
Page 4: ...a x8 Bolts M8x30mm for fitting angle brackets F to side rails C D footboard B Flat Washers for M8 bolts Spring Washers for M8 bolts Hardware needed for fixing side rails to headboard footboard packed...

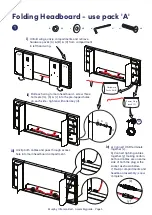
Page 5: ...Re zip compartments and headboard assembly is now complete M i ii iii iv Ha rdw are Pac ks A B C Power Plug pack C y x Conne ct lightin g cables togeth er y makin g certain both red cables are on same...

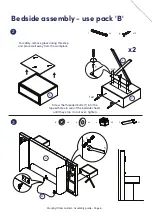
Page 6: ...se pack B g x12 f x4 f x2 gx6 g K L x2 c x4 b x4 h x1 e x4 c b h e M Screw the threaded bolts f into the tapped holes in rear of the bedside chests until they stop do not over tighten K For safety rem...

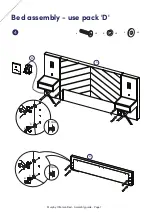
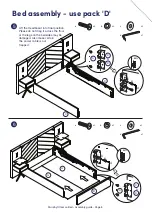
Page 7: ...4 Bed assembly use pack D 10mm 10mm A B a c b a x8 b x8 c x8 a c b Murphy Ottoman Bed Assembly guide Page 7 M...

Page 8: ...G G a x4 b x4 c x4 d x1 C D Bed assembly use pack D Lift the Headboard into final position Please do not drag it across the floor or the legs on the bedsides may be damaged Also make certain the powe...

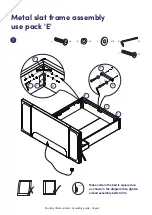
Page 9: ...embly use pack E 7 100 a x8 b x8 c x10 d x1 l x2 a c d b Make certain the bed is squared up as shown in the diagram then tighten all bed assembly bolts 100 F C D B B E l c d Murphy Ottoman Bed Assembl...

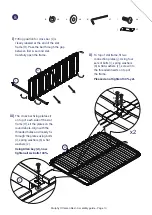
Page 10: ...each side of the slat frame H sit the plates on the round labels Align with the threaded holes and loosely fix through the plates using bolts i spring washers b flat washers c Using Allen key d now ti...

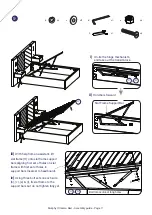
Page 11: ...x6 h x1 e x6 d x1 l d c b c h e Bolt into centre of long holes iii With help from an assistant lift slat frame H onto slat frame support bars aligning first set of holes on slat frame with first set o...

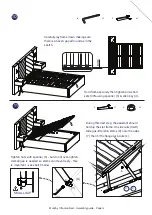
Page 12: ...100 using spanner h allen key d h x1 d x1 During this next step the assistant should hold up the slat frame On side rails C D slide gas lift piston stems X onto the axles Y then fit the flange lock nu...

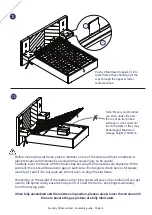
Page 13: ...he slat frame Depending on the weight of the mattress the rising speed will vary so be careful until you get used to the speed Always use the strap to lift or lower the frame keep fingers well away fr...

Page 14: ...between beds Over a period of time the wood might lighten or fade slightly due to light exposure Fabric Please note depending on the lighting positioning and surroundings of your period of time the c...

Page 15: ...Little dreamers Keep the little ones entertained while you assemble your new purchase...

Page 16: ......

Reviews: