background image

Stage

2

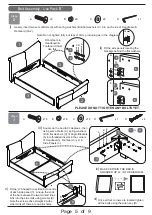
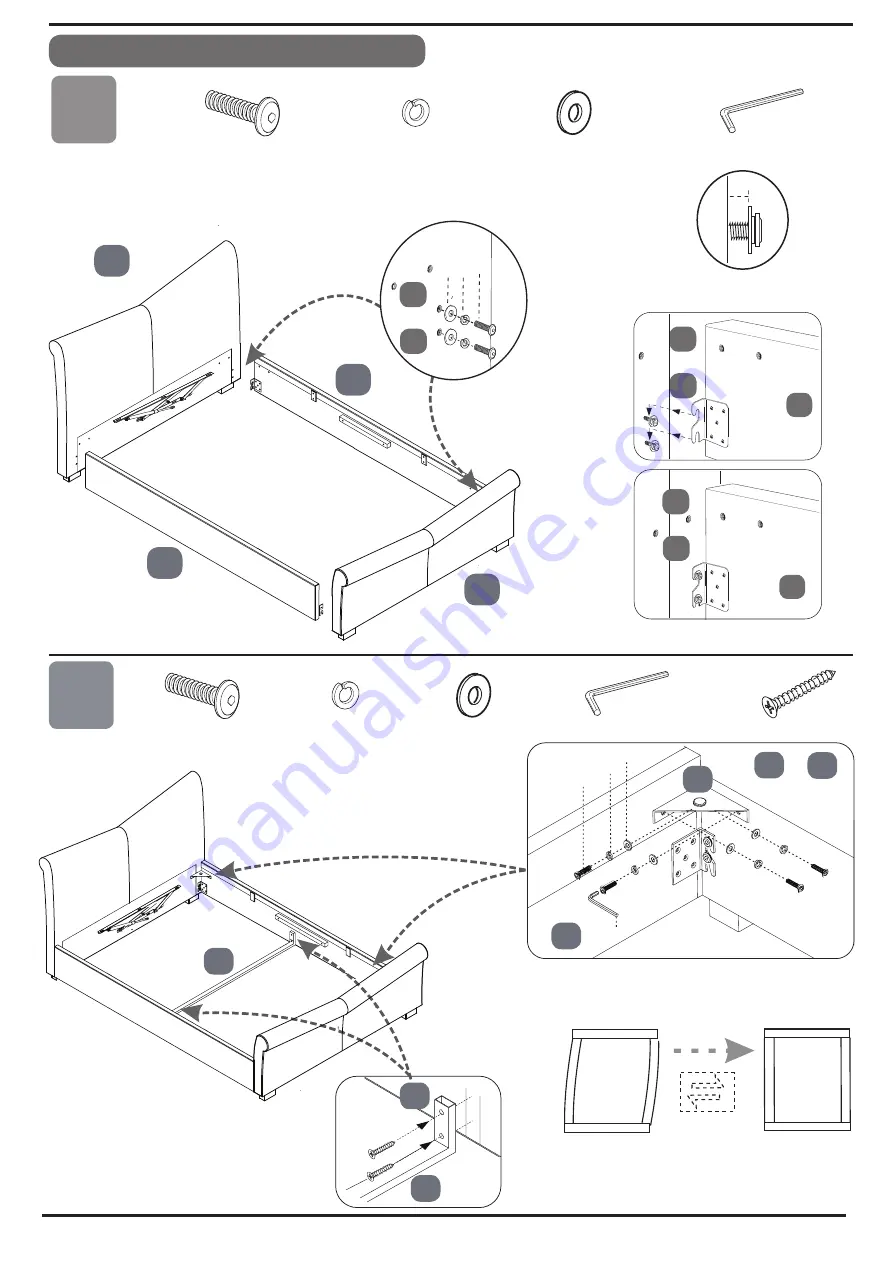
Bed Assembly - Use Pack 'B'

A

x8

B

x8

C

x8

D

x1

Loosely  insert  two  sets of Bolts (A)   with  spring  washers (B) & flat  washers (C)  into  each  side  of Headboard    

&

.

)

1&2

 (


d

r

a

o

b

t

o

o

F

Note: Do  not  tighten  fully  but  leave 10mm  protruding  as  in  the  diagram. 

10mm

1

2

3

3

A

B

C

2

&

Fit bolt


sets to 

Headboard & 

Footboard (1&2) 

like this..

1

2

&

1

&

3

3

a.

 b.

1

2

Fit the side panels locating the 

brackets behind the flat washers. 

ii)

i)

PLEASE DO NOT TIGHTEN ANY BOLTS YET.

A

x16

B

x16

C

x16

D

x1

K

x4

Stage

3

A

B C

2

1

&

3

5

D

Square up the bed to 90 degrees - then 

using sets of bolts (A), spring washers 

(B) & flat washers (C) fit Angle Brackets 

(5) into threaded inserts in the corners 

of Headboard 

&

 Footboard (

1&

2) & 

Side Panels (3).    

Once all four corners are located tighten 
all the bolts using the Allen key (D).

iii)

vi)

MAKE CERTAIN THE BED IS


SQUARED UP


A

S

 IN THE DIAGRAM.

iv)

v)

K

K

3

8

8

Page  5  of  9

.

.

.

.

Fit the 'U' Shaped Cross Bar (8) to centre 

of each side panel (3). Line up the ends 

of the bar between the two marked lines 

& fix into the side rails using screws (K). 

Note the screws drive straight into the 

side rail itself, there are no pilot holes.

Summary of Contents for WILLIAM OTTOMAN BED 4-0

Page 1: ...y CAUTION There are small components used in the construction of this unit These loose items should be kept away from young children during assembly to avoid the danger of choking IMPORTANT BEFORE STA...

Page 2: ...are part of the assembly of this bed ensure that the barrel nuts are fitted the correct way so the hole in the nut is facing towards the intersecting hole in the panel Intersecting Hole We recommend t...

Page 3: ...FOLLOW THE DIAGRAM BELOW LEFT Fitting Gas Lift Mechanisms Use Pack A M b B A C D M a 1 2 R F I T H E R E R F I T H E R E L F I T H E R E R F I T H E R E R F I T H E R E BLUE R F I T H E R E L F I T H...

Page 4: ...AGRAM BELOW RIGHT Fitting Gas Lift Mechanisms Use Pack A 1 M a M b 2 R F I T H E R E L F I T H E R E L F I T H E R E R F I T H E R E L F I T H E R E L F I T H E R E L F I T H E R E R F I T H E R E R F...

Page 5: ...x16 B x16 C x16 D x1 K x4 Stage 3 A B C 2 1 3 5 D Square up the bed to 90 degrees then using sets of bolts A spring washers B flat washers C fit Angle Brackets 5 into threaded inserts in the corners o...

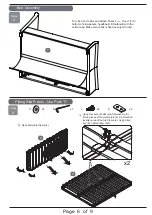
Page 6: ...the velcro tape Make sure fabric is fixed evenly all round 7 Fitting Slat Frame Use Pack C C x4 D x1 x4 J x2 K Using four sets of bolts J flat washers C d e d a e r h t o t n i K e t a l p l a t e m e...

Page 7: ...D x1 x6 F x6 E D E C F B C H Page 7 of 9 Stage 7 ii Using two bolt sets on each side E C B F loosely fix slat frame to six holes finger tight Bolt into centre of long holes i With help lift Slat Frame...

Page 8: ...there is an even gap each side of about 10mm as in the sketch G H G x2 H x1 Slide gas lift piston stem onto the axle then fit the flange lock nut G Tighten nut with spanner H do not over tighten A sm...

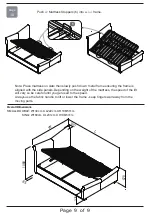
Page 9: ...with the side panels Depending on the weight of the mattress the speed of the lift will vary so be careful until you get used to the speed Always use the fabric handle to lift or lower the frame keep...

Reviews: