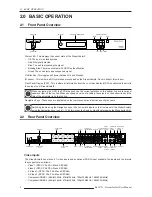
2.0 BASIC OPERATION
10
R699751 - DreamScaler3 User Manual
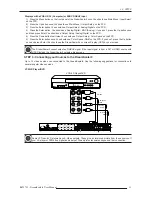
3) Plug the small connector attached to the cable that comes out of the power supply into the ‘DC In’ port on the
back of the DreamScaler3. The DreamScaler3 should power on and display ‘DreamVision Powered by ABT’ on the
FPD for a couple of seconds.
2.3
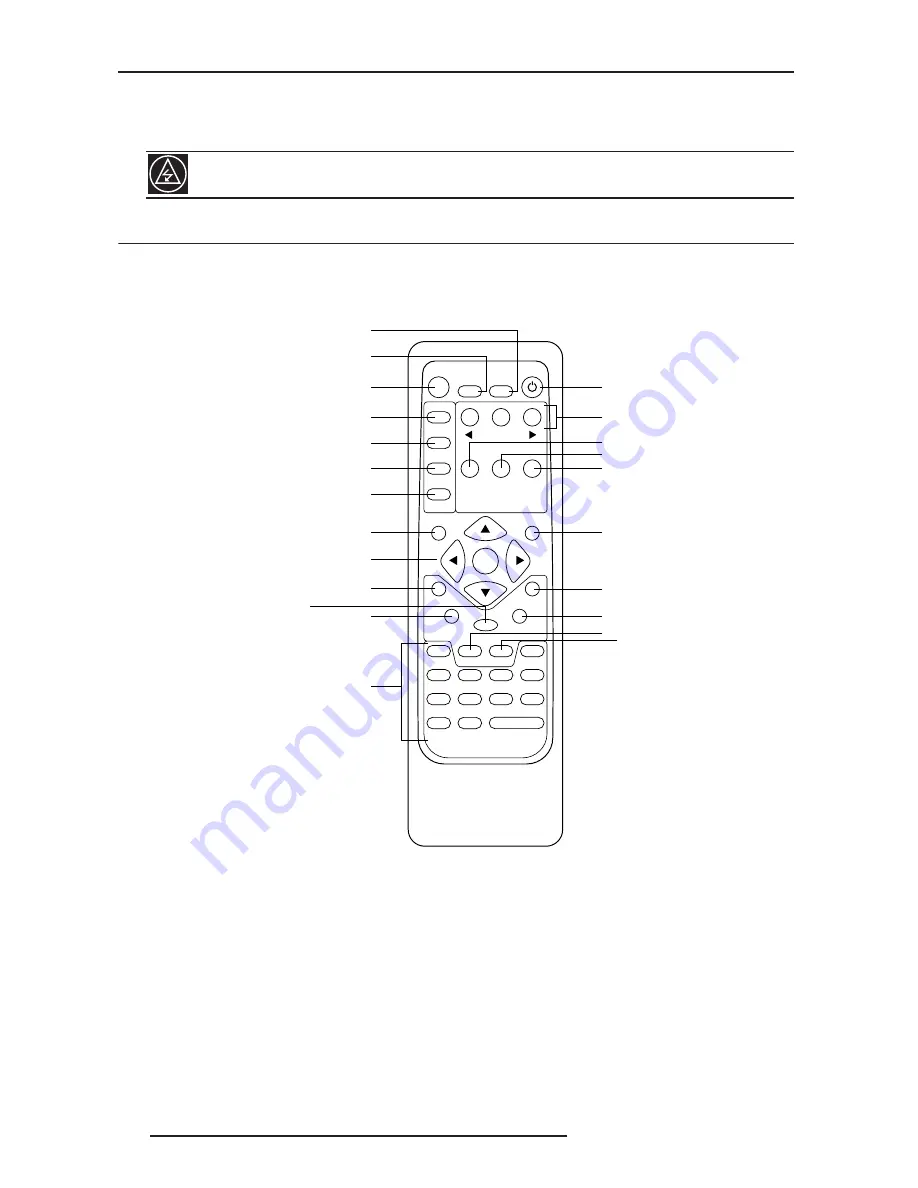
Remote Control Overview
The functions of these buttons are detailed in the next paragraph. An asterisk (*) indicates this feature will be
implemented in future software.
Power/Standby Buttons
The DreamScaler3 remote has a Power and a Standby button. The Power button always turns the DreamScaler3 on
and the Standby button always put the unit into Standby mode.
Curtain Button
The DreamScaler3 remote has a Curtain button which allows you to close a ‘curtain’ over the image. This feature is
especially useful when an image is paused on a display susceptible to burn-in.
Remote Control Battery Installation
The remote control for the DreamScaler3 requires two AA batteries. These should be replaced as needed. ABT
recommends Alkaline batteries because they last longer without leaking.
Use only the power supply that came with your DreamScaler3.
INPUT SELECT
STANDBY
POWER
INPUT
ADJUST
CONFIG
PICTURE
CONTROL
OUTPUT
SETUP
MENU
EXIT
16:9
4:3
AUTO
VIDEO 1
S-VIDEO 1
COMP 1
HDMI 2
VIDEO 2
S-VIDEO 2
COMP 2
HDMI 3
ENTER
HDMI 4
BORDER
CROP
INFO
CURTAIN
MEMORIES
RGBHV
HDMI 1
SDI
ASPECT
ZOOM
PAN
ON/OFF
DISPLAY
PROFILES
VIEWING
MODES
INPUT
ASPECT
RATIO
TEST PATTERN
Standby
Info
Curtain
Output Setup
Configuration
Picture Control
Input Adjust
Menu
Border
Zoom
Input Select
(HDMI 1, HDMI 2, HDMI 3, HDMI 4,
Component 1, Component 2,
RGBHV/Component,
S-Video 1, S-Video 2,
Video 1, Video 2, AUTO)
Aspect
Navigation Keys
(Up, Left, Enter, Right, Down)
Exit
Crop
Pan
Power
Input Aspect
Ratio
Viewing Modes
Display Profiles
4:3
16:9
Test Patterns
(Left, On/Off, Right)
8
*
*
*
*

