21
A S S E M B L Y
Assembling the Chair, continued...
STEP 5
Install the right arm.
Note: This step requires two people.
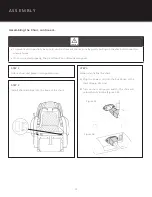
A. Unbox the right arm and carefully remove the remote control protective packaging, then place the remote
control into the remote pocket.
B. Gently pull the two hinges out/away from the base of the chair.
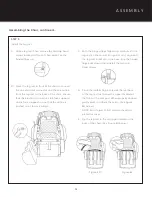
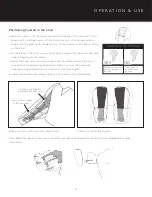
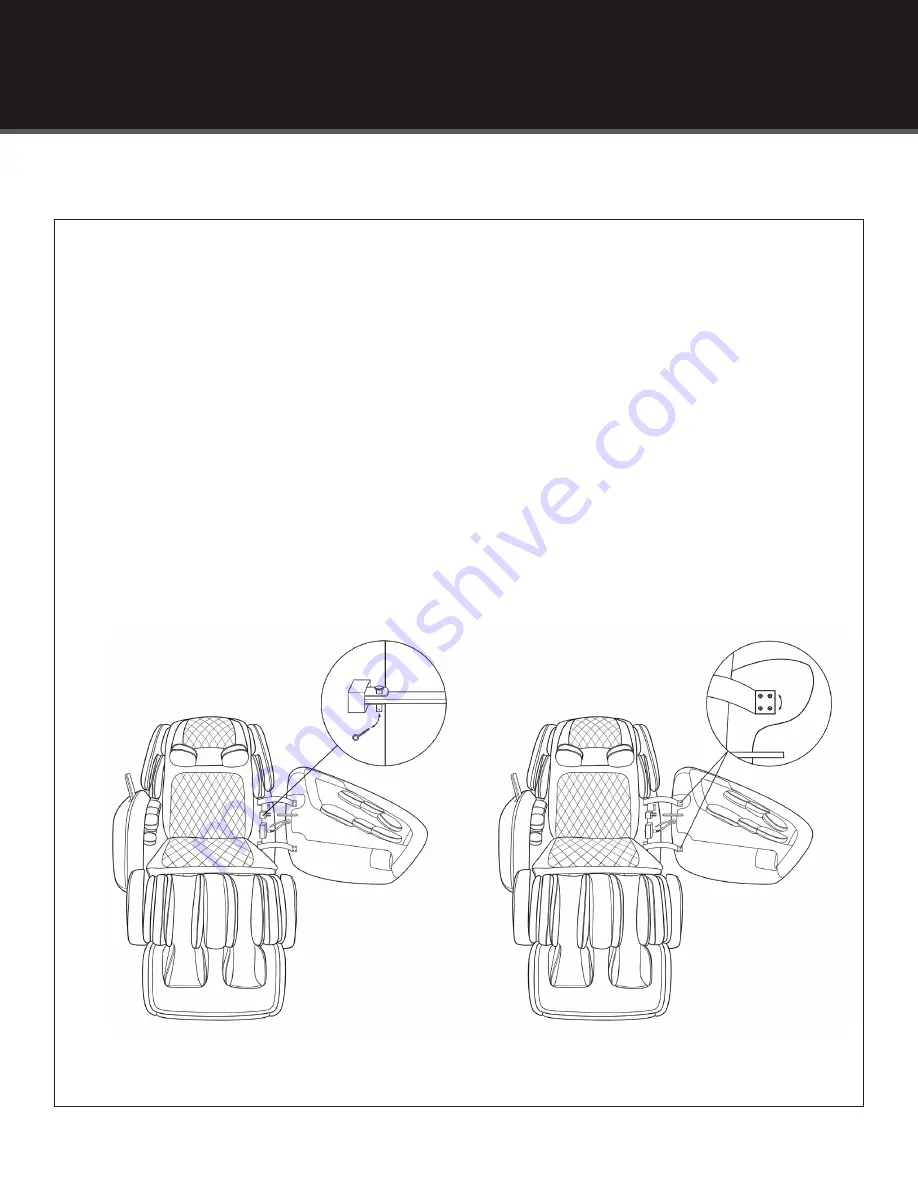
C. Lift the arm to align the arm’s connection points to the upper and lower hinges of the base. Once
aligned carefully install the 4 cap head screws on both the upper and lower hinges. Ensure that alignment
is perfectly accurate so you do not cross thread screws which will result in stripped screws. TIP: Hand start 2
diagonally located screws on the top hinge, then hand start 2 diagonally located screws on the bottom hinge.
Once these 4 screws are successfully installed, continue with the remaining 4. Tighten all 8 cap head screws
using the provided T-wrench tool. (See Figure 5C below.)
D. Align the center bracket on the arm to the center bracket on the base. Once aligned, secure with the straight pin
cotter pin. (See Figure 5D below.)
Figure 5C
Figure 5D

